Bronze Casting course - the ancient way!
Run by Mark Vyvyan Penney at the Dorset Craft Workshops, I had a thoroughly enjoyable and hugely informative day.
Before the course
Prior to the course I'd prepared a green wax to use for the casting. My Labrador had been the subject. Once the model of soft cream coloured wax was completed. I made a rubber mould to enable me to reproduce it in the harder green casting wax needed for casting. I set two green casting waxes initially. Whilst slightly larger than Mark had suggested, measuring 18cm long, I set about preparing them for the casting day as they weren't far off. One was a straight forward model - as it would be as a finished piece.
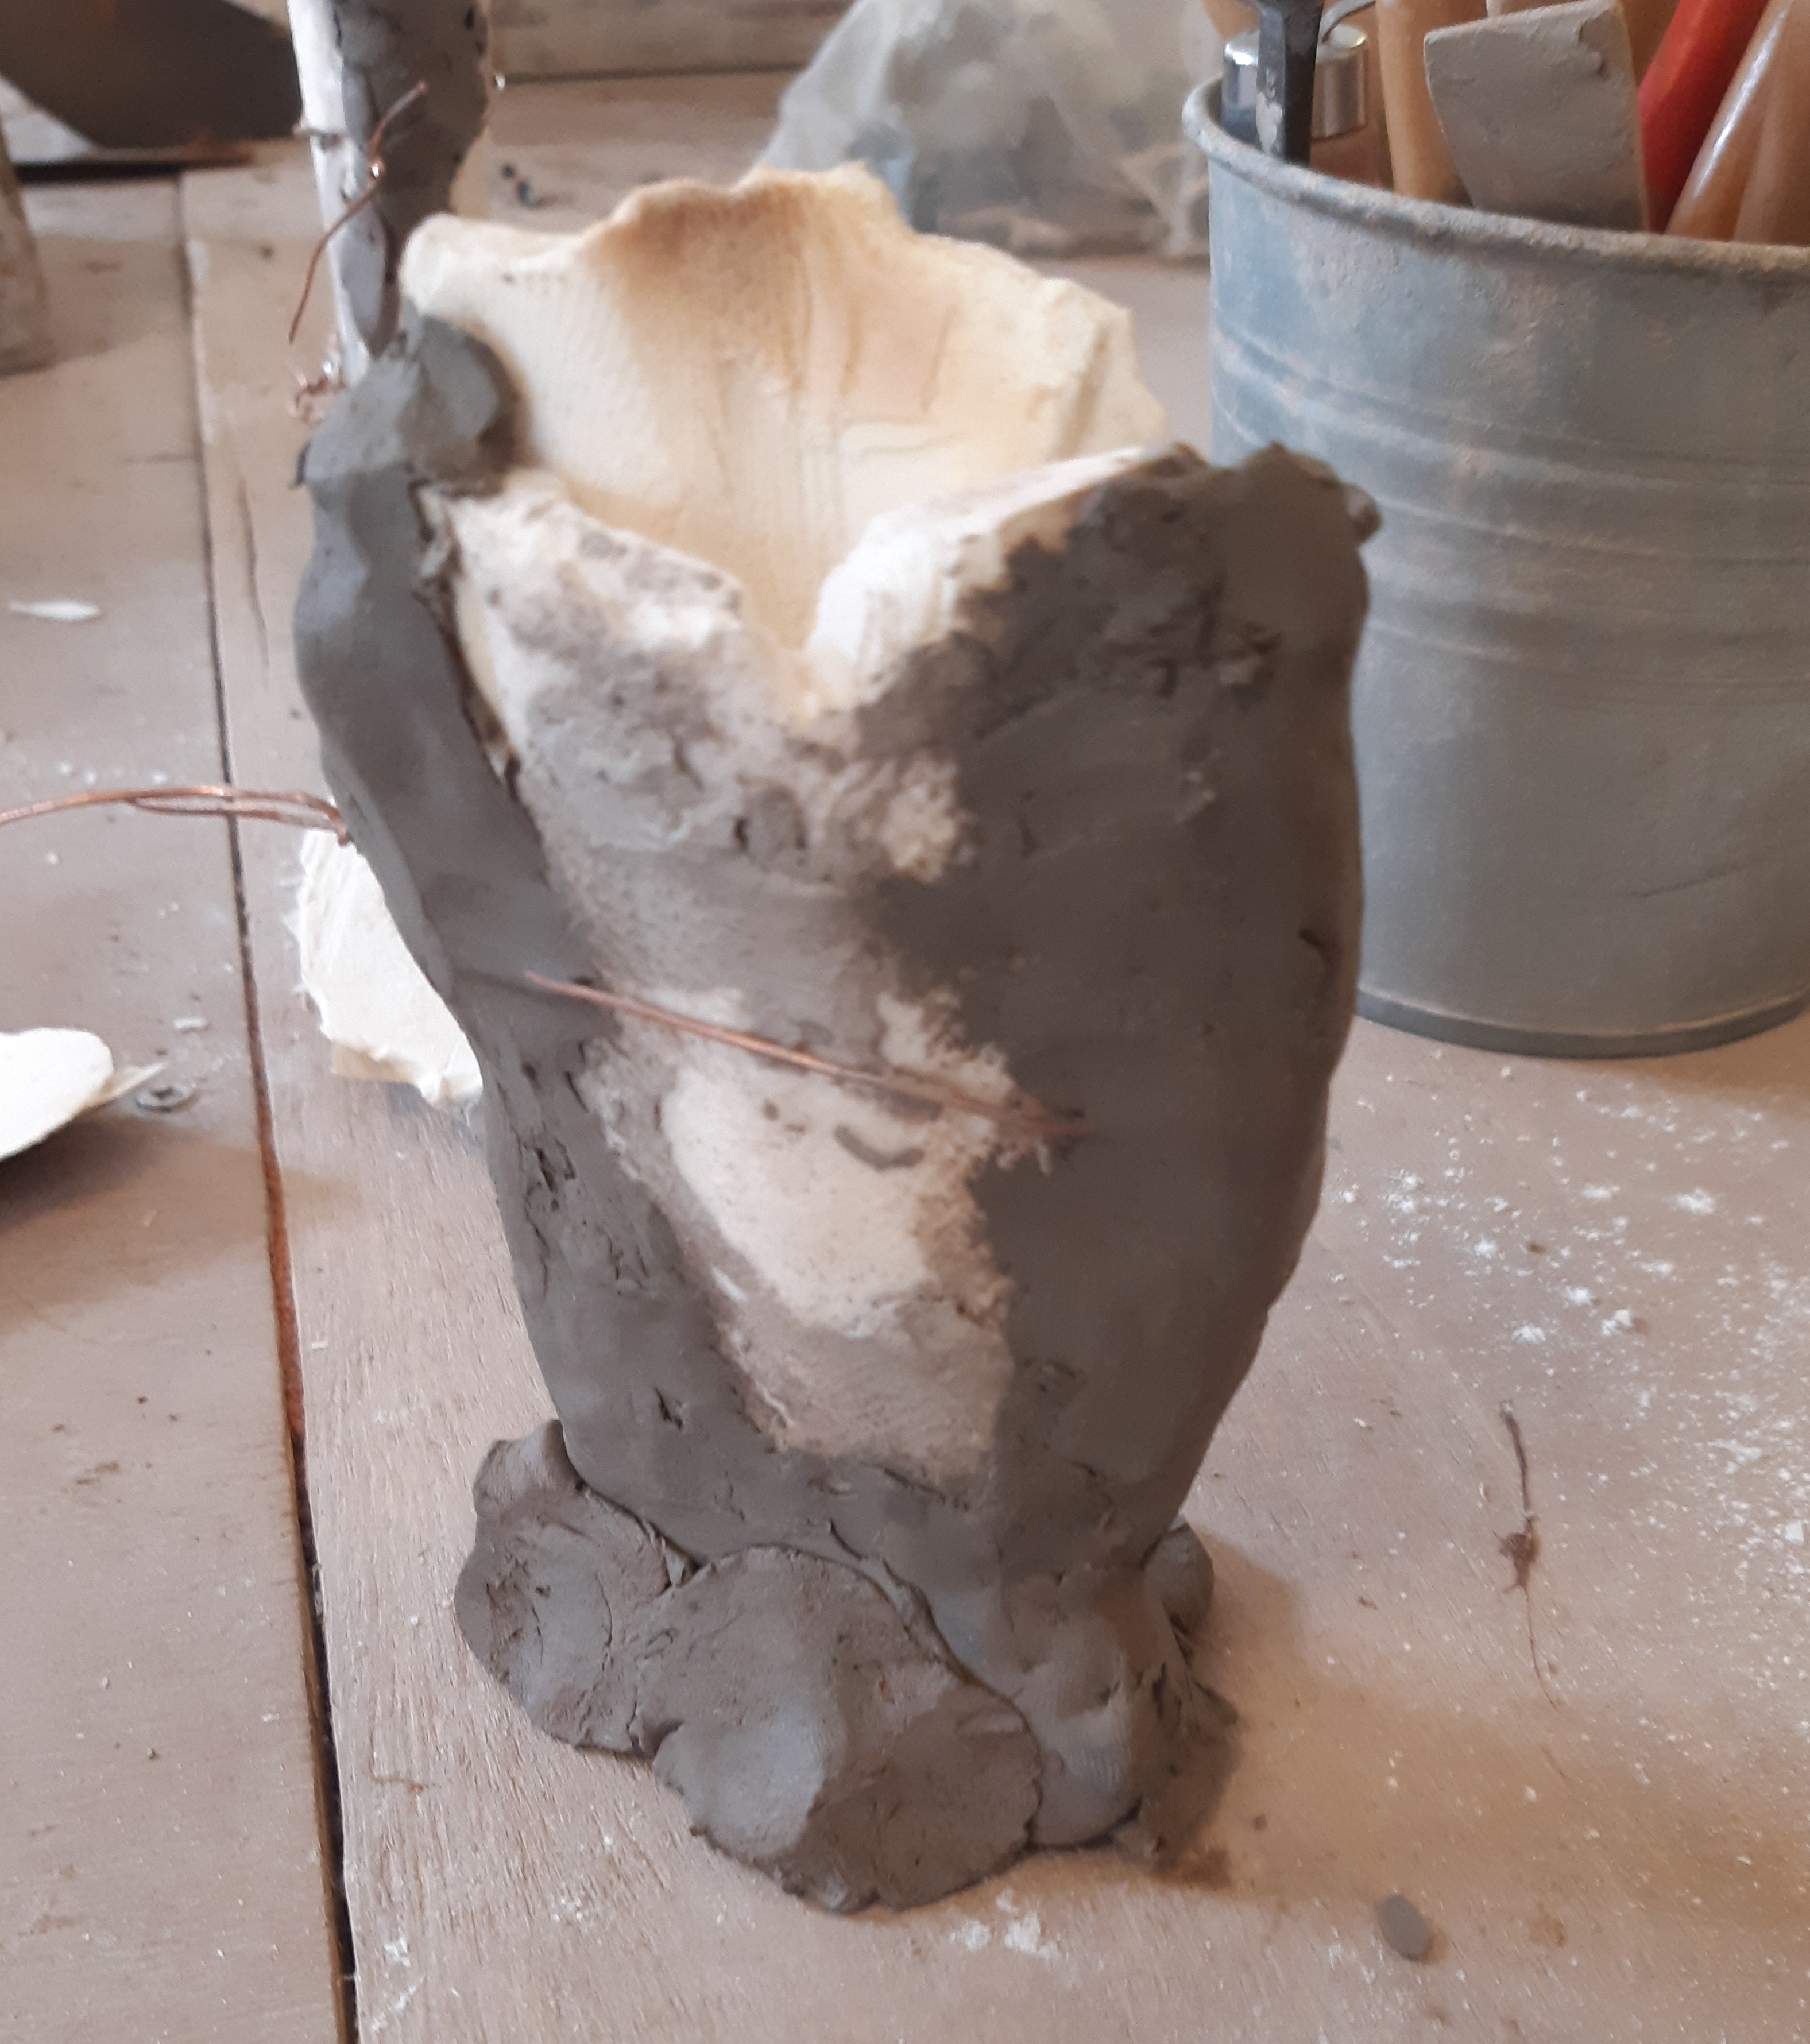
Once the system was cold and set I followed Mark's email instructions regarding 'grogging up'. This was the art of smearing the entire wax with sloppy clay to produce a ceramic type mould. The top of the cup was left free from clay - this would be the entry point for pouring out hot wax and pouring in molten bronze. Several layers were required building them up slowly as one was already drying. It needed to be completely dry in the firing process and this way helped ensure the deepest clay touching the wax was as dry as the outer layer. I was running out of time prior to the course for it to become so but it could not be rushed. It was imperative that it dried slowly so it didn't crack. To assist with this it was recommended to add natural fibre; hay & horse dung! I duly followed instructions!! Sadly even with covering the piece in plastic to slow evaporation, it started cracking. So on the day of the course I just took the non-treed piece.

On the day of the course:
Our day started with an introduction into the ancient methods of casting. Also, a practical exercise in a very simplistic form using cuttlefish bones for the mould as Romans would have done. Taking two cuttlefish bones, we rubbed them together gently. They acted like sandpaper and sanded themselves flat where they touched. With little effort required, I then carved a geometric design onto one of the flat sides. From the design to the edge, I further carved a pouring channel. Placing the other bone on top like a sandwich, I then wired the two together. Air could get into the sides so clay was pushed around the edge to prevent this from happening. I also added a clay base so that the whole thing could stand up with the entrance to the pouring channel at the top. Molten Tin was then poured in (by Mark's expertly steady hands). We left it to cool whilst getting on with the main cast of the day.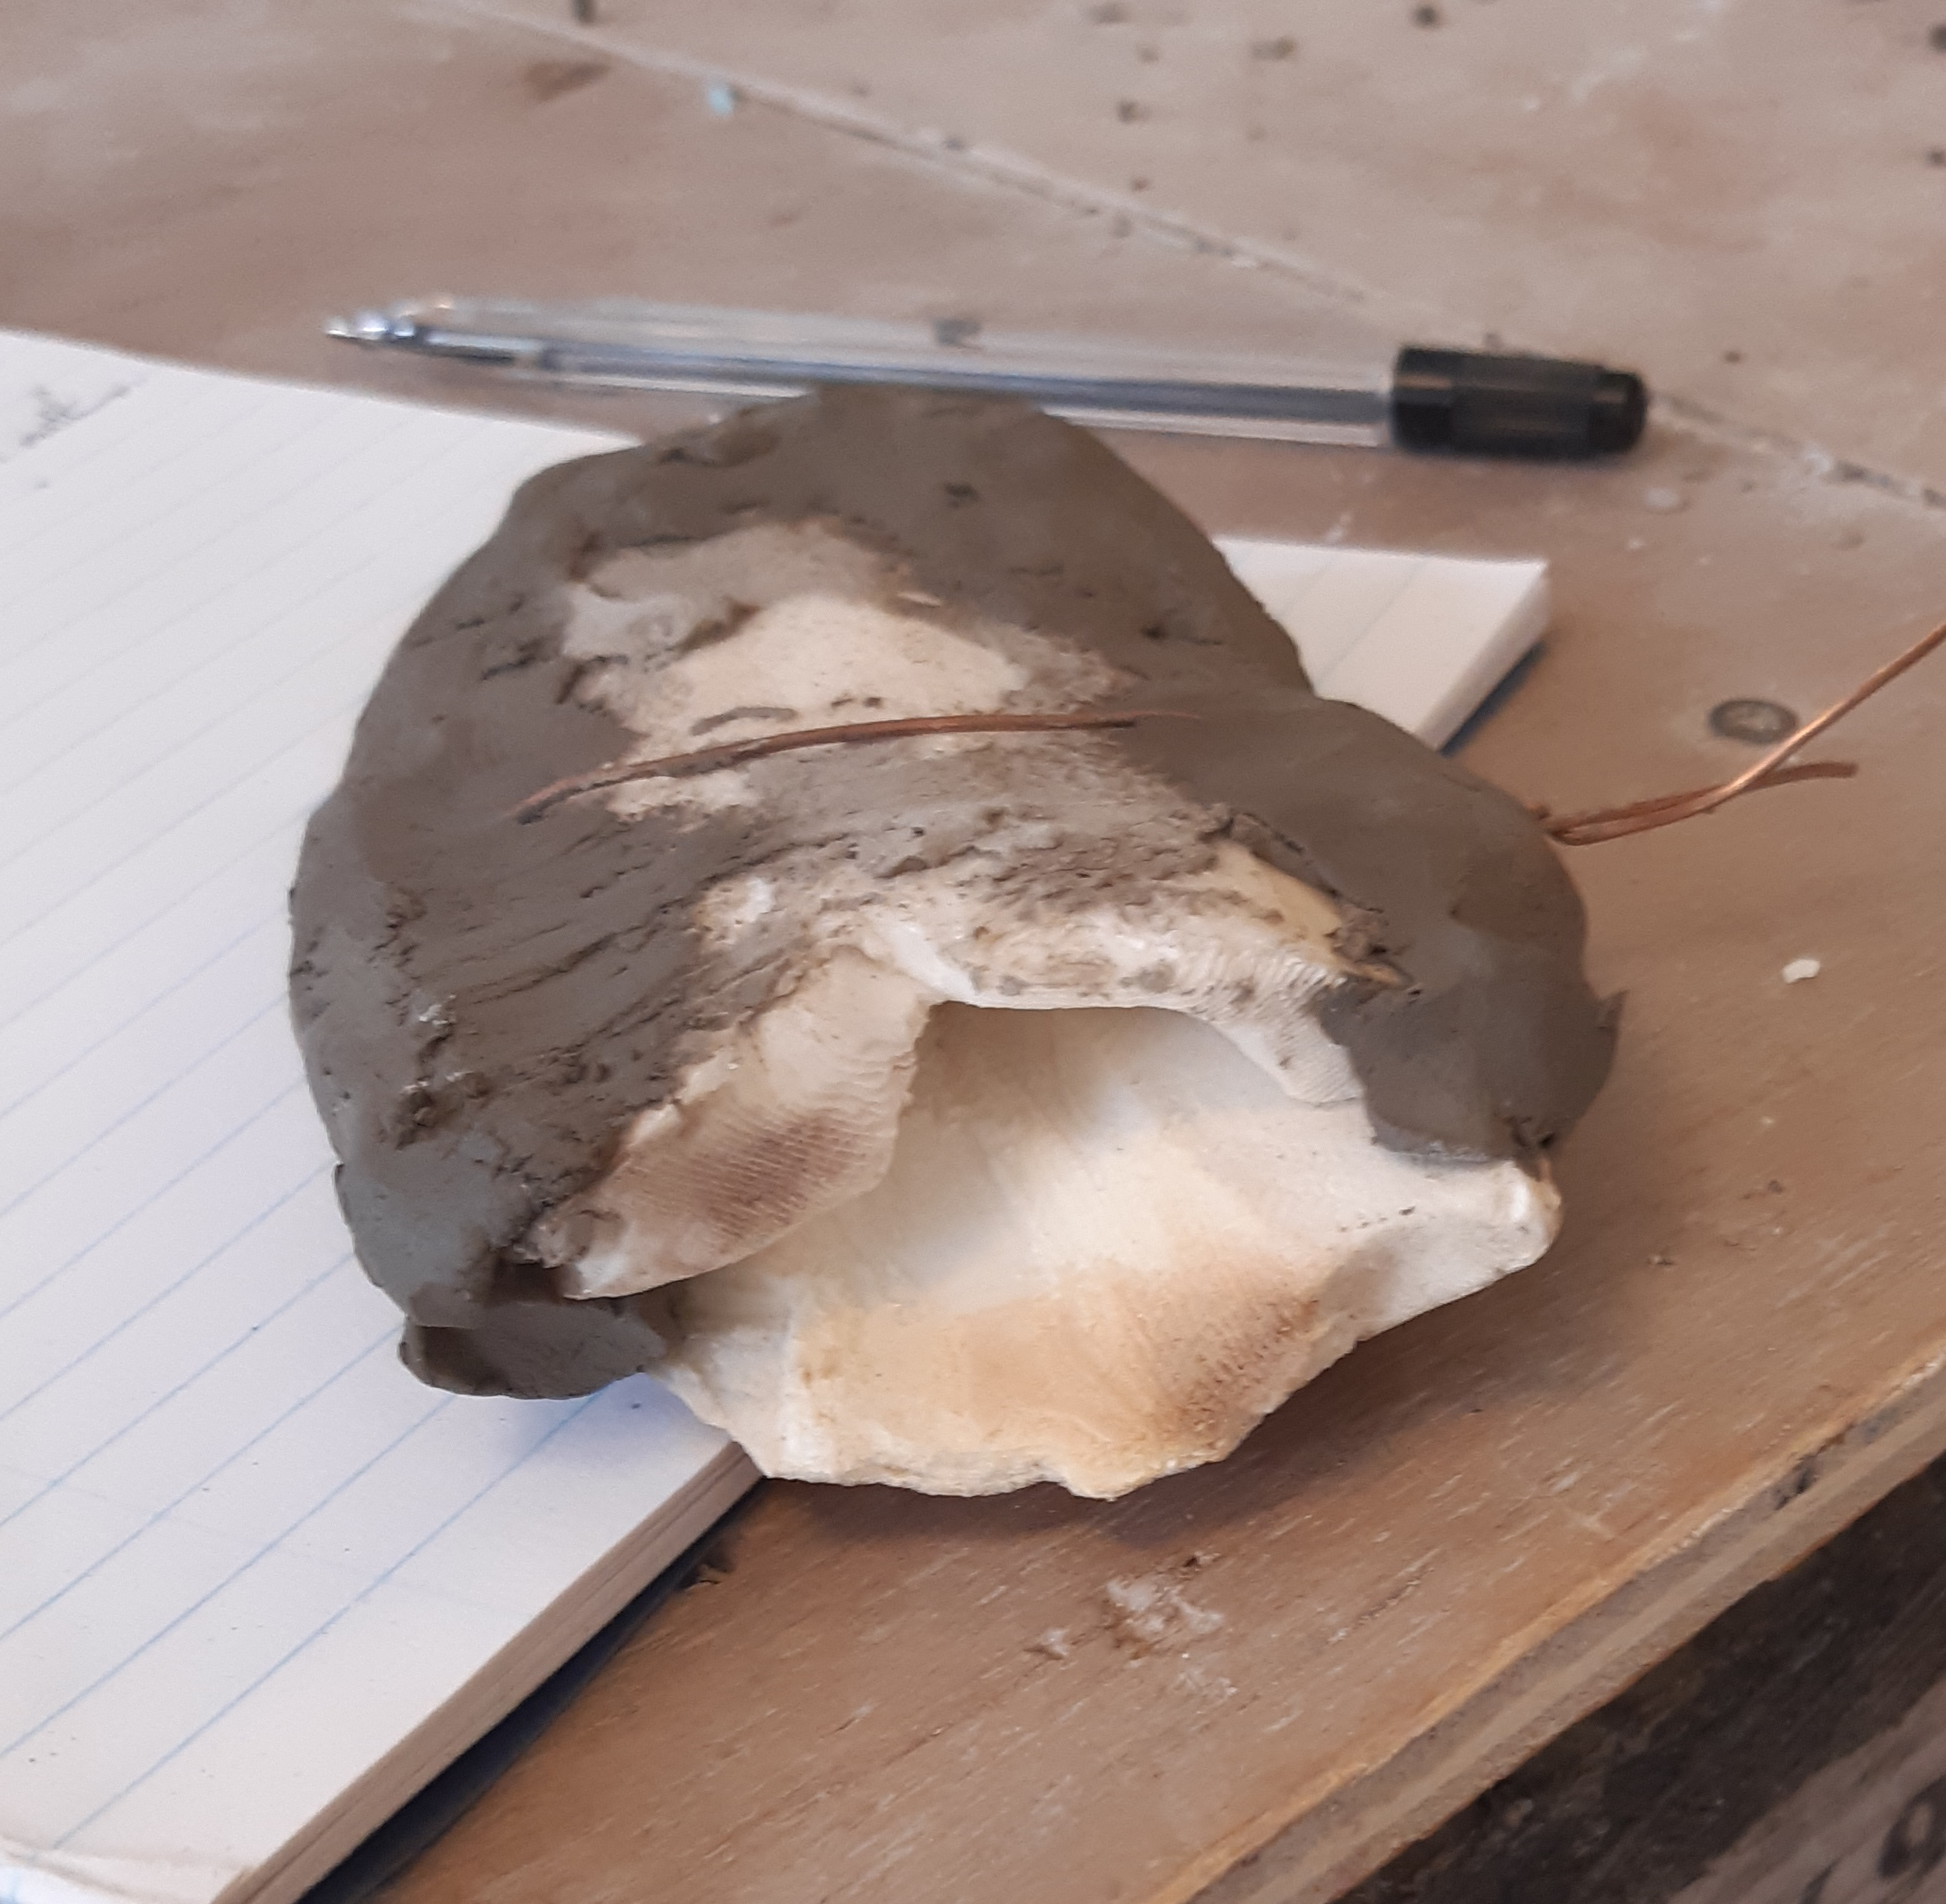
Moving on to sand box casting:
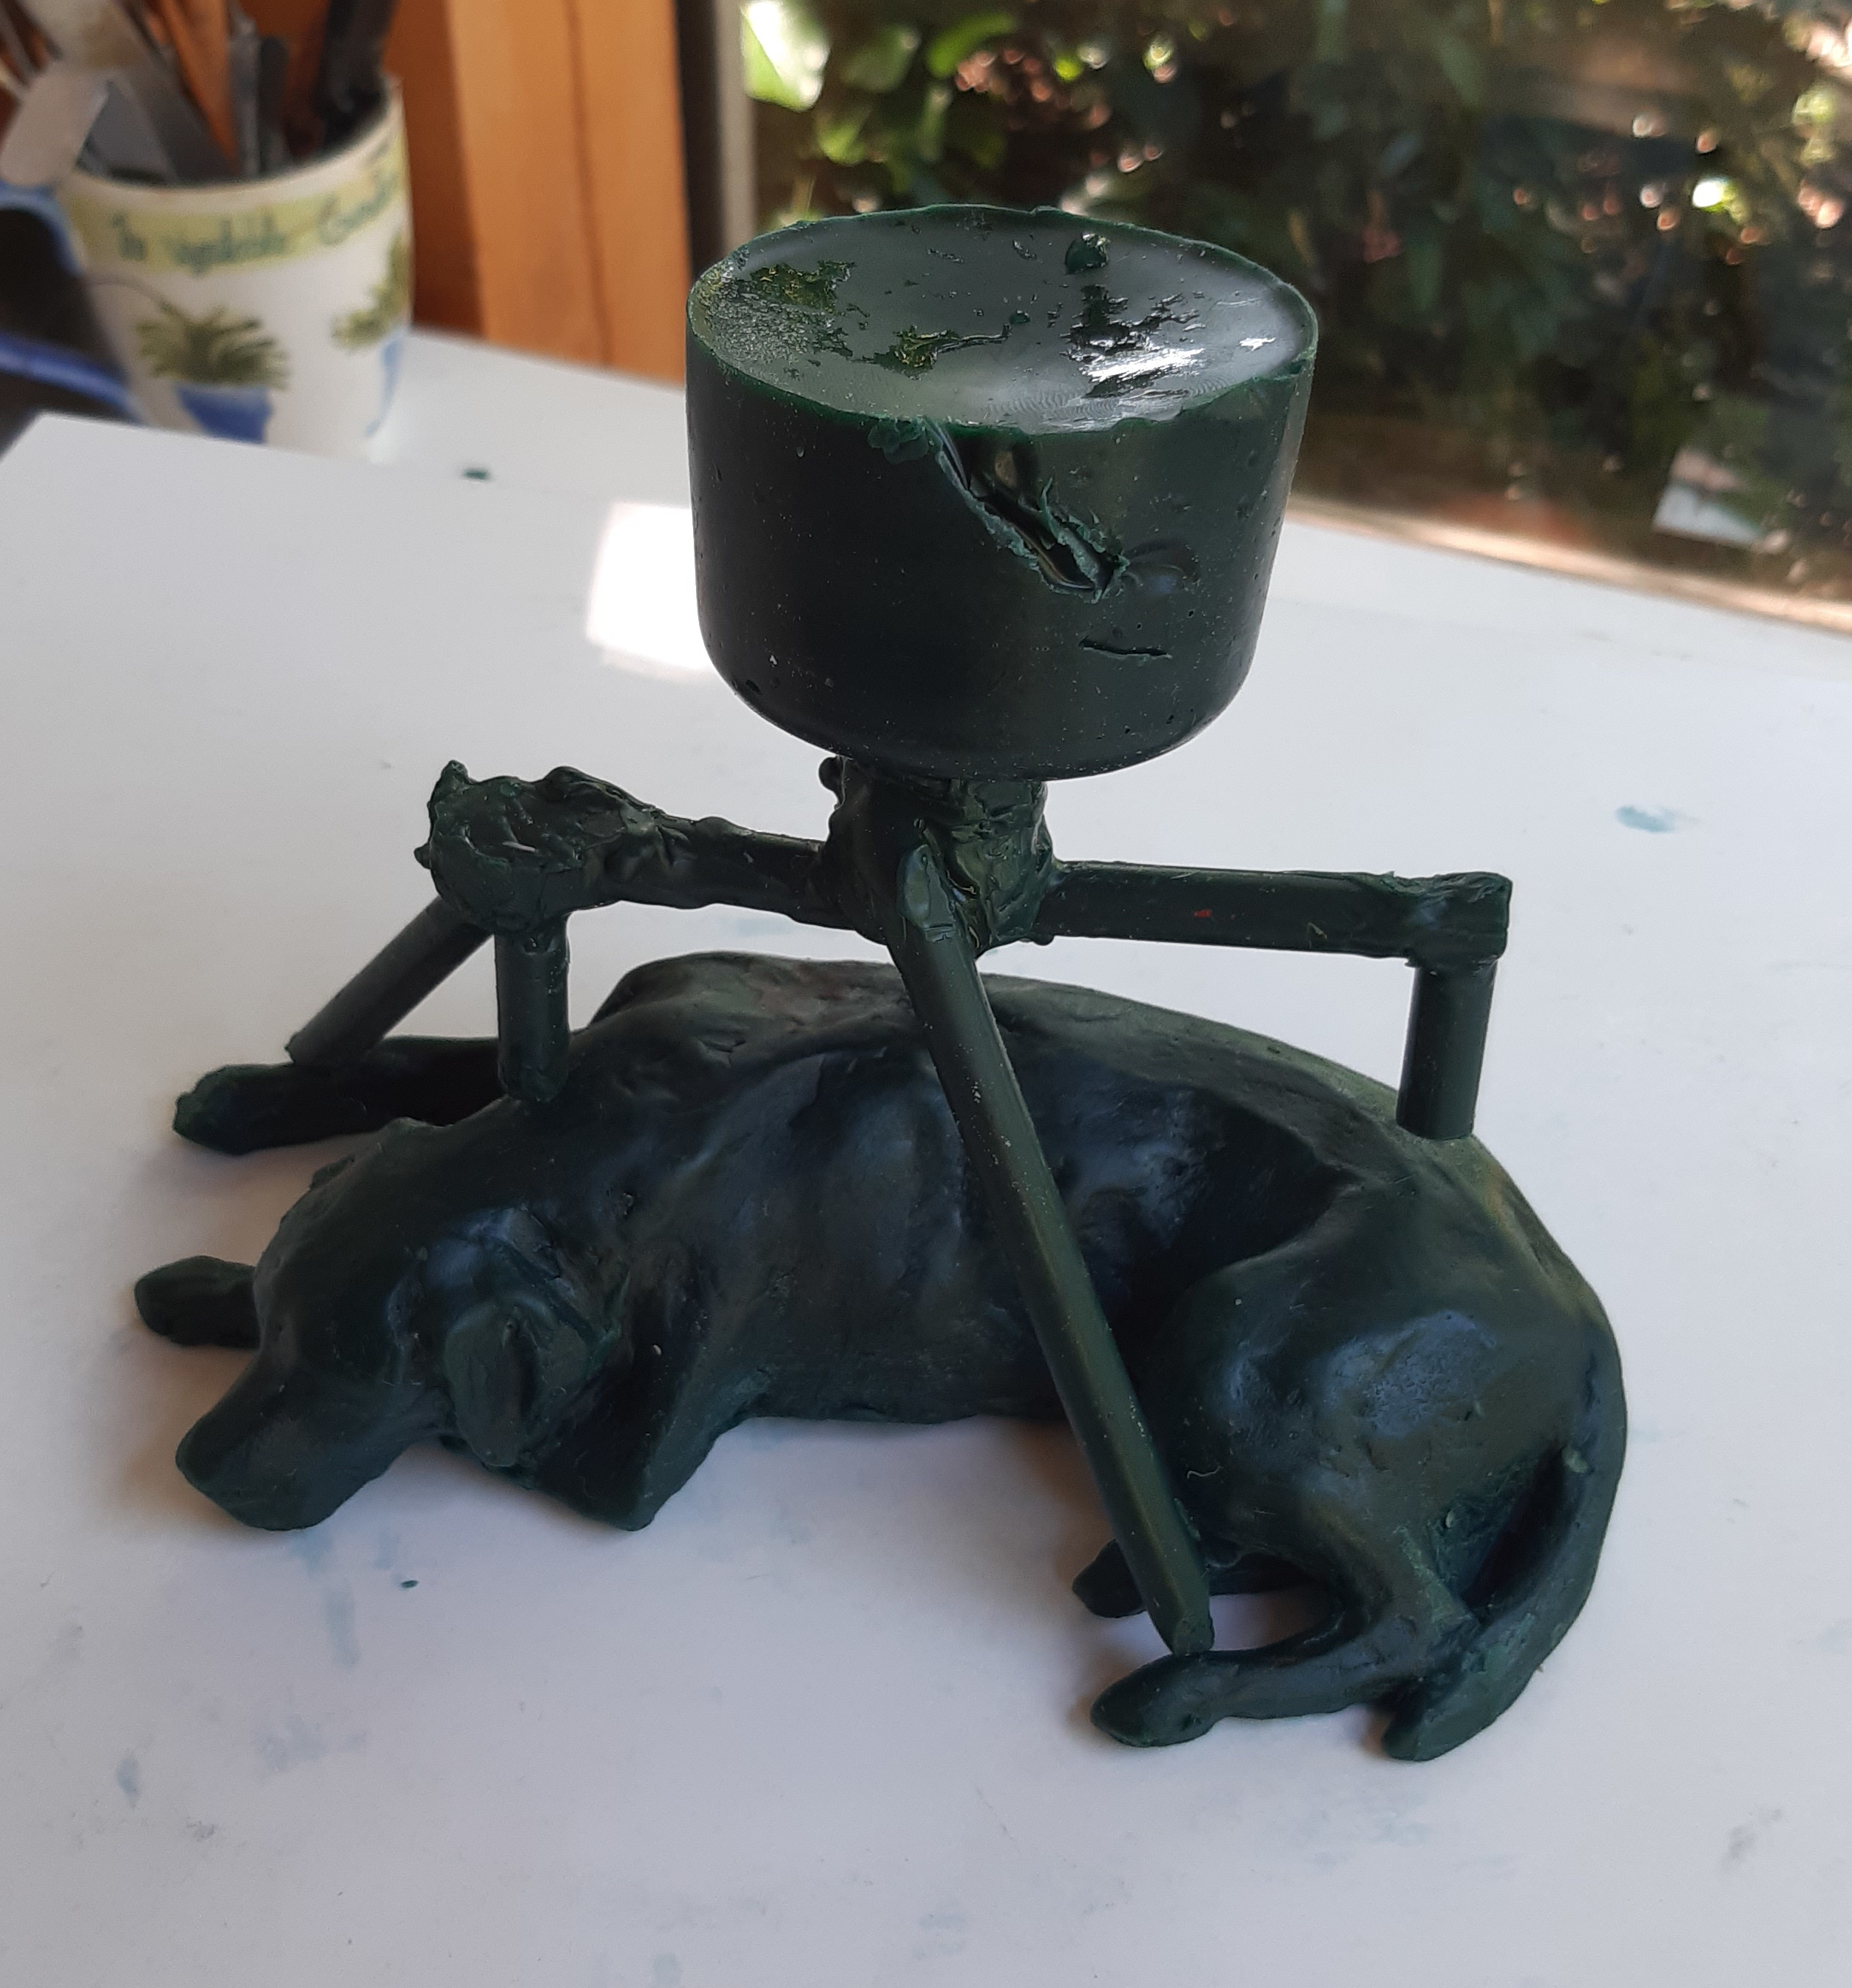
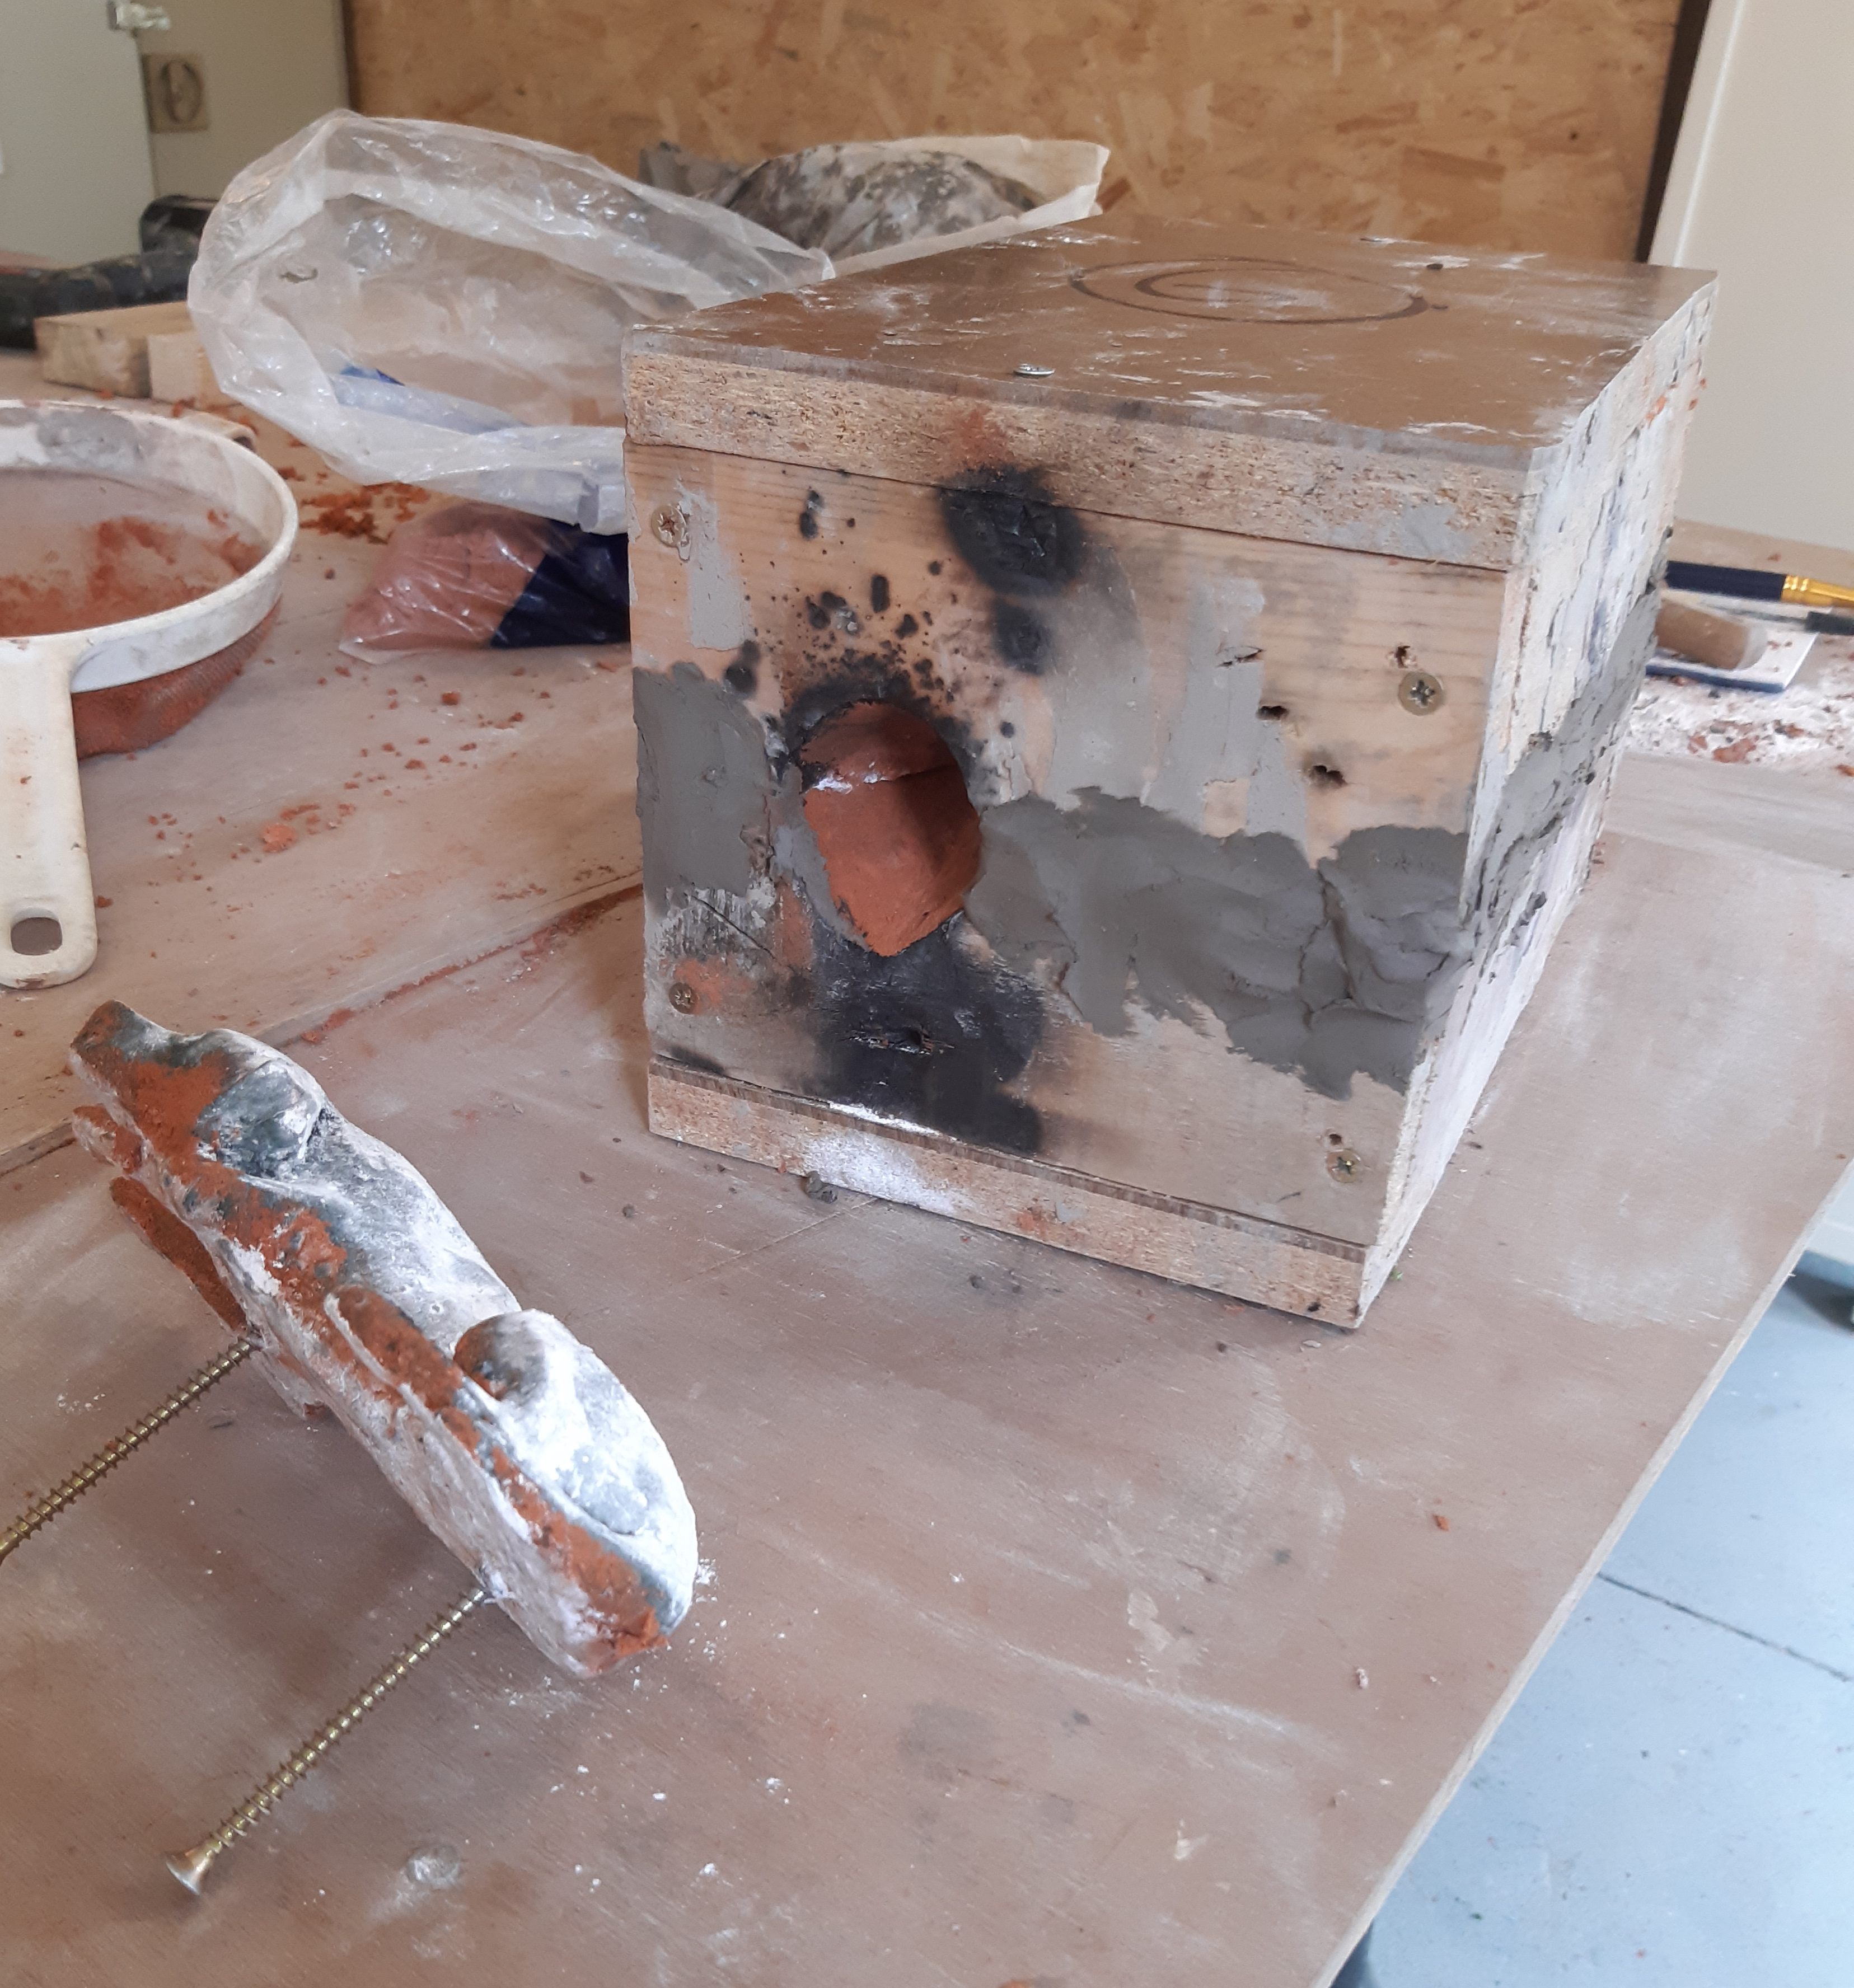
For the bronze cast of my little dog we were using a sand box. It came in two wooden halves and a lid. One half had a base. The other was just side surrounds. The half with the base was filled with petrol bond sand. This contained oil that burns and so heats the mould rather than the mould cooing it. The wax model was inserted into one half and sand packed down hard around it to prevent the sand crumbling which could otherwise occur as the model was removed. The other half was then placed on top and more sand put in until that too was full. Then the lid was placed on top of that and screwed onto the second half. This enabled both halves to now be separated and very carefully the model could now be removed leaving a negative imprint, a light dusting of talcum powder was applied on the sand surface of both halves which miraculously did not fall out. Compacting was thankfully sufficient! The talc helps release both bronze and mould halves later. A pouring hole had to be dug away ensuring one end of it connected with the impression a bit like a funnel. Once both halves were placed back together they were joined using long screws. Clay was pushed into the crack where they joined to seal it and so prevent seepage.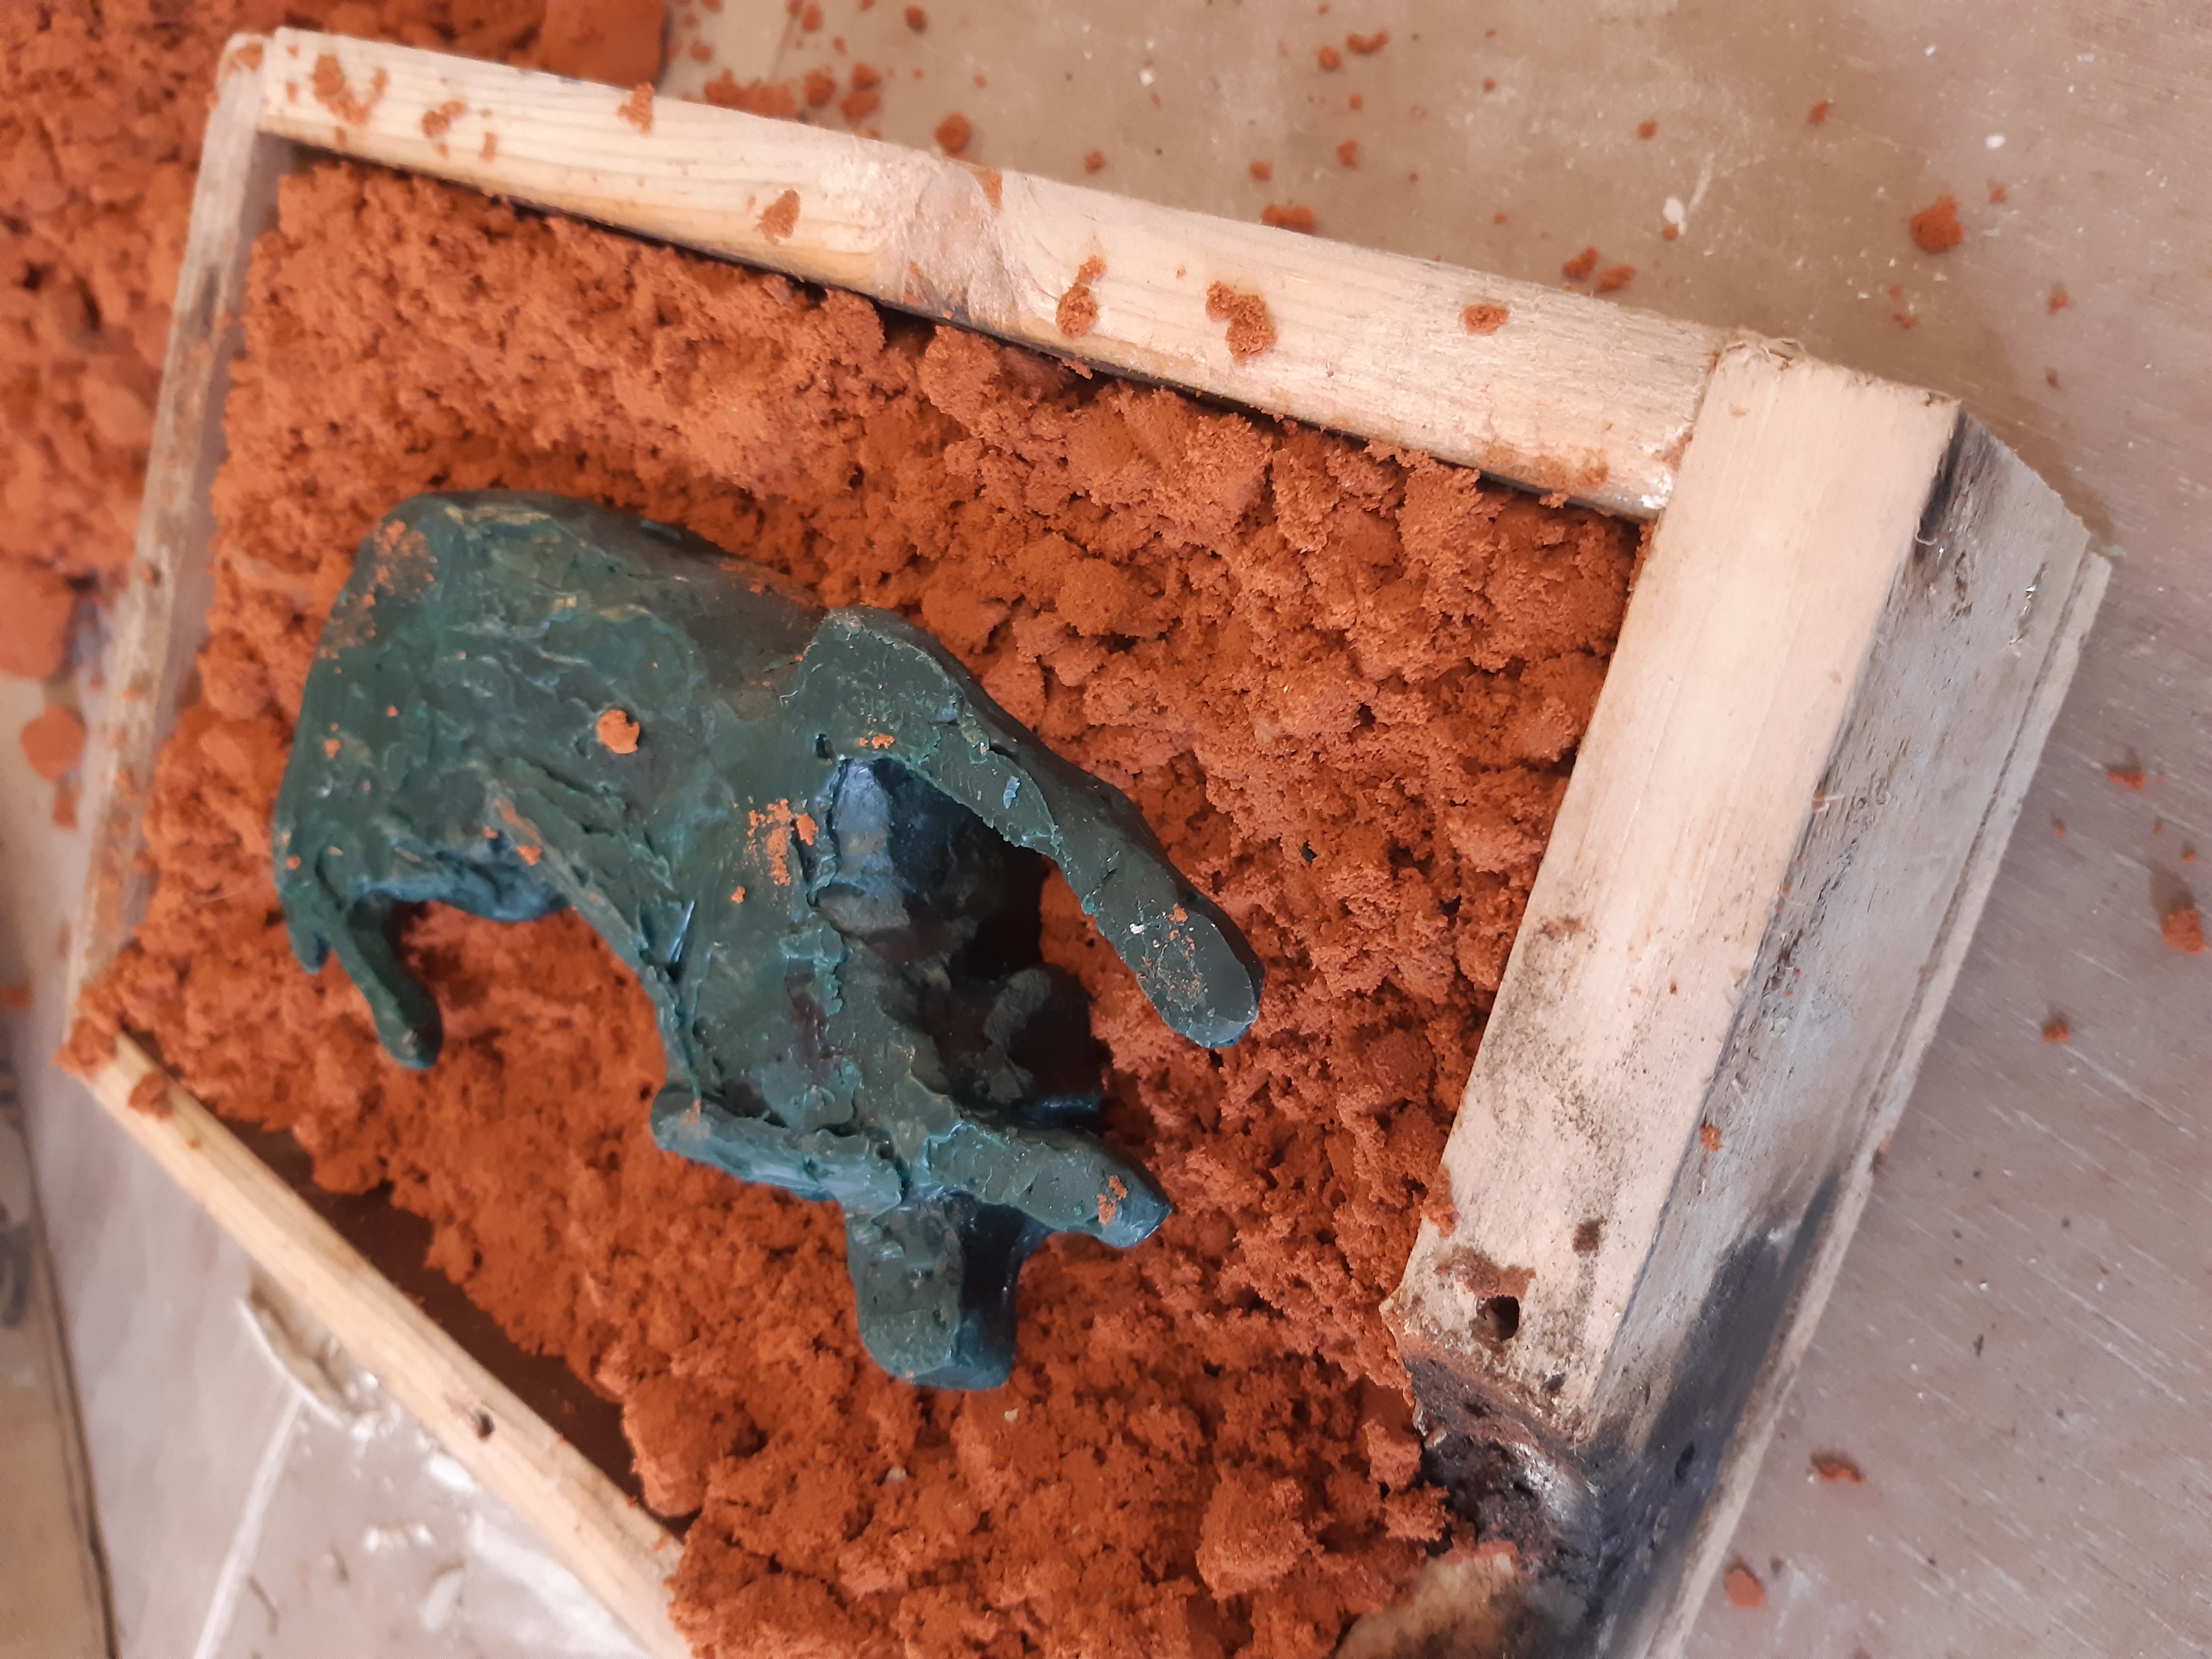

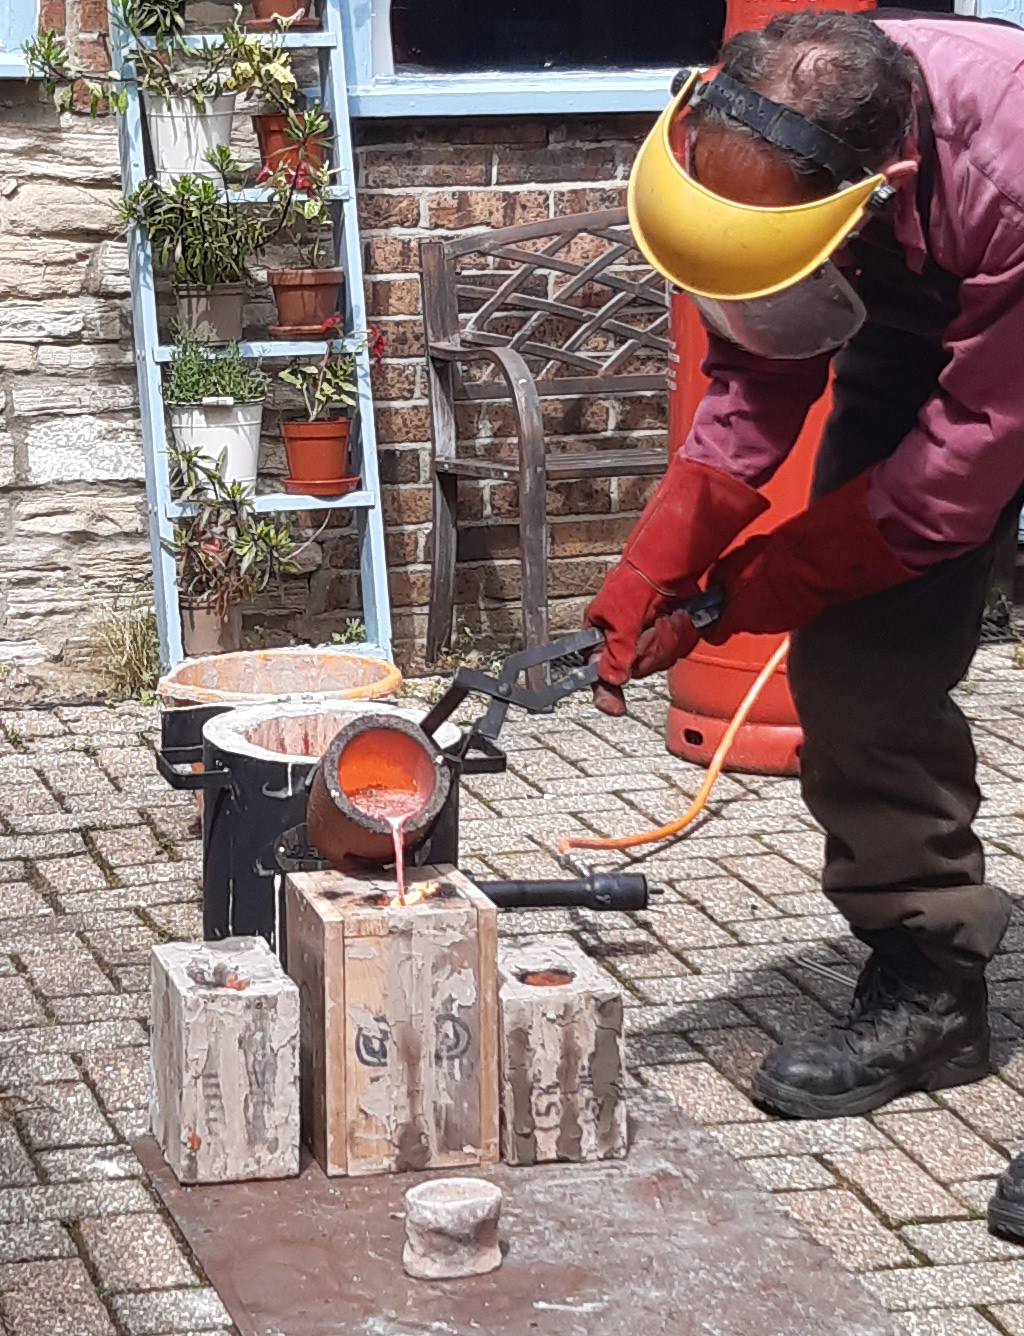
Melting bronze to molten:
In full safety gear we then went into the yard. Mark had previously poured our cuttlefish designs with tin but in another gas-fired kiln acting as crucible, the bronze had been getting up to the correct temperature. Bronze had to reach the dizzy heights of 1100'C. The boxes were positioned on a level surface with pouring holes upward. Blazing brightly, the hot orange bronze was then poured in. Not a drop spilt. Nothing leaked either! Bronze has eleven seconds before it solidifies so speed and precision are called for. This knowledge gave me a huge appreciation for the skills needed to cast my usual pieces that Art Of Fine Nature in Shepton Mallet do with expertise.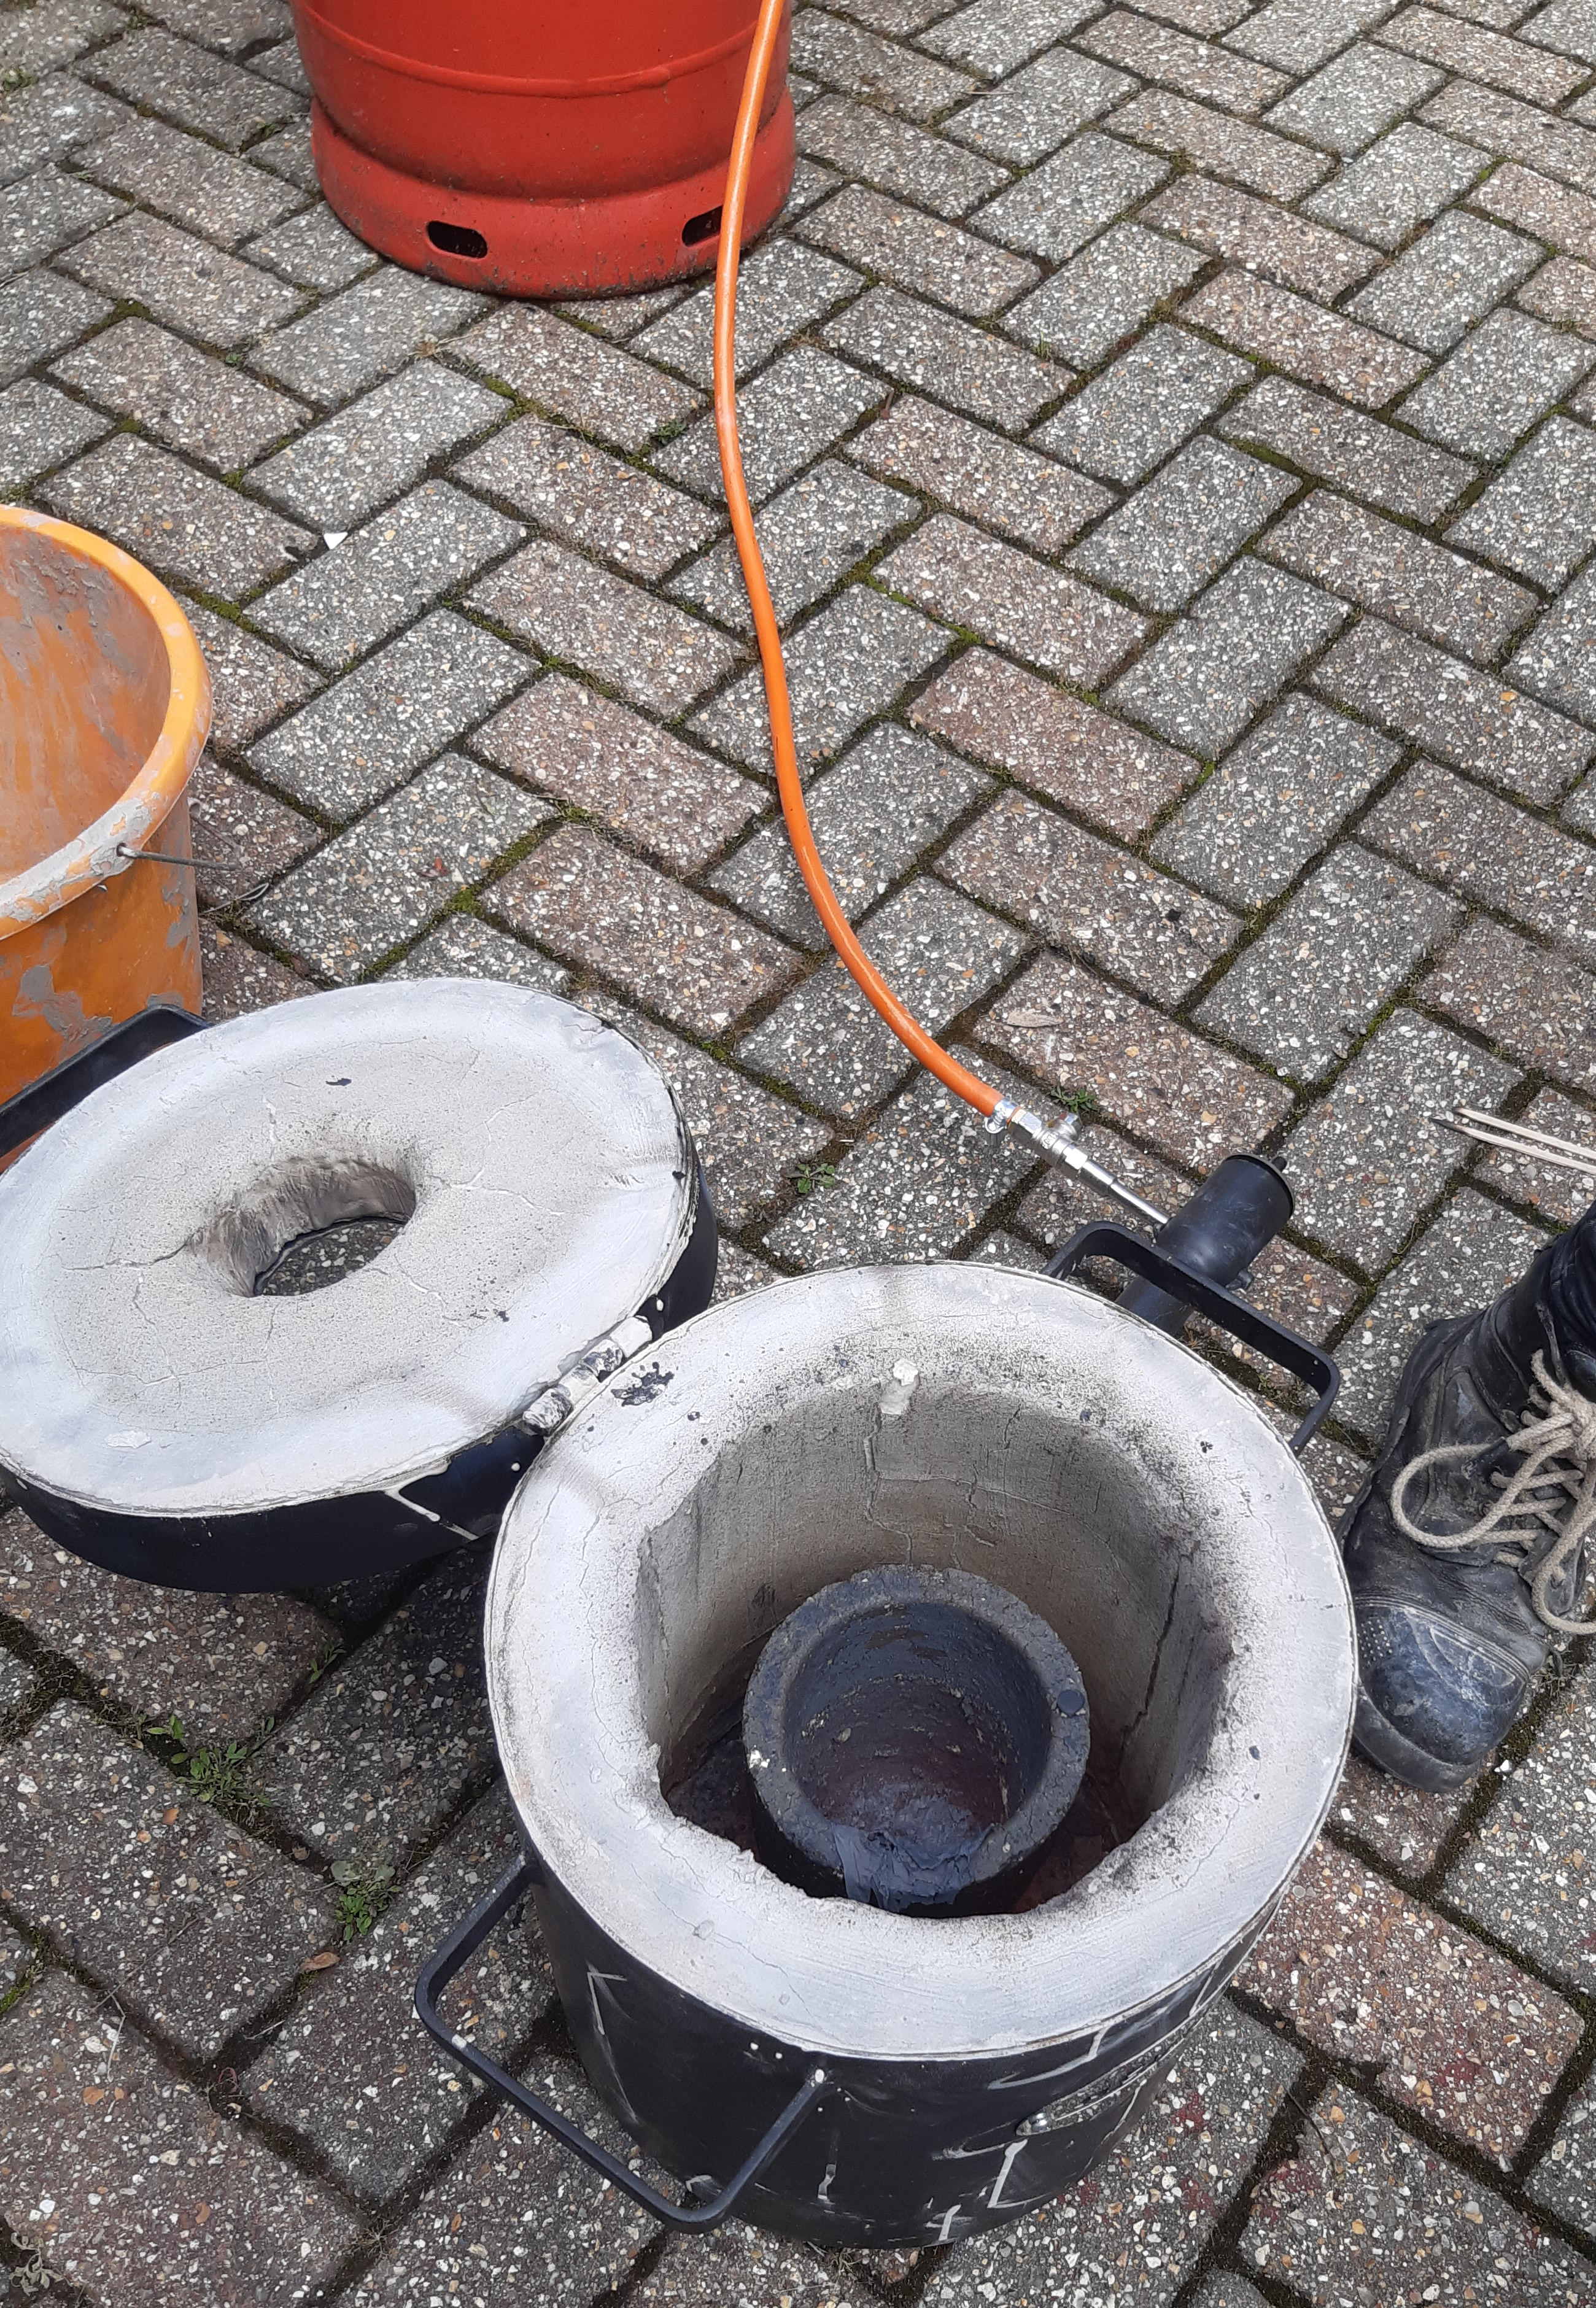
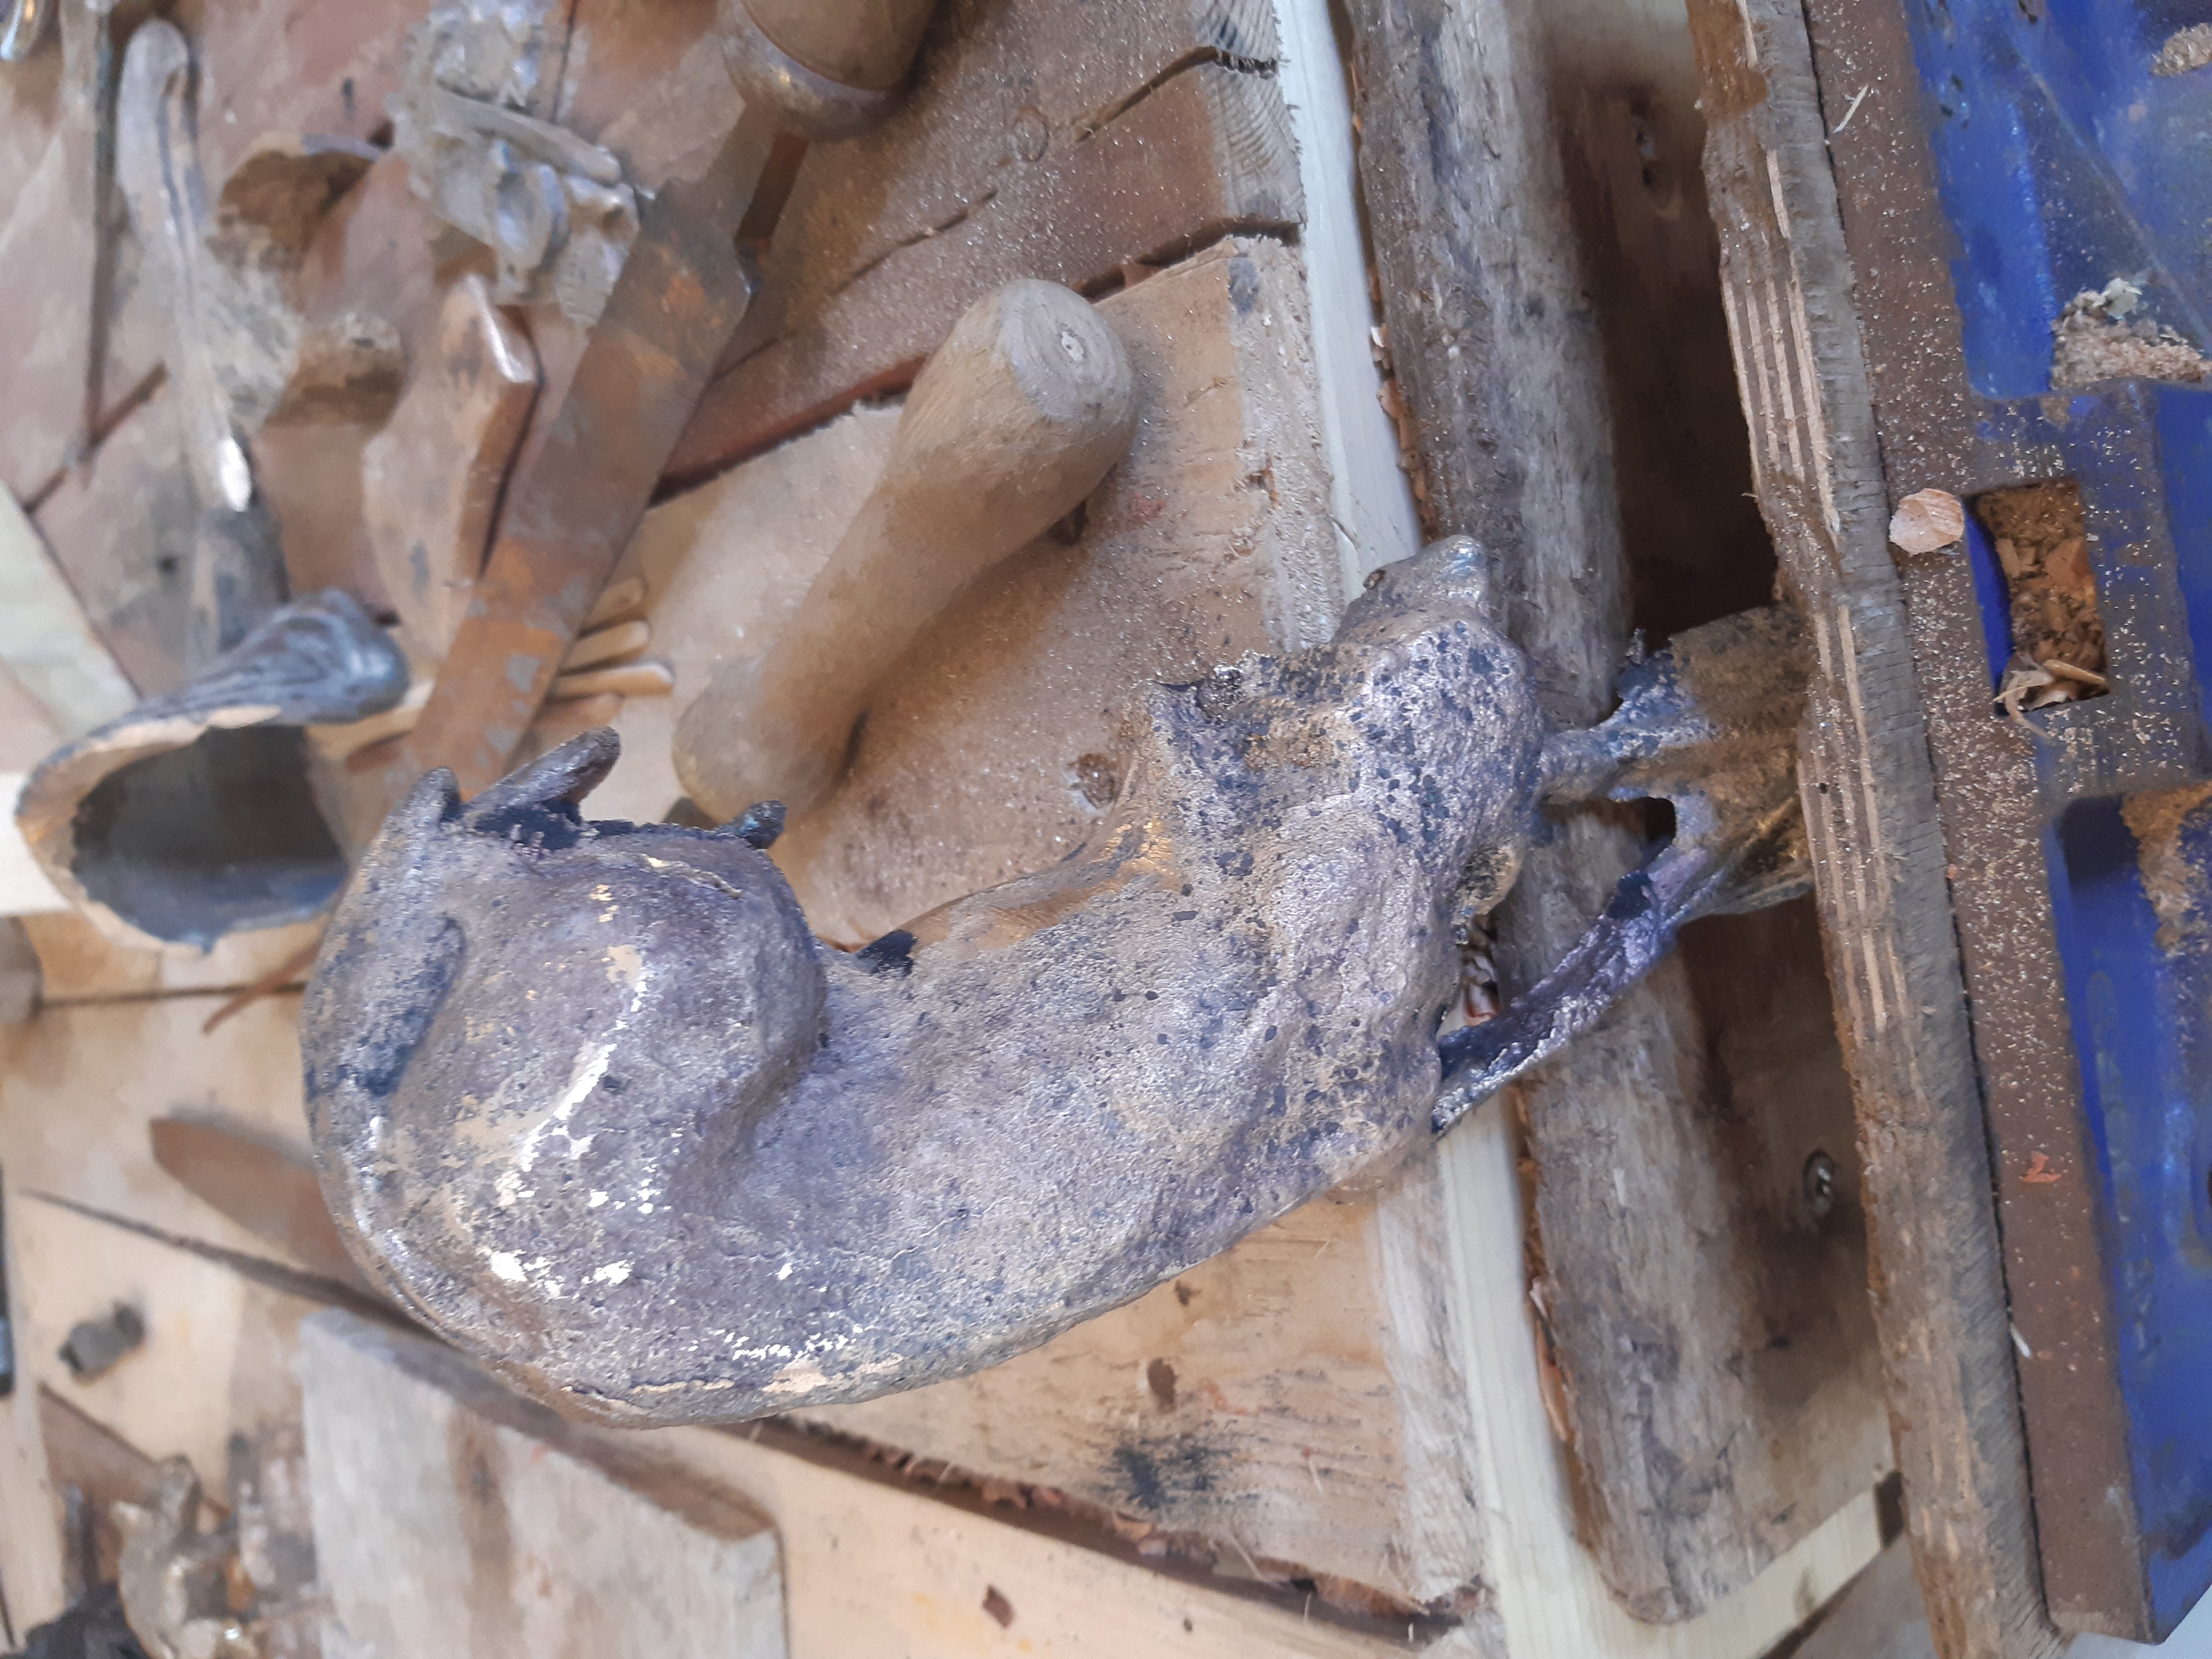
Revealing the bronze within:
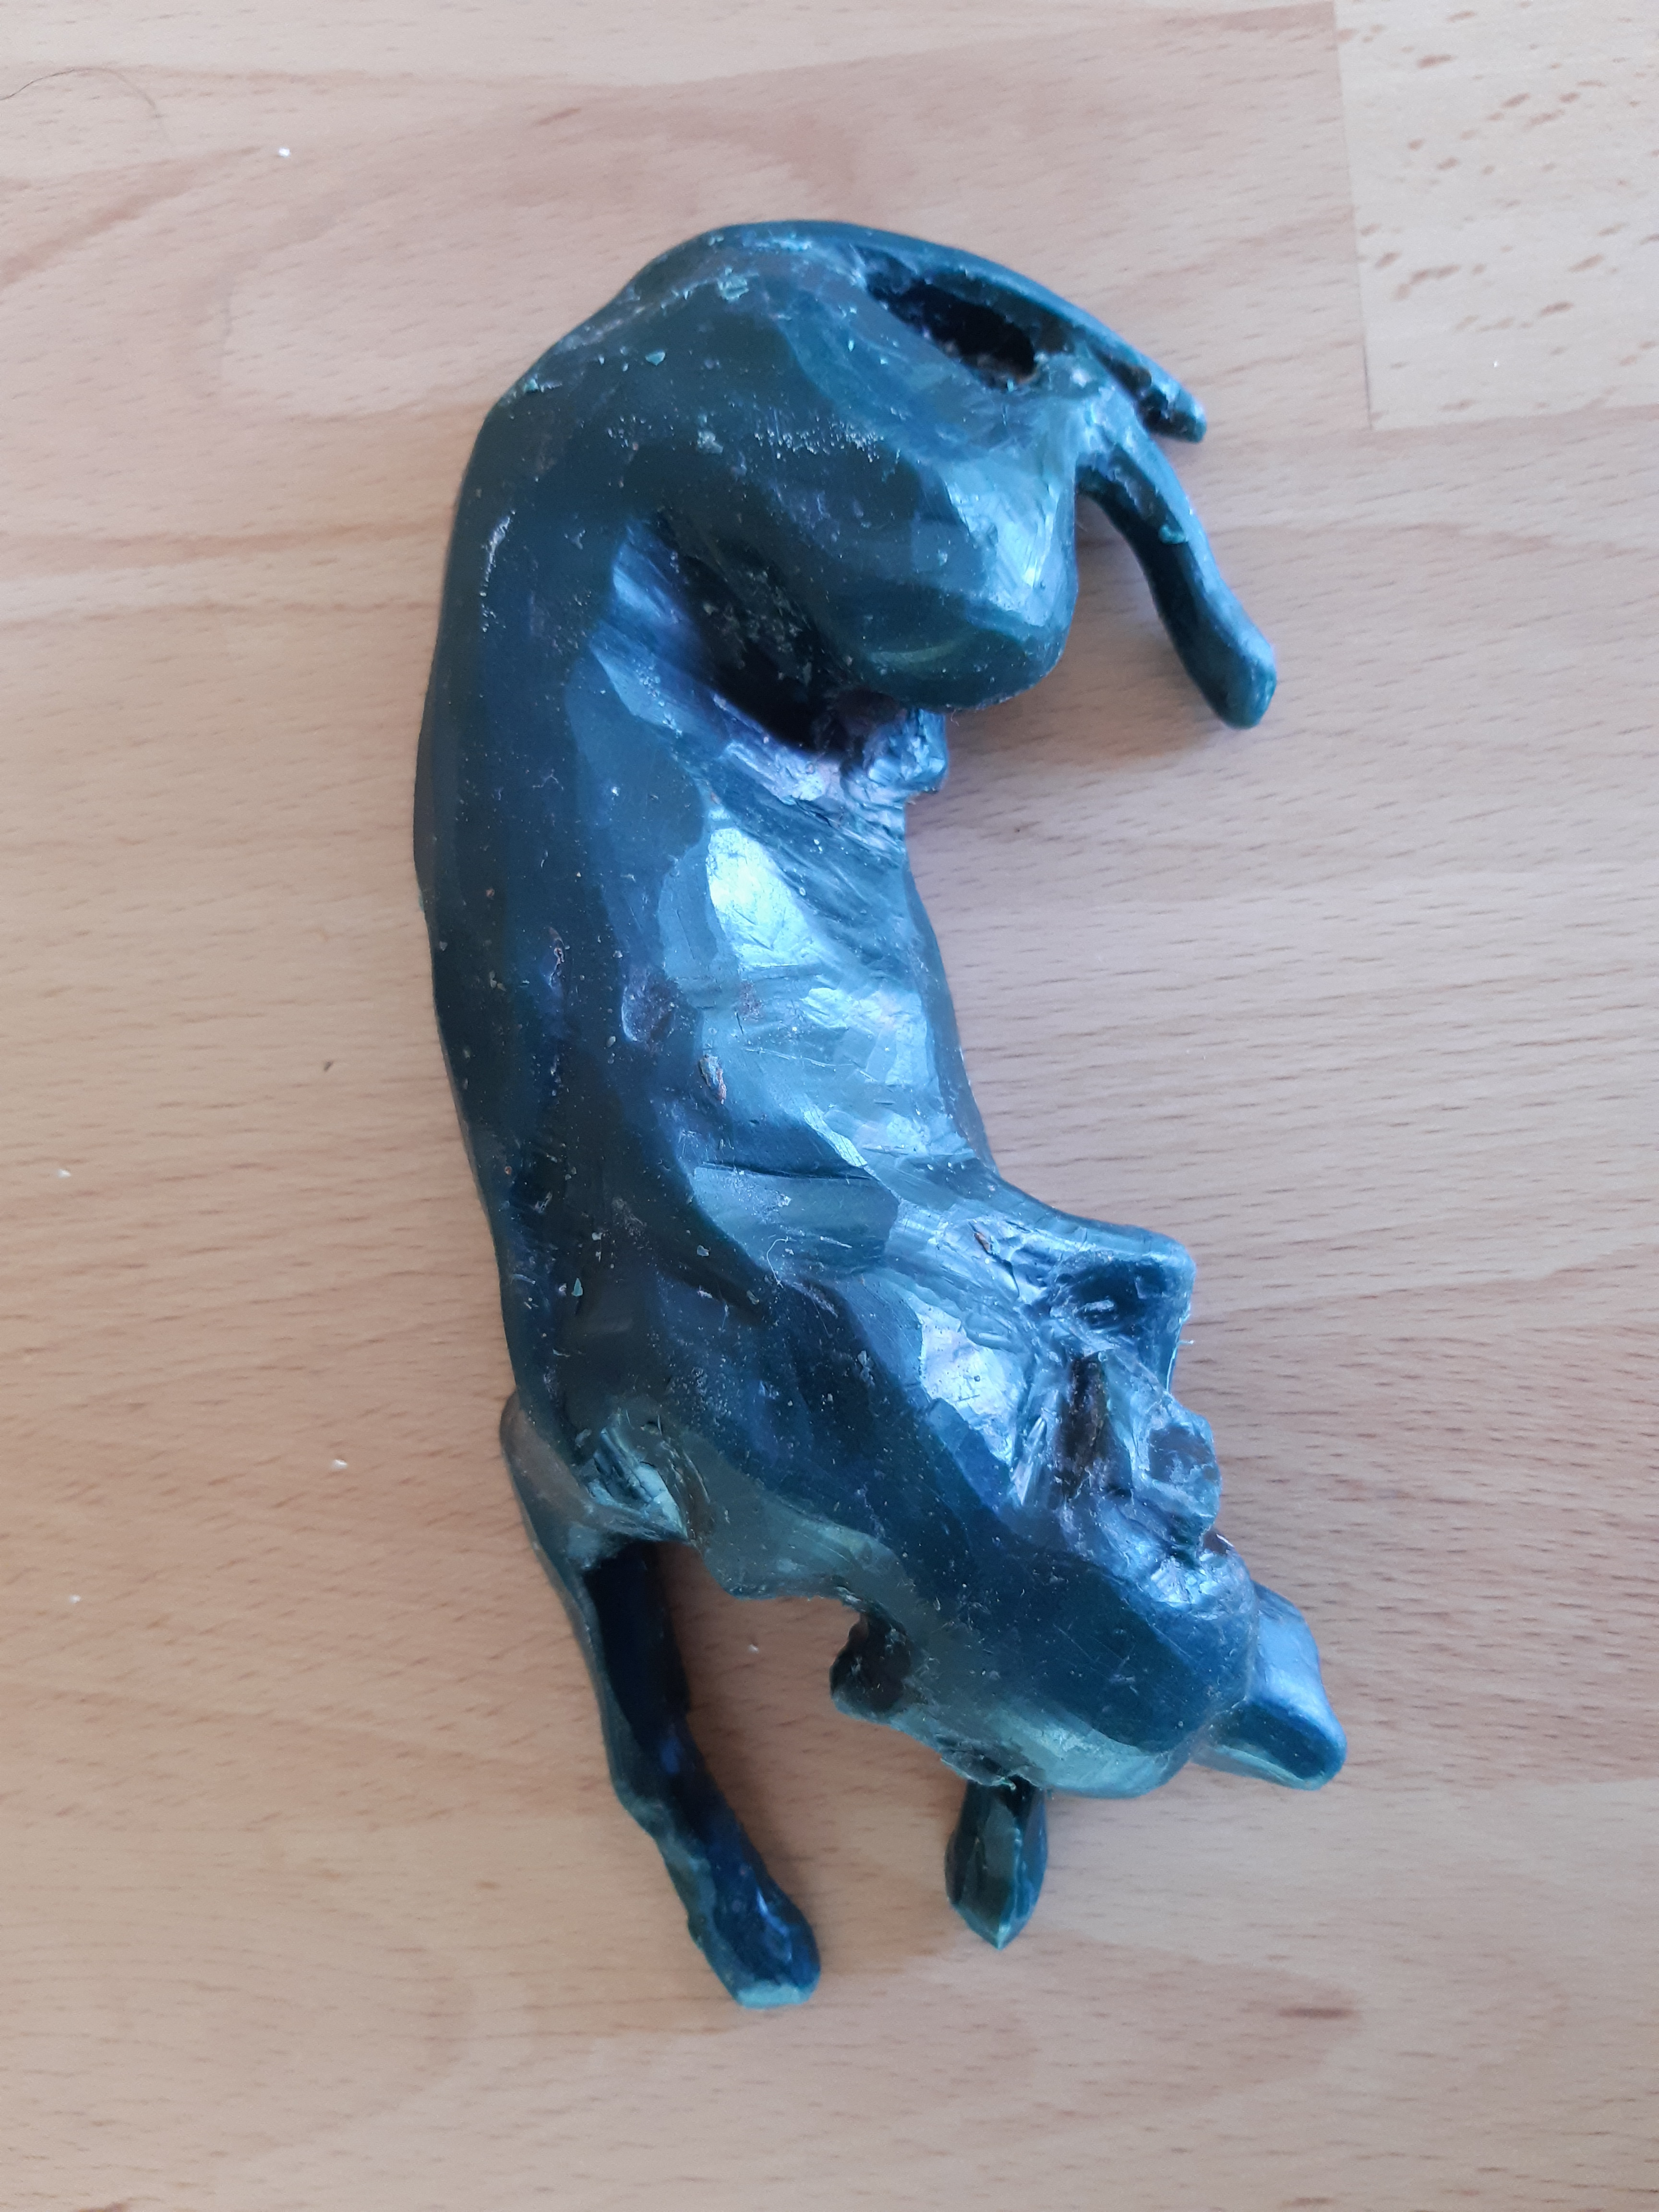
A while later, likewise the bronze boxes were opened. The heat could be felt as the lid was removed initially revealing a sand covered lump. But as the sand was knocked off, a rather charred version of the wax dog appeared. The dog too was pretty good but lessons were learnt regarding shapes and how these affect the compacted sand. For instance where areas of the dog were undercut, such as around the back legs and under the chin, sand lifted when I earlier removed the wax disturbing the imprint. Bronze simply filled the space thereby distorting the shape. But that is what metal files are for and so for the rest of the afternoon I expended vast energy with the dog in a workbench vice, filing down unwanted areas and generally cleaning the piece up. The day was a fantastic learning experience that I'd recommend to any interested party.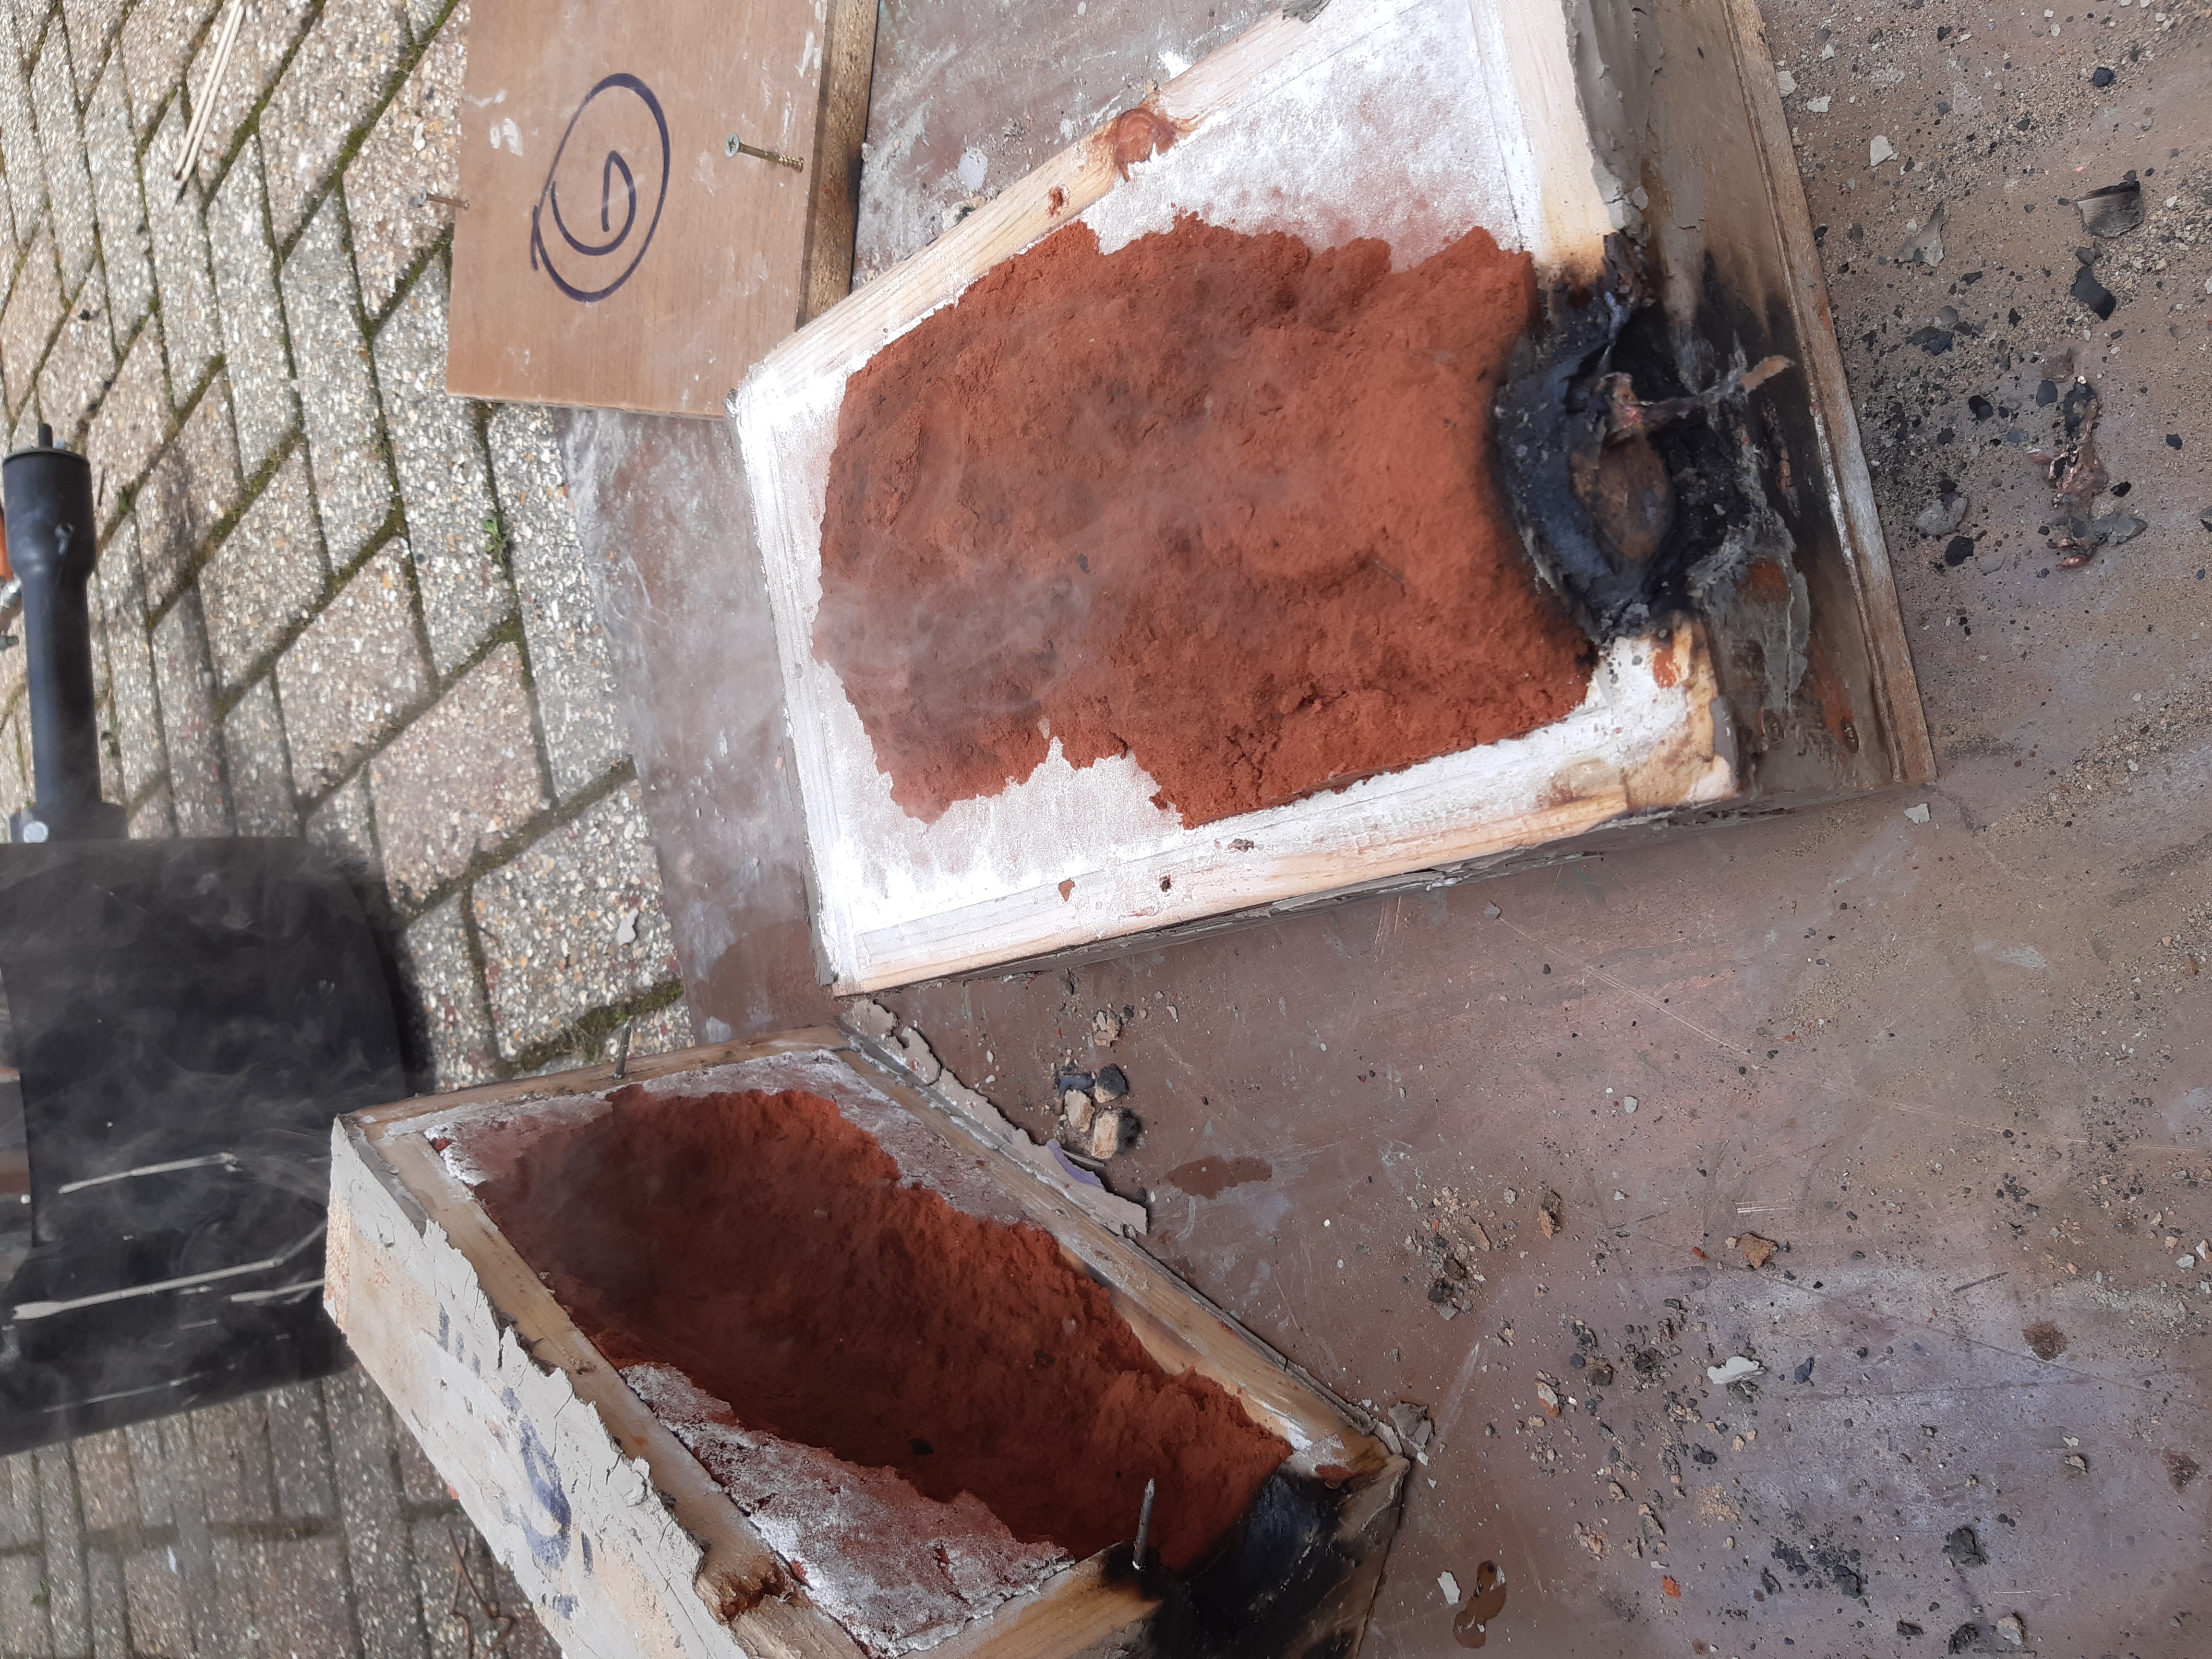

'Contentment' - Limited Edition of Nine plus Artist Proof:
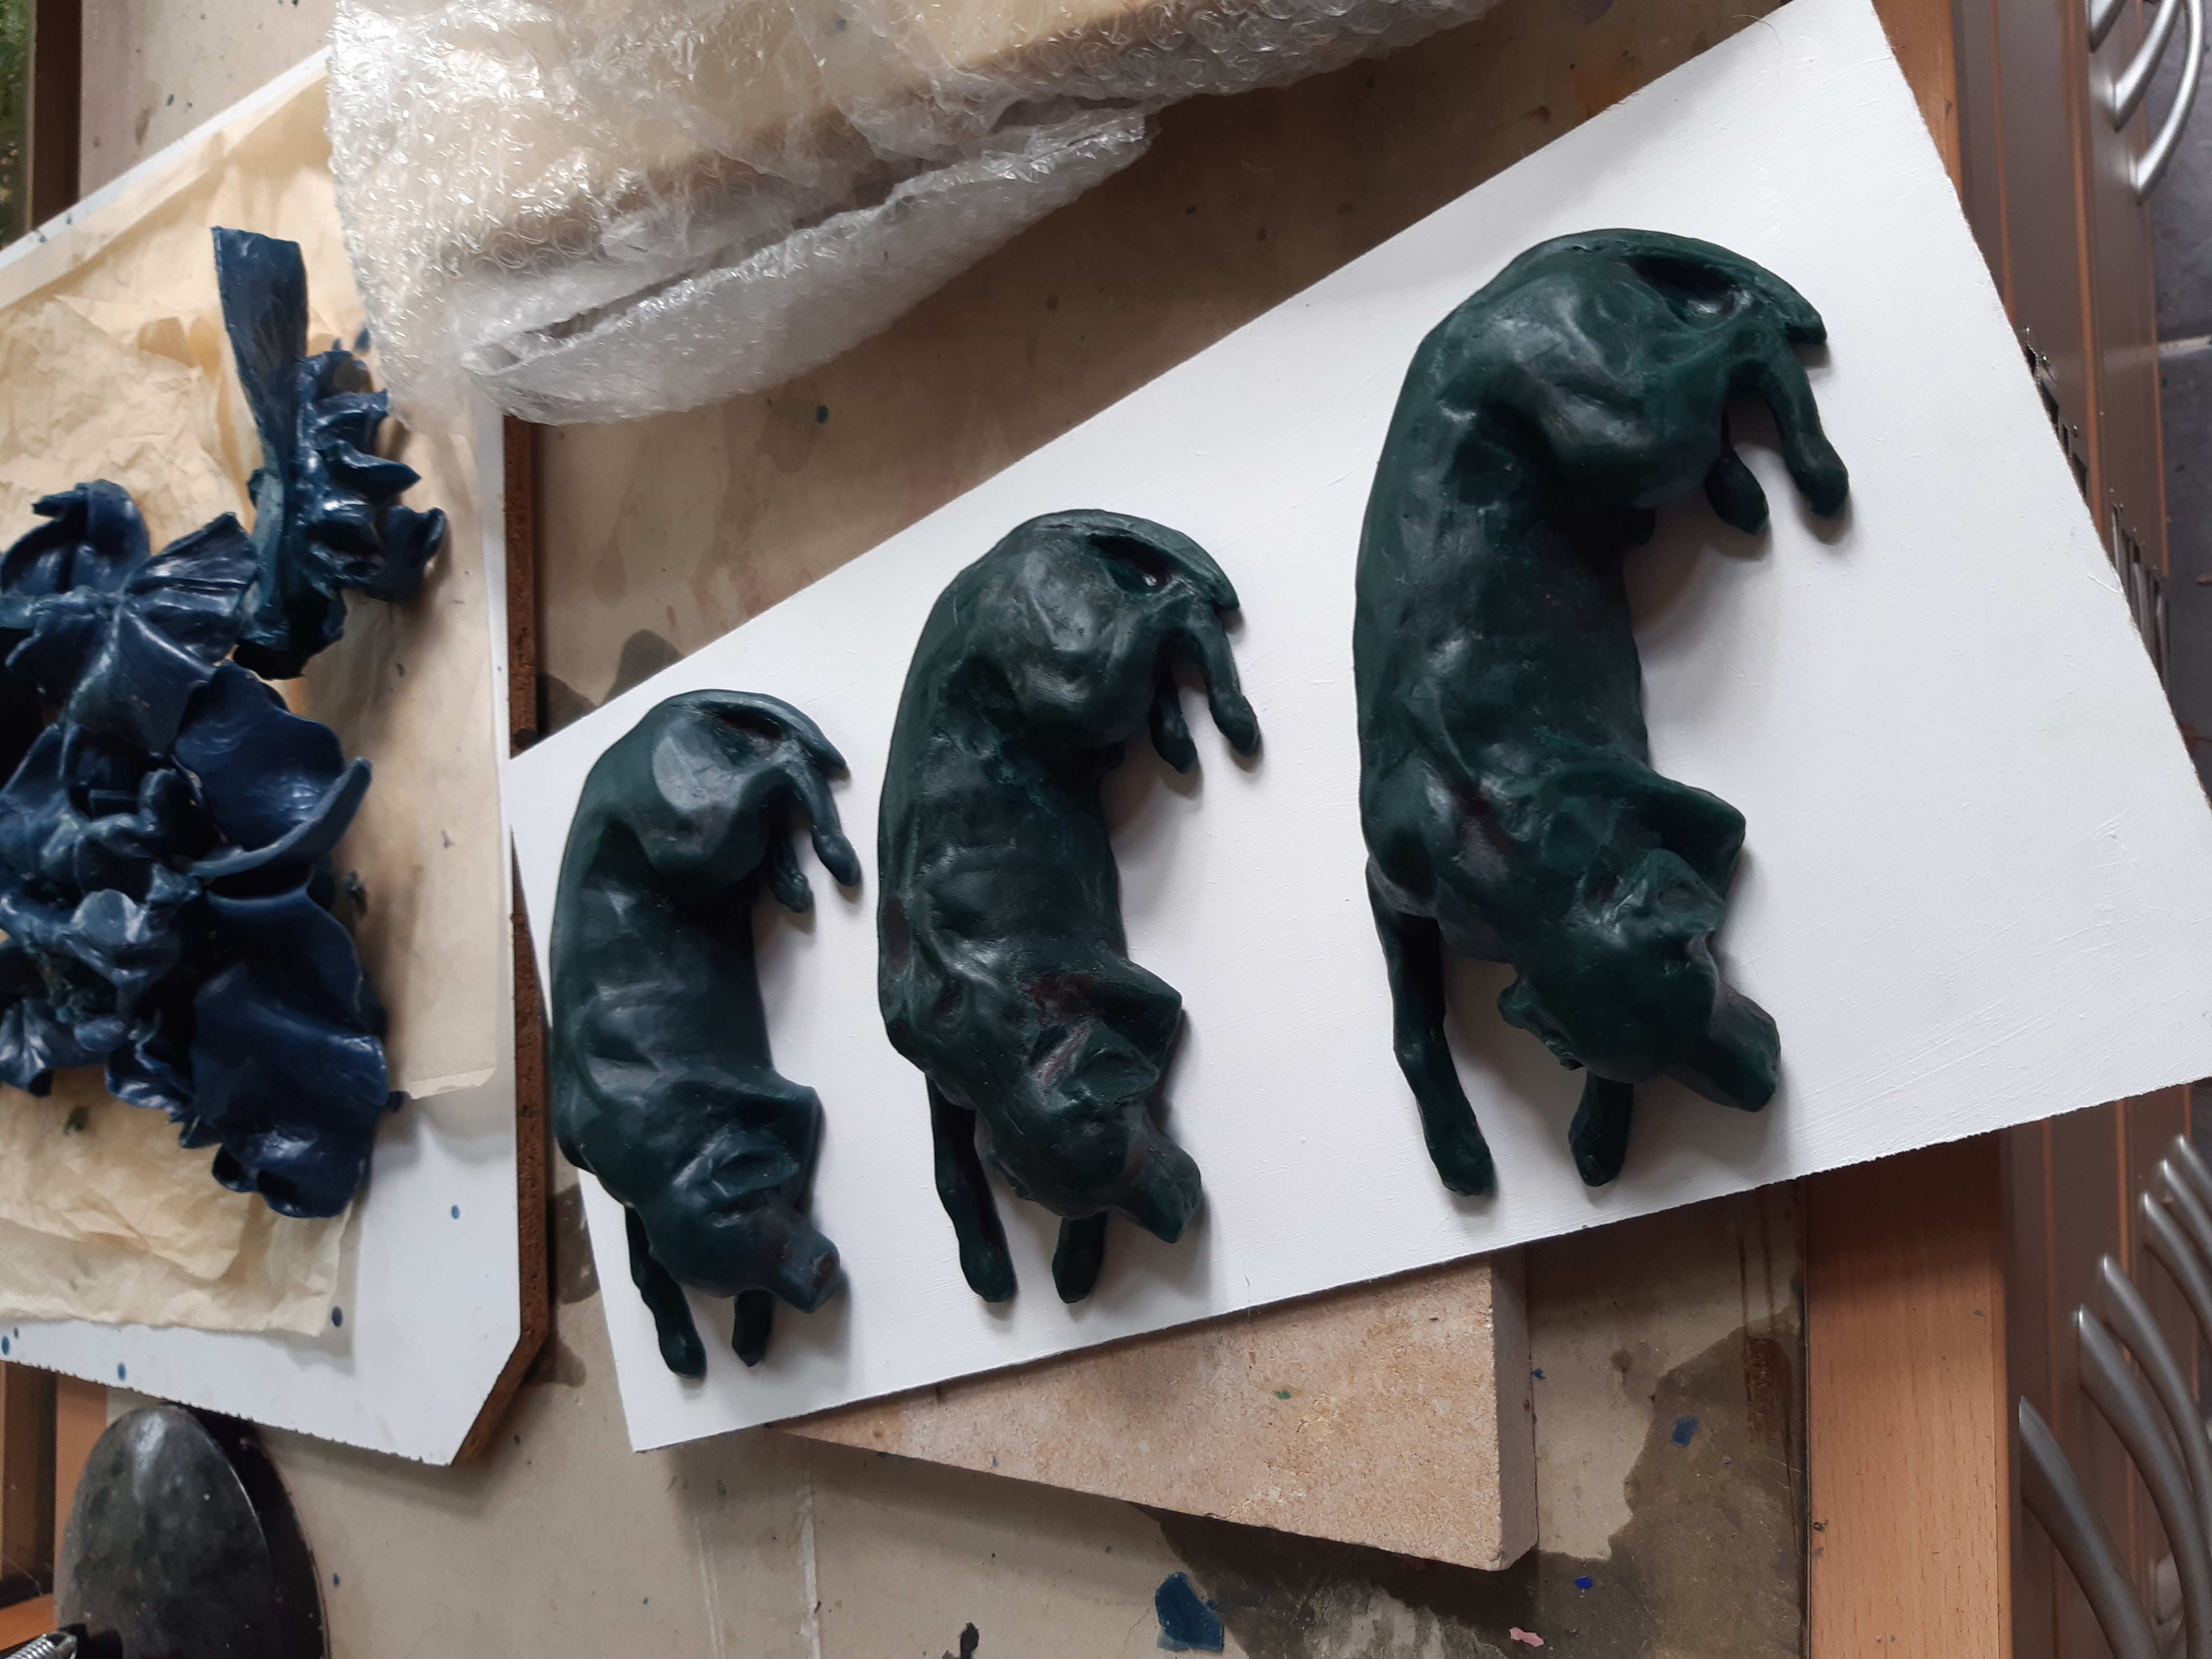
My wax of the dog was later commissioned for purchase. This version was an Artist Proof (AP) i.e. an original version that often differs only slightly to any later refined models. I had AP1 cast at my usual foundry 'Art of Fine Nature' in May 2025. In addition to the commission, a limited edition of nine are planned. Below is a picture of three of the limited edition at the green wax stage having been signed and prepared by me for the foundry. The other photograph below shows the same three dogs as their bronze forms cool after patina had been applied and waxed whilst warm to sink into the metal for protection. Entitled 'Contentment' this is one of my favourite pieces. Versions can be purchased from the Cove Gallery in Weymouth.