Mould Making
Mould making.
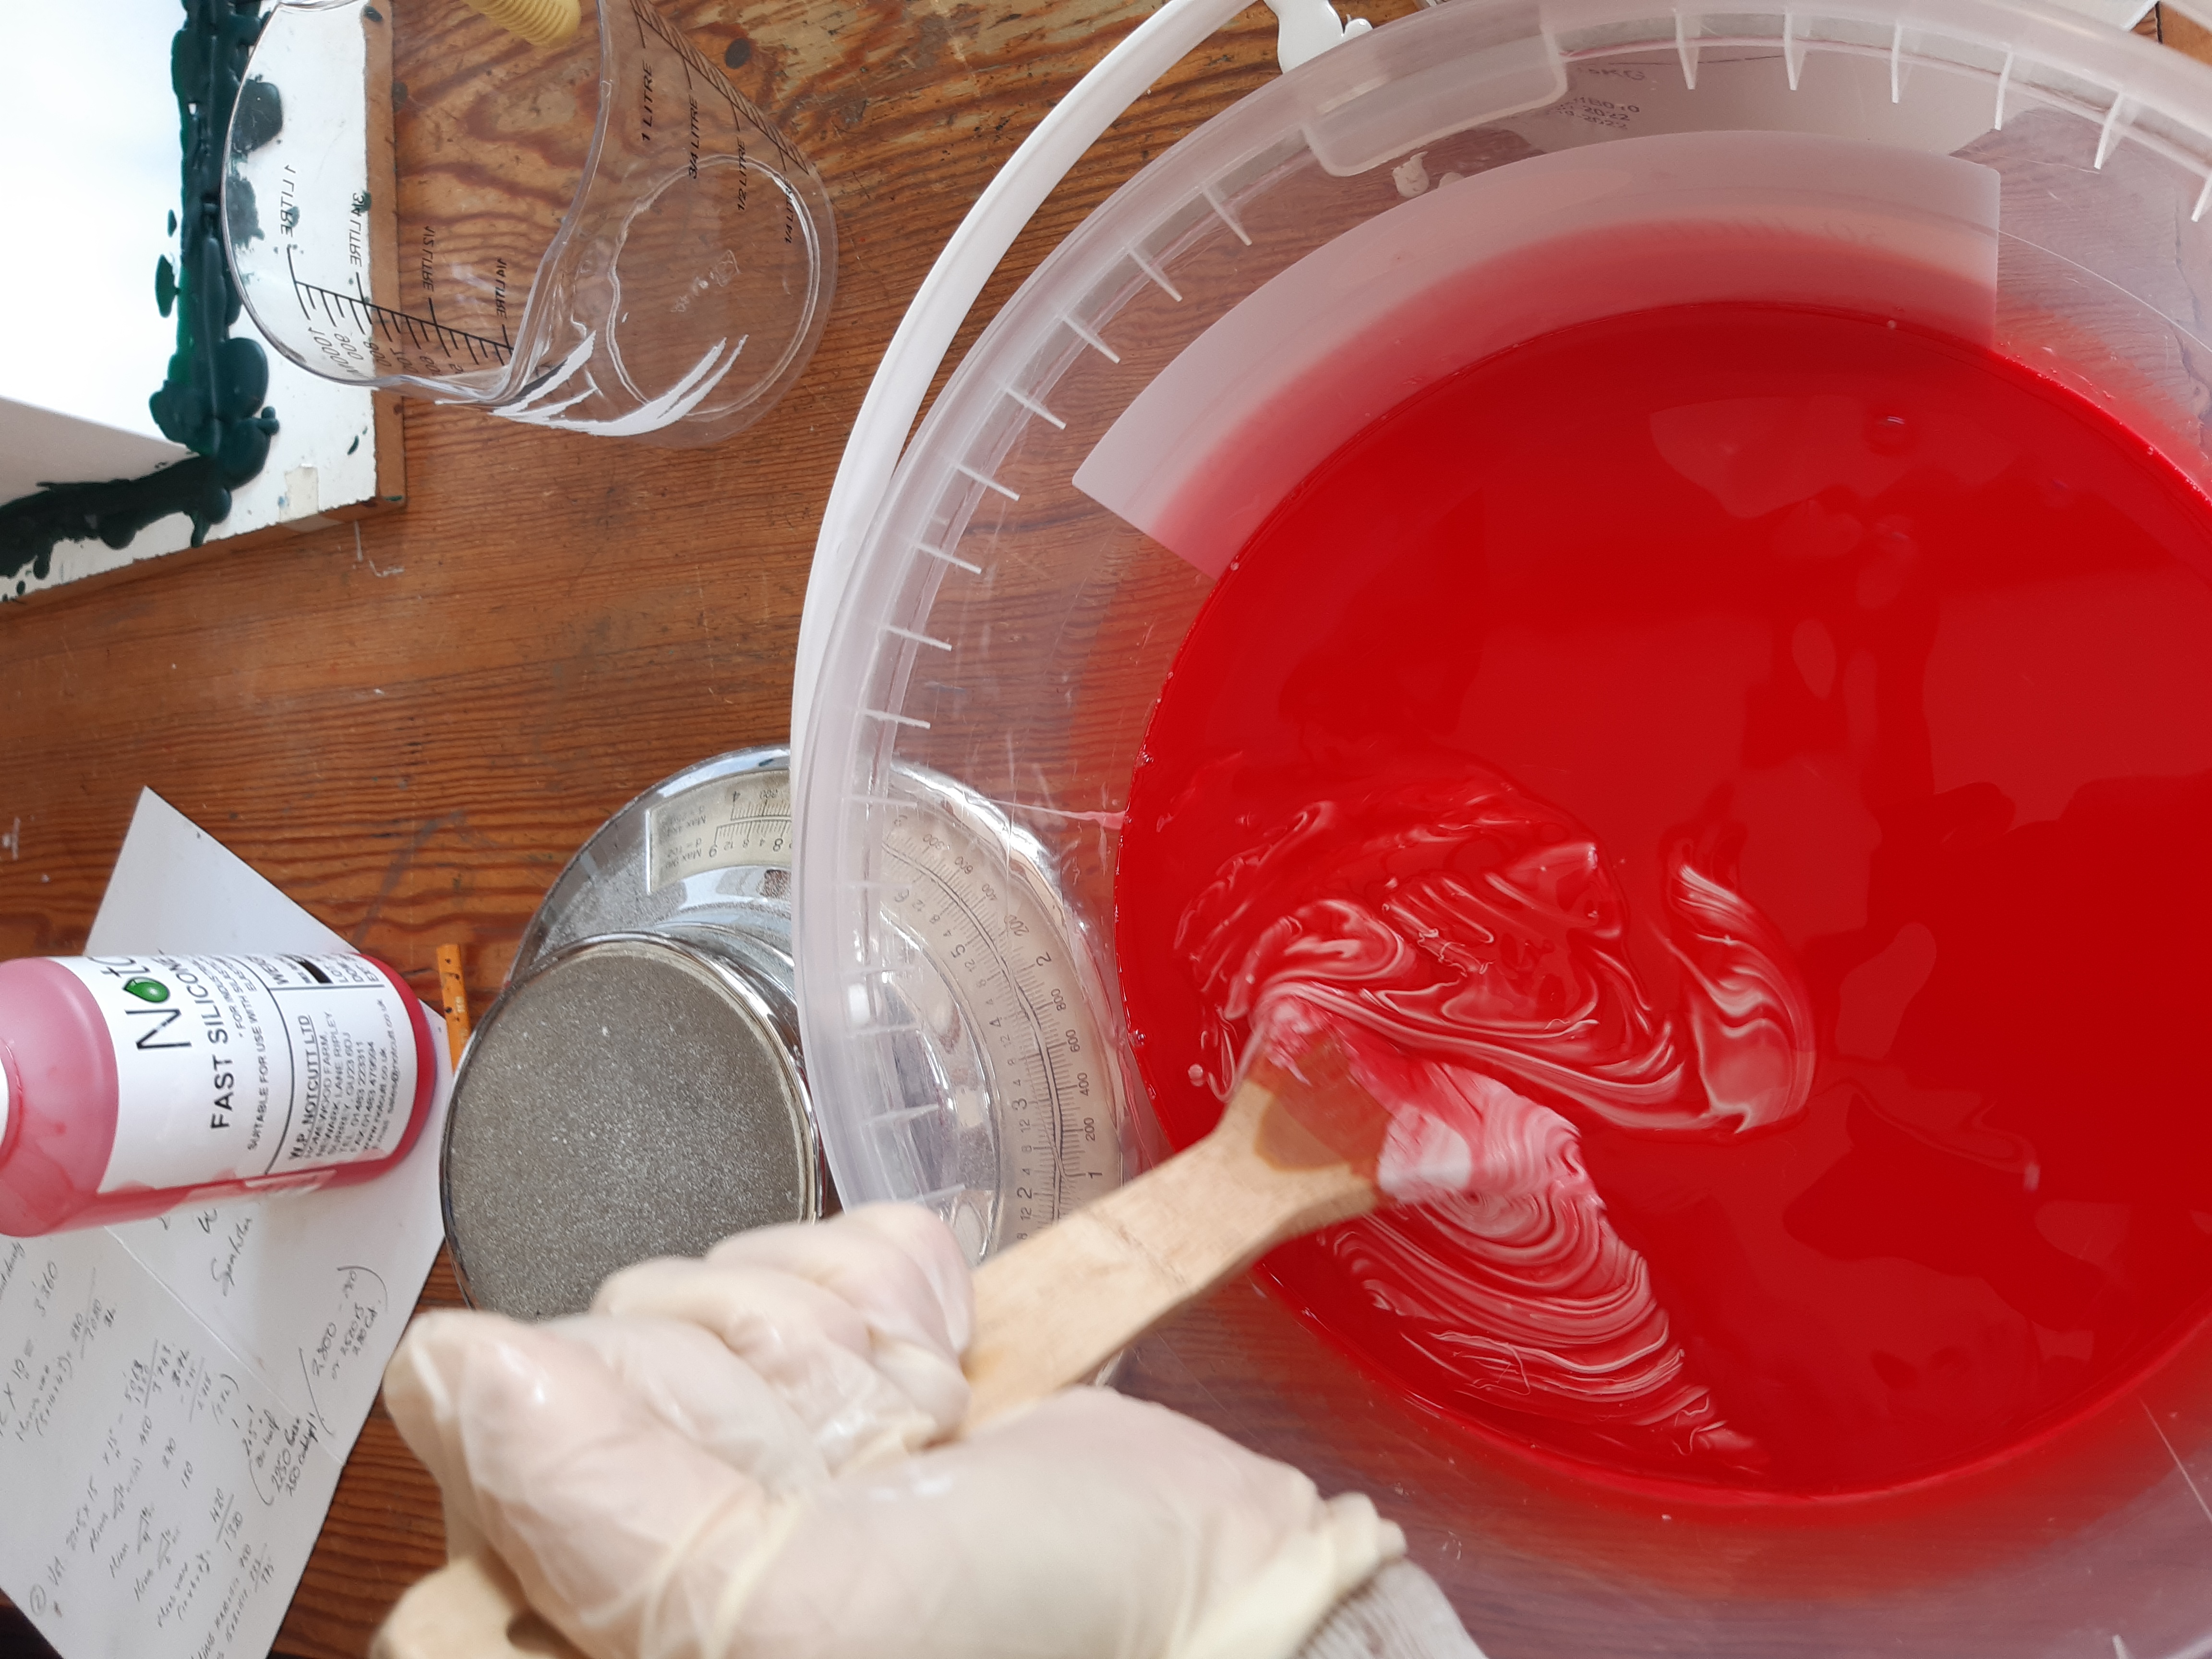
Reducing costs is an excellent motivator! I needed to do just that. Whilst I'm fortunate enough to sell my work, the margin for profit over and above foundry costs is slim. A lot of my work is done with green casting wax. A quick melting, clean running material ideal for the 'lost wax' casting method. By using casting wax only one mould, a ceramic one, is needed. The ceramic mould is made by the foundry and destroyed in the casting process as it is smashed off to extract the set bronze. Many of my pieces are therefore one-off's. However, when I started using soft modelling wax for my life model sculpting sessions, an initial rubber mould was additionally required. Modelling wax contains a filler that makes it unsuitable for casting. A rubber mould is therefore needed to make a subsequent green wax version that can be cast. It is also the mould required if multiple waxes are desired of the same artwork as it can be reused. Two moulds are therefore used to produce the bronze: a rubber mould and then a ceramic mould.The foundry, supportive as always, encouraged me to give it a go and make my own rubber mould. They told me what I needed to do and which materials to use. So in March 2022 I rang Norcutt, a moulding compound and resin supplier based in Surrey, and ordered a small amount of Silastic and catalyst. In the days waiting for delivery I organised myself getting together all the sundry items; mixing bucket, scales, latex gloves, safety glasses, lab-coat (just happened to have one and it has proved very useful in my sculpture exploits), spatula etc. I also needed a container for the artwork. Something that I could pour the mould mix into around the model. The container had to be of a type easily removed once the mould was set ruling out anything like glass or pottery. The foundry had suggested card.
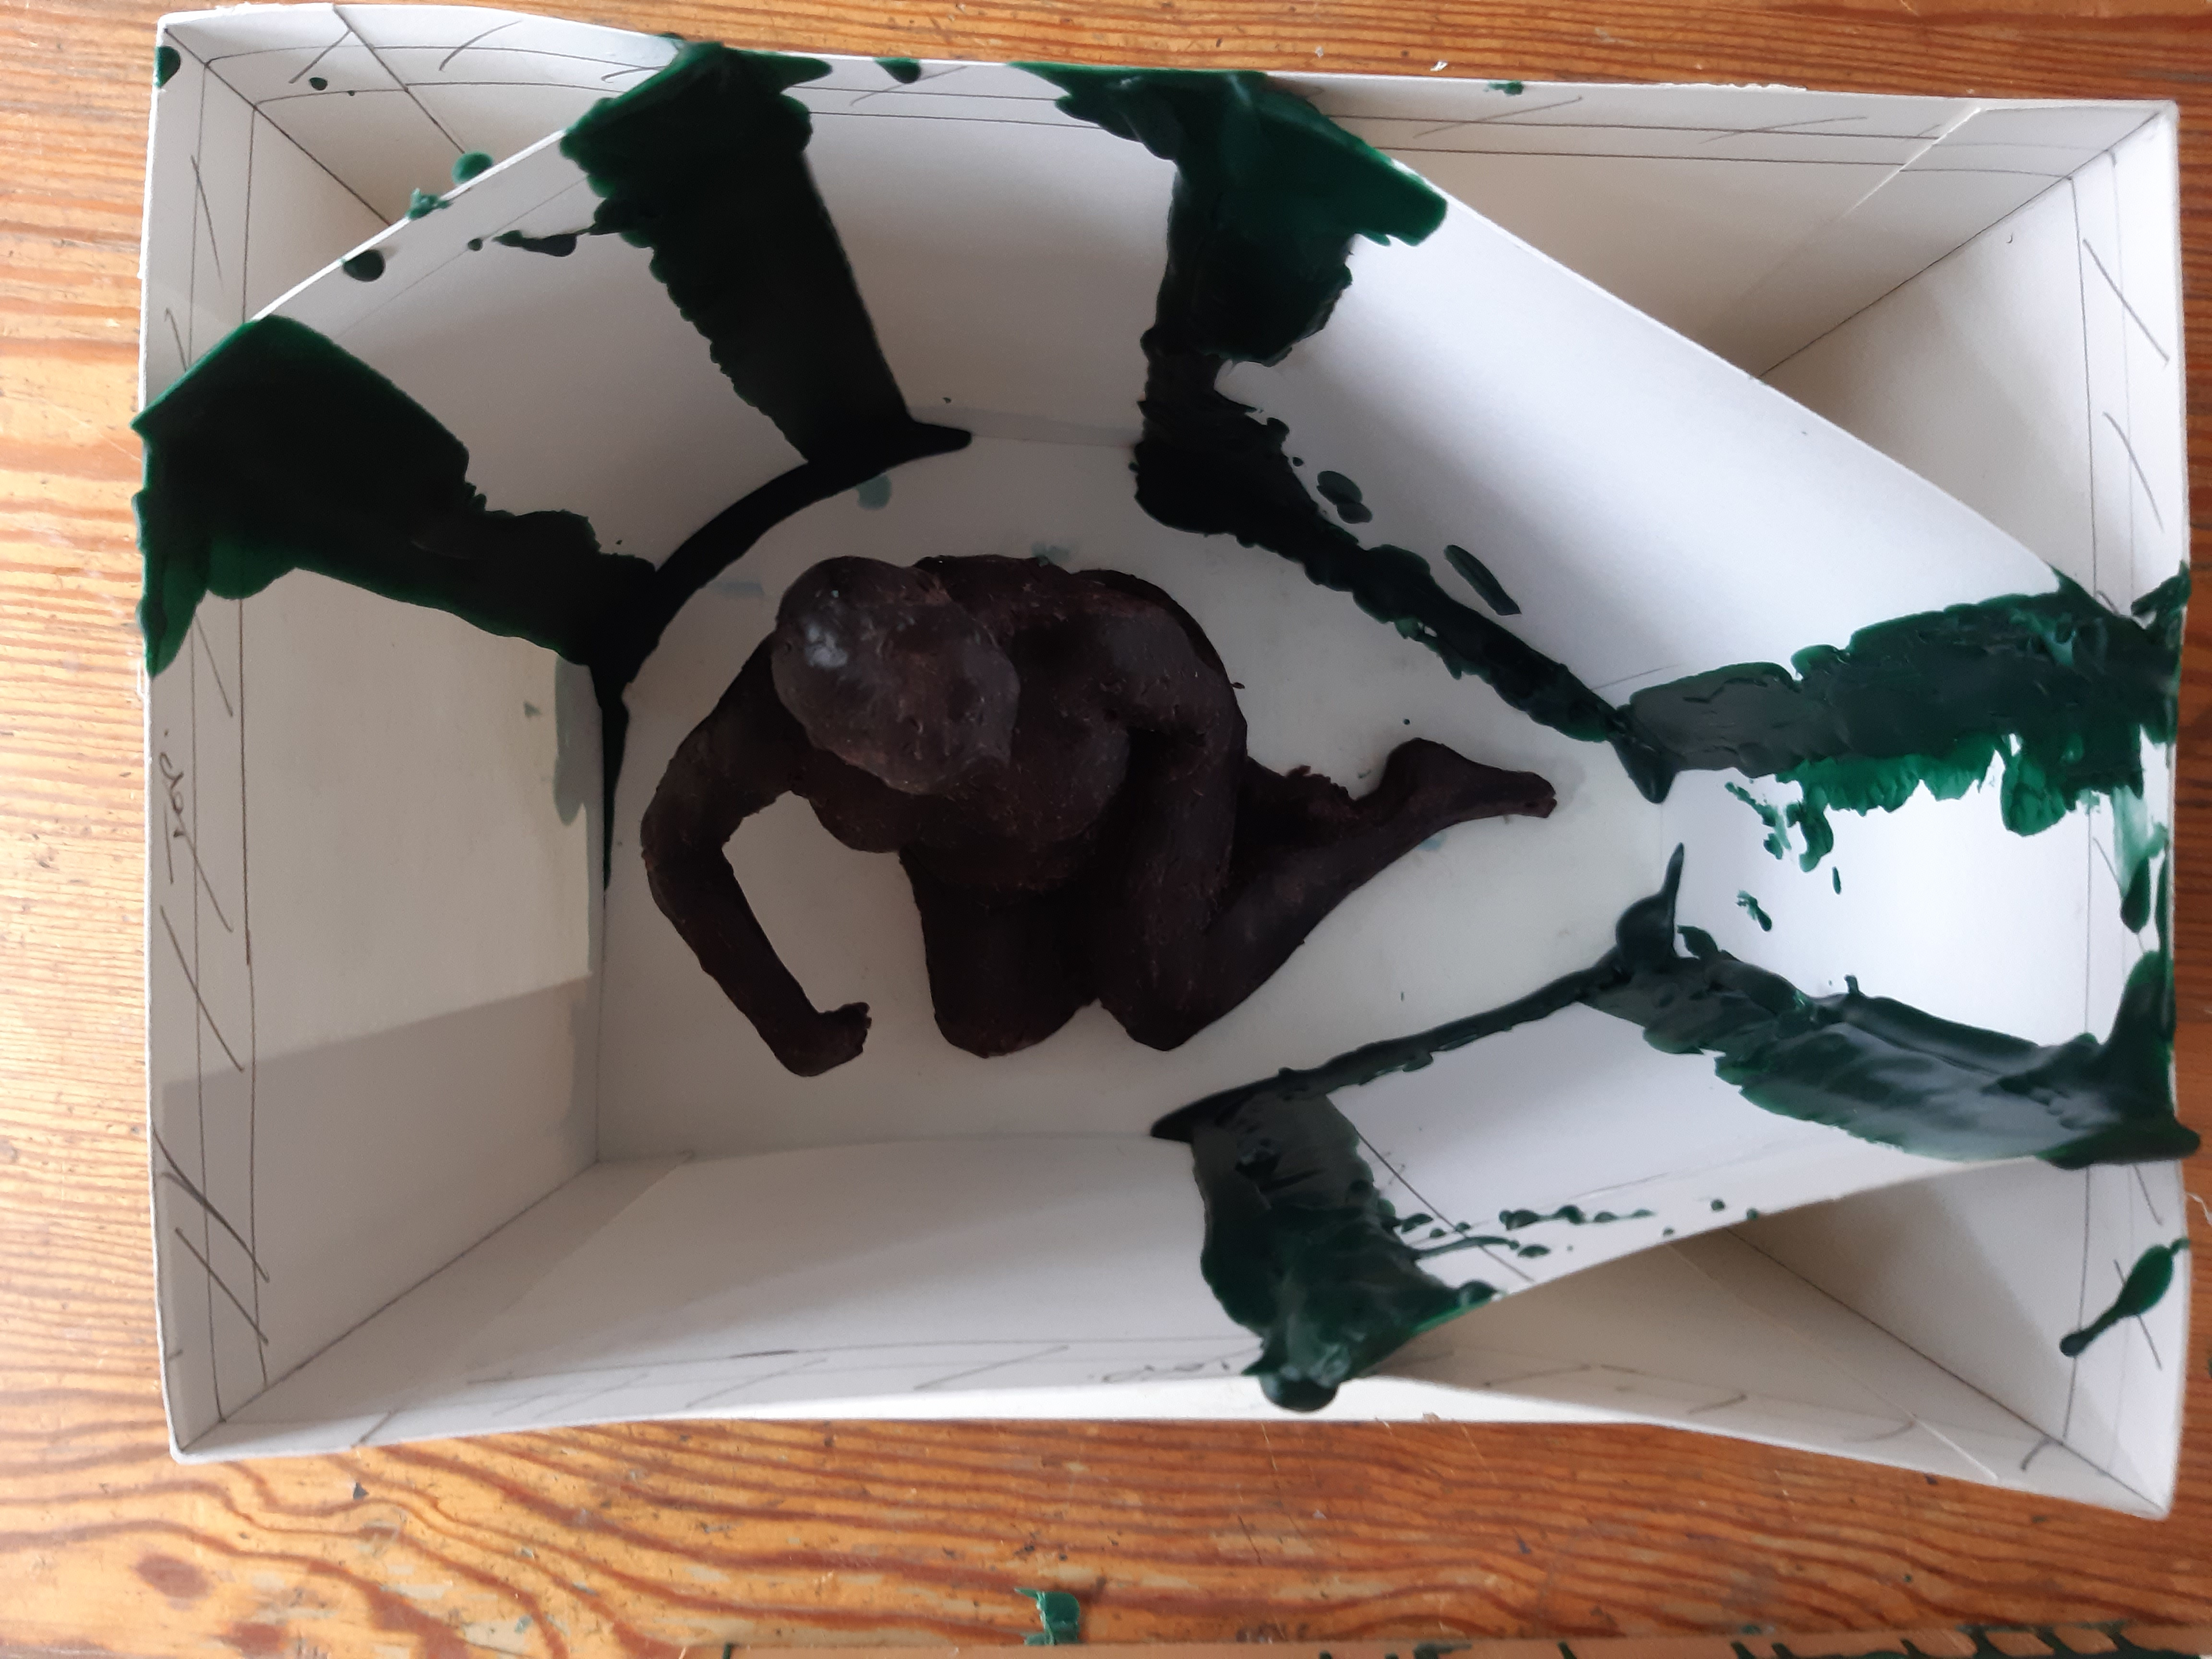
Maths is not my strongest forte, having had to sit my O Level twice to attain my B grade. The art work I had chosen was of a floor-seated life model; a relatively simplistic shape but even so not regular by any means. My brain cells were challenged to drag up basic calculations to ascertain which shape provided the least volume - as always in an effort to be as cost effective as possible I didn't want to waste the raw materials. Hence estimates of rectangular, triangular and circular surrounds were worked out and yes, I did have to remind myself of the digits of 'pi'. The difficult bit was estimating the volume of the model and subtracting it from the volume of the container. It rather pushed the boundaries to the notion of estimation. Not helped by my attempt to reduce the volume of the rectangle by adding diagonal pieces of card to block off corners. But I obtained a ballpark figure. I then sealed the edges with the handy melted wax and placed my model inside.

Pouring
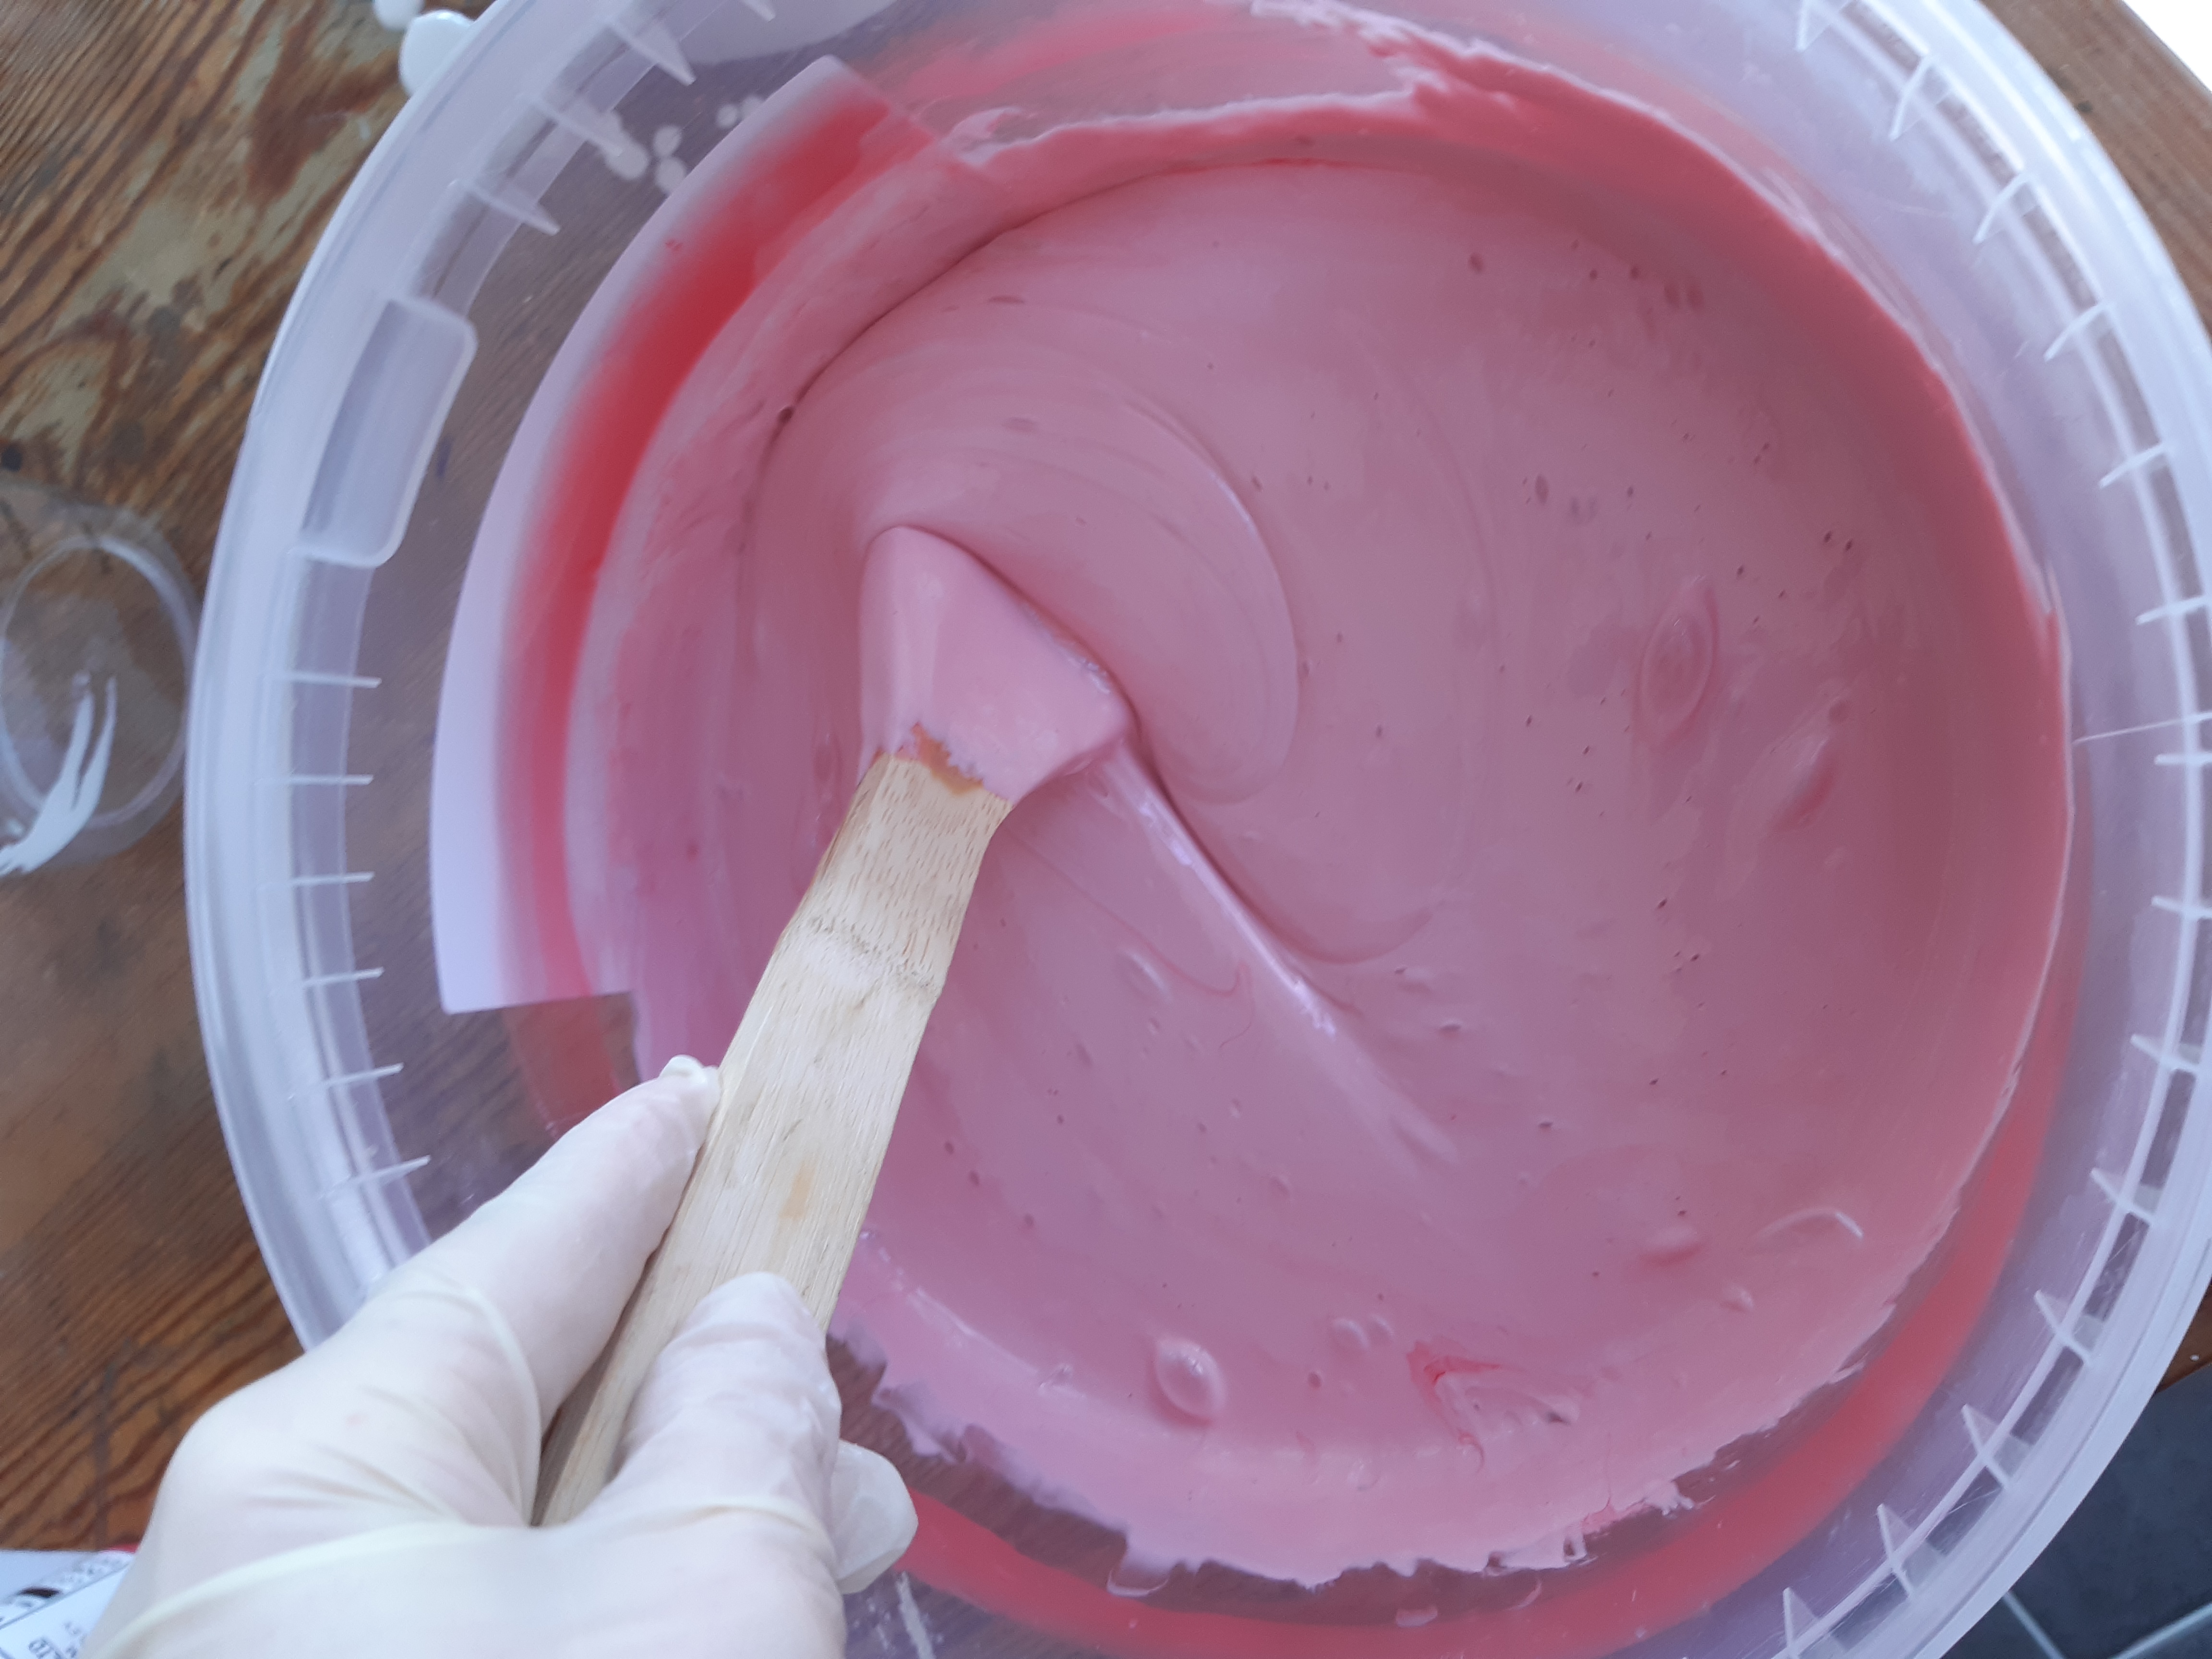
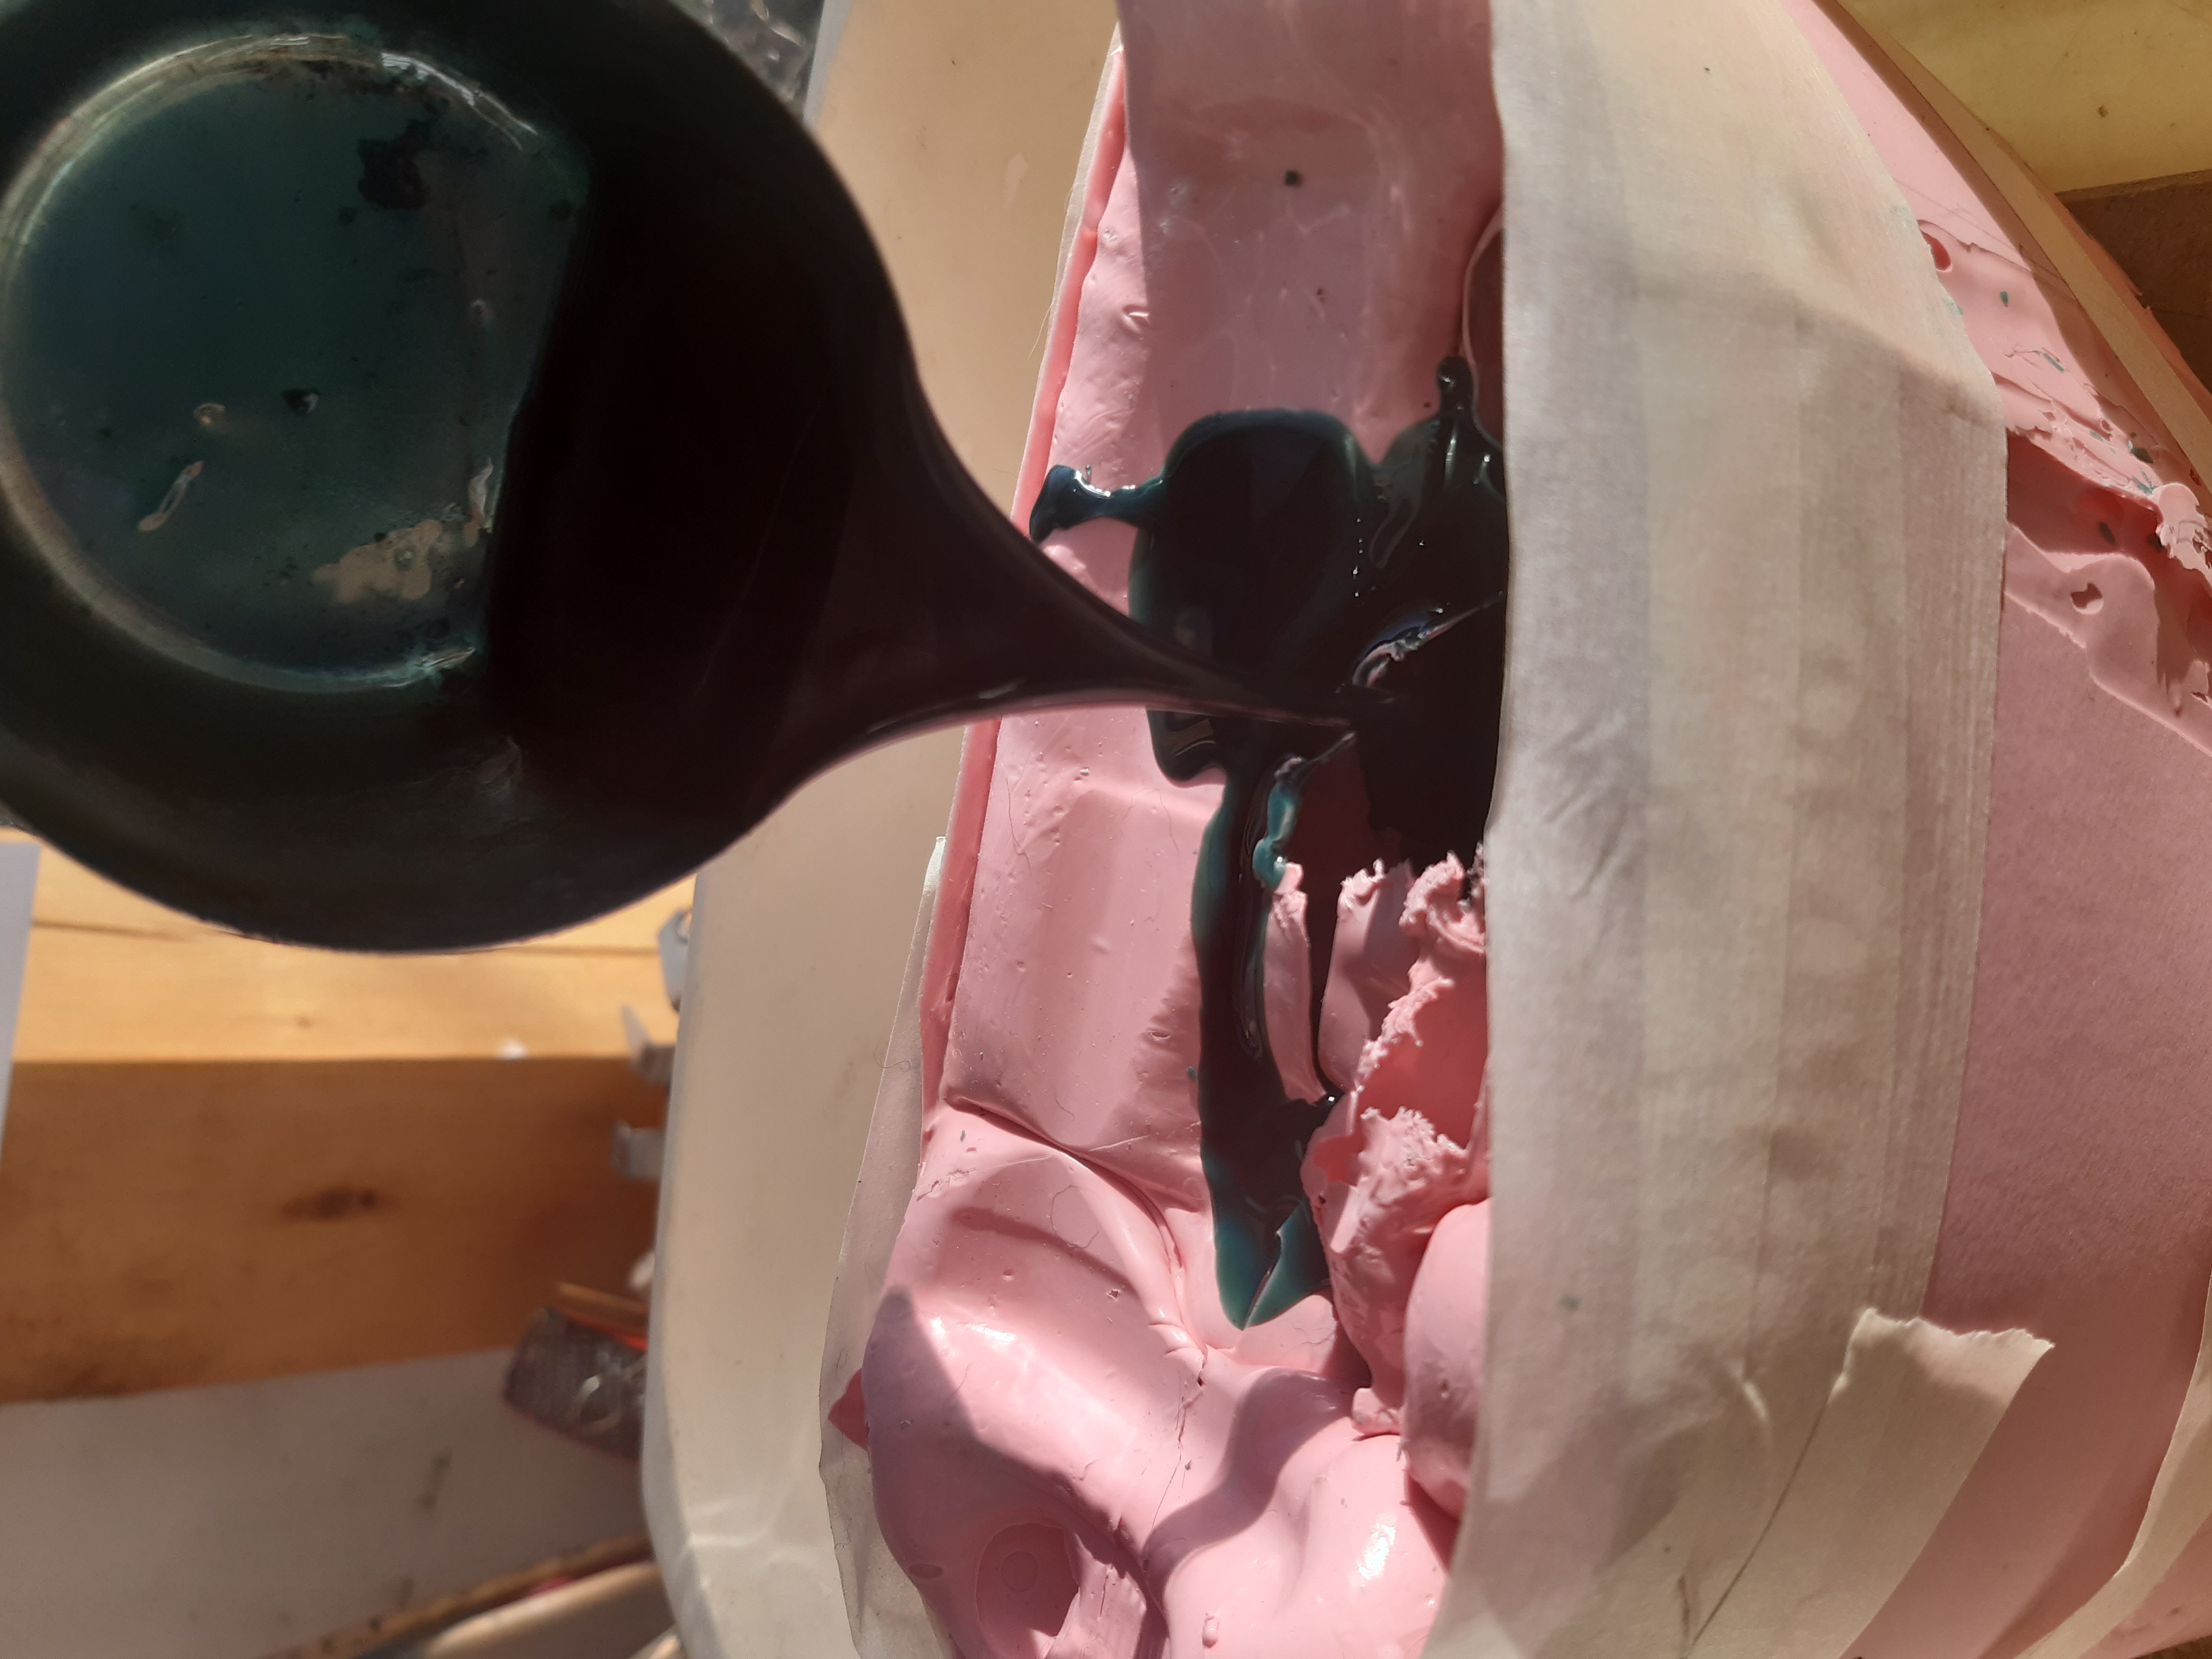
Thick, but smooth, the silastic mix was poured into my prepared mould. My eyes were out on stalks watching for the tiniest of pink specks on the seals. If one was spotted, it meant that the mix had found a gap and needed to be plugged. The pressure of the mix has a propensity to force its way through and if unchecked would lead to all the mixture escaping via an ever increasing hole.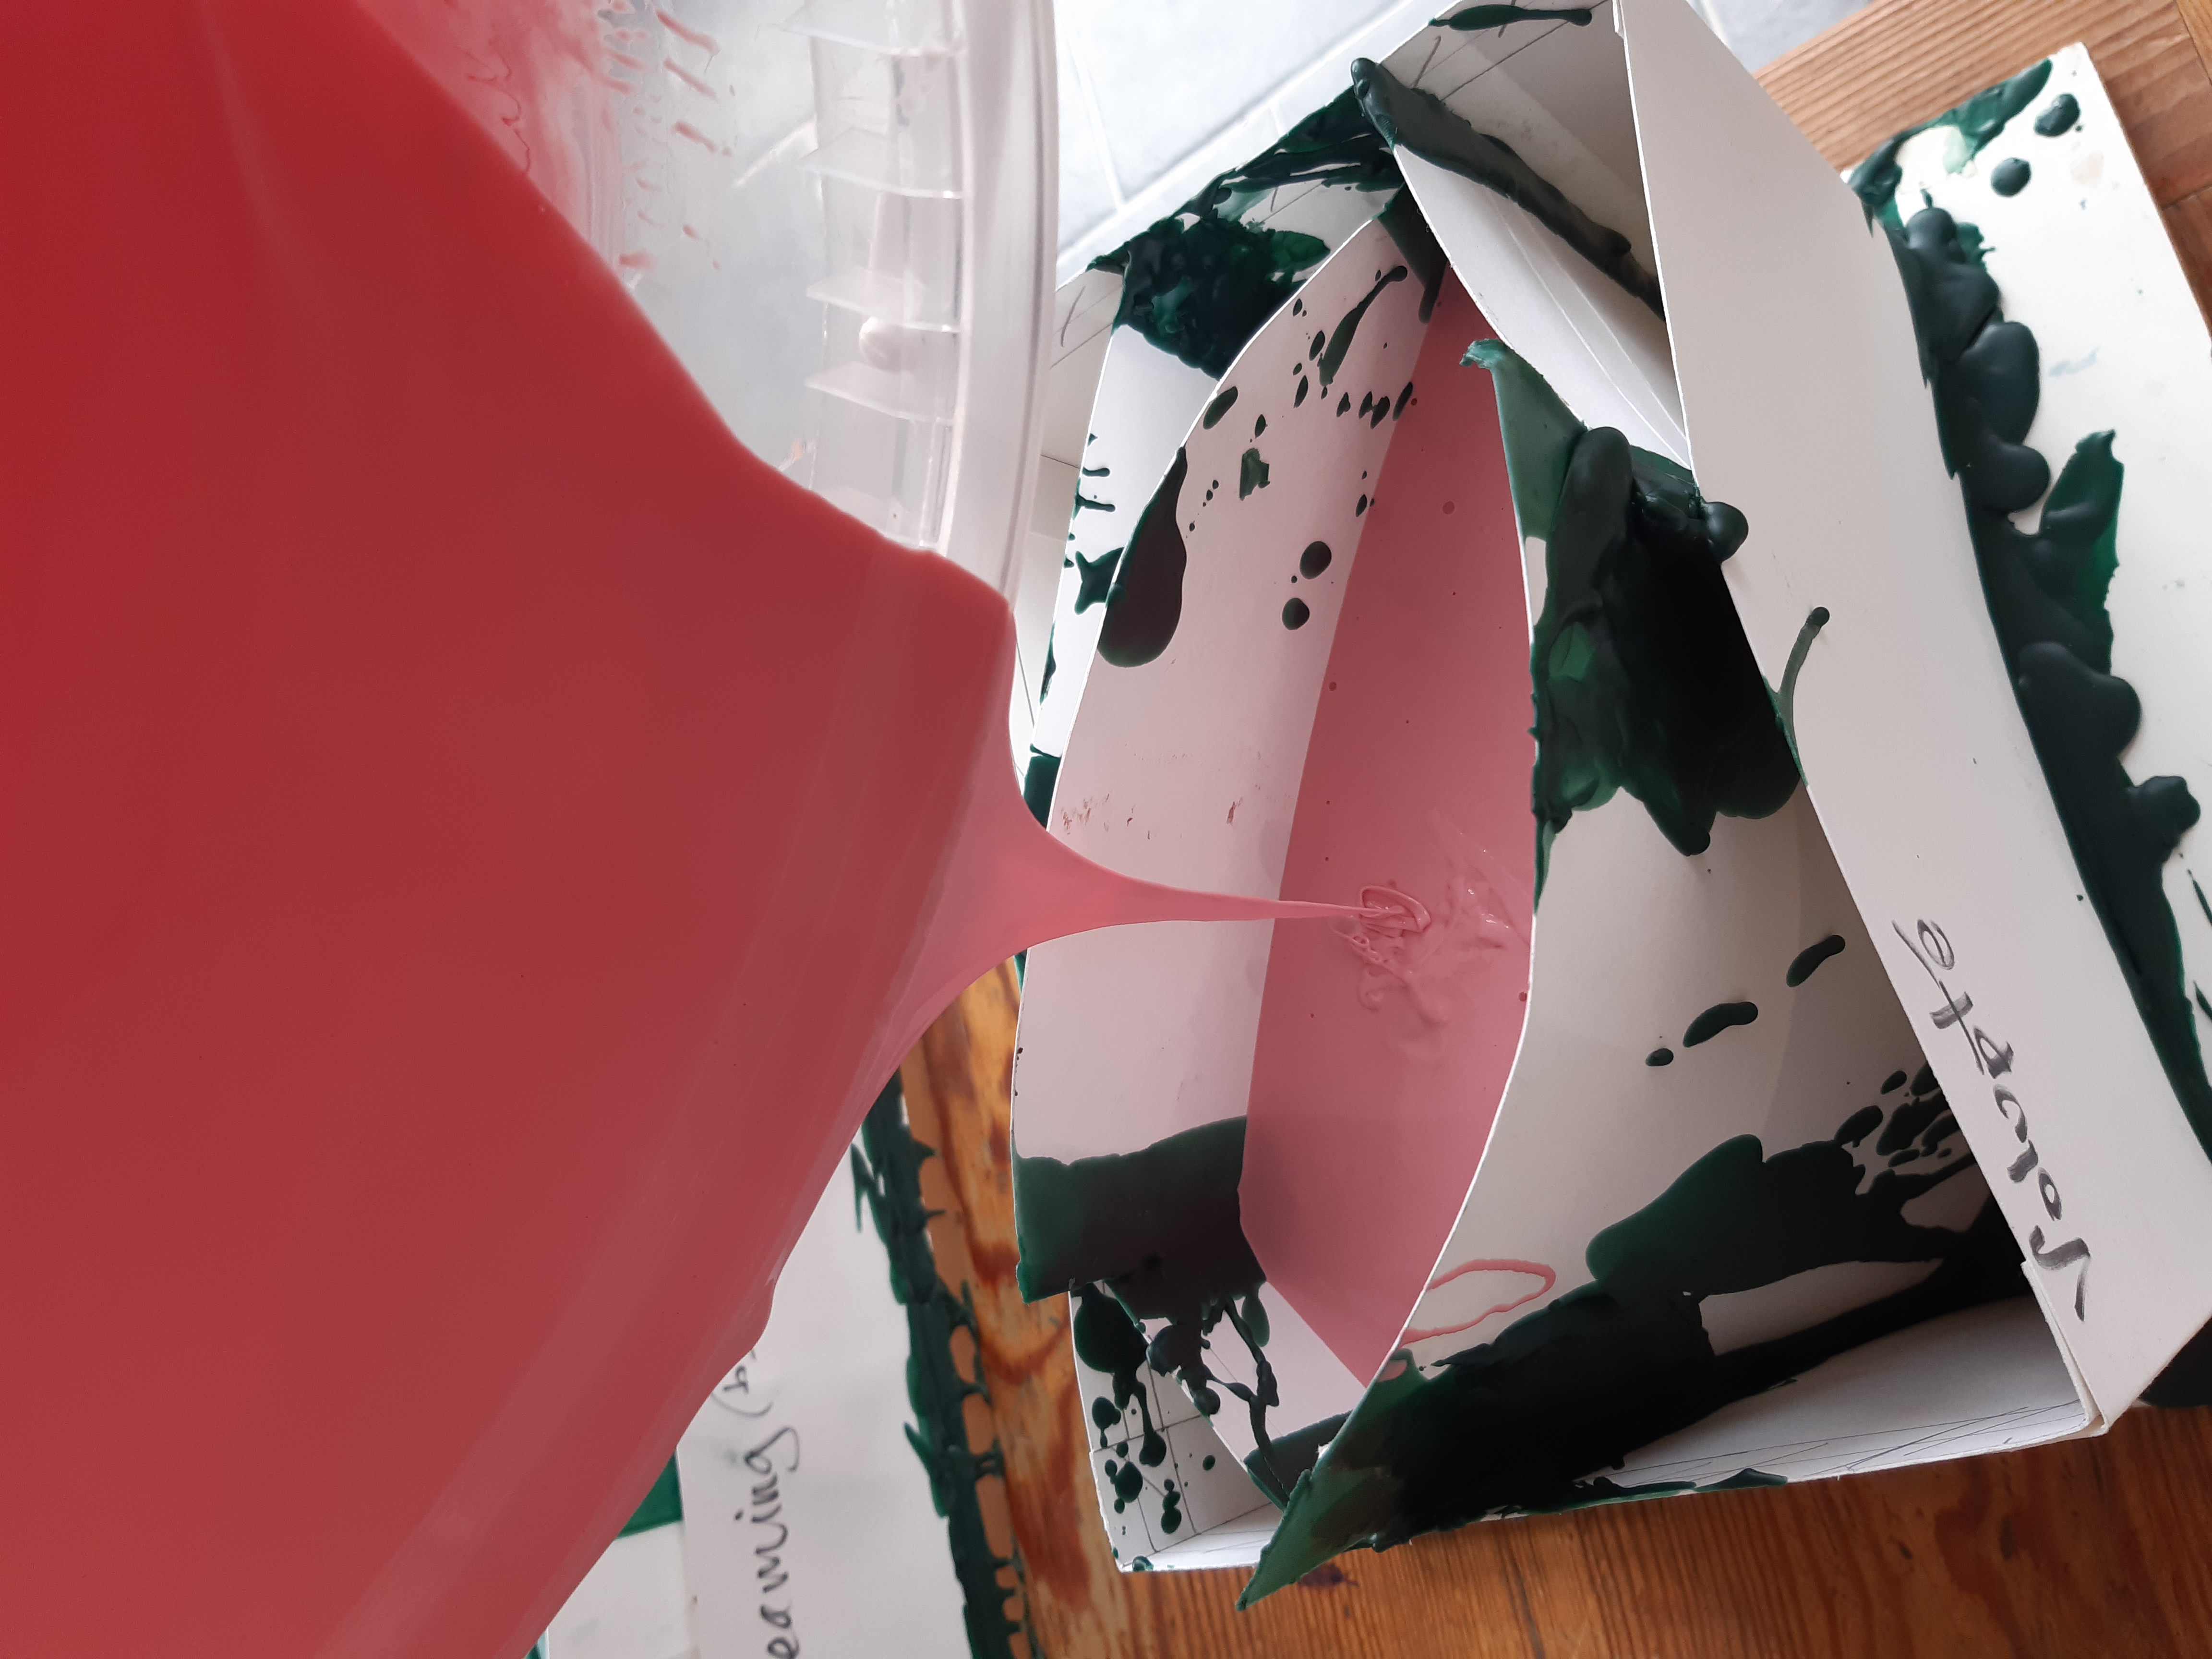
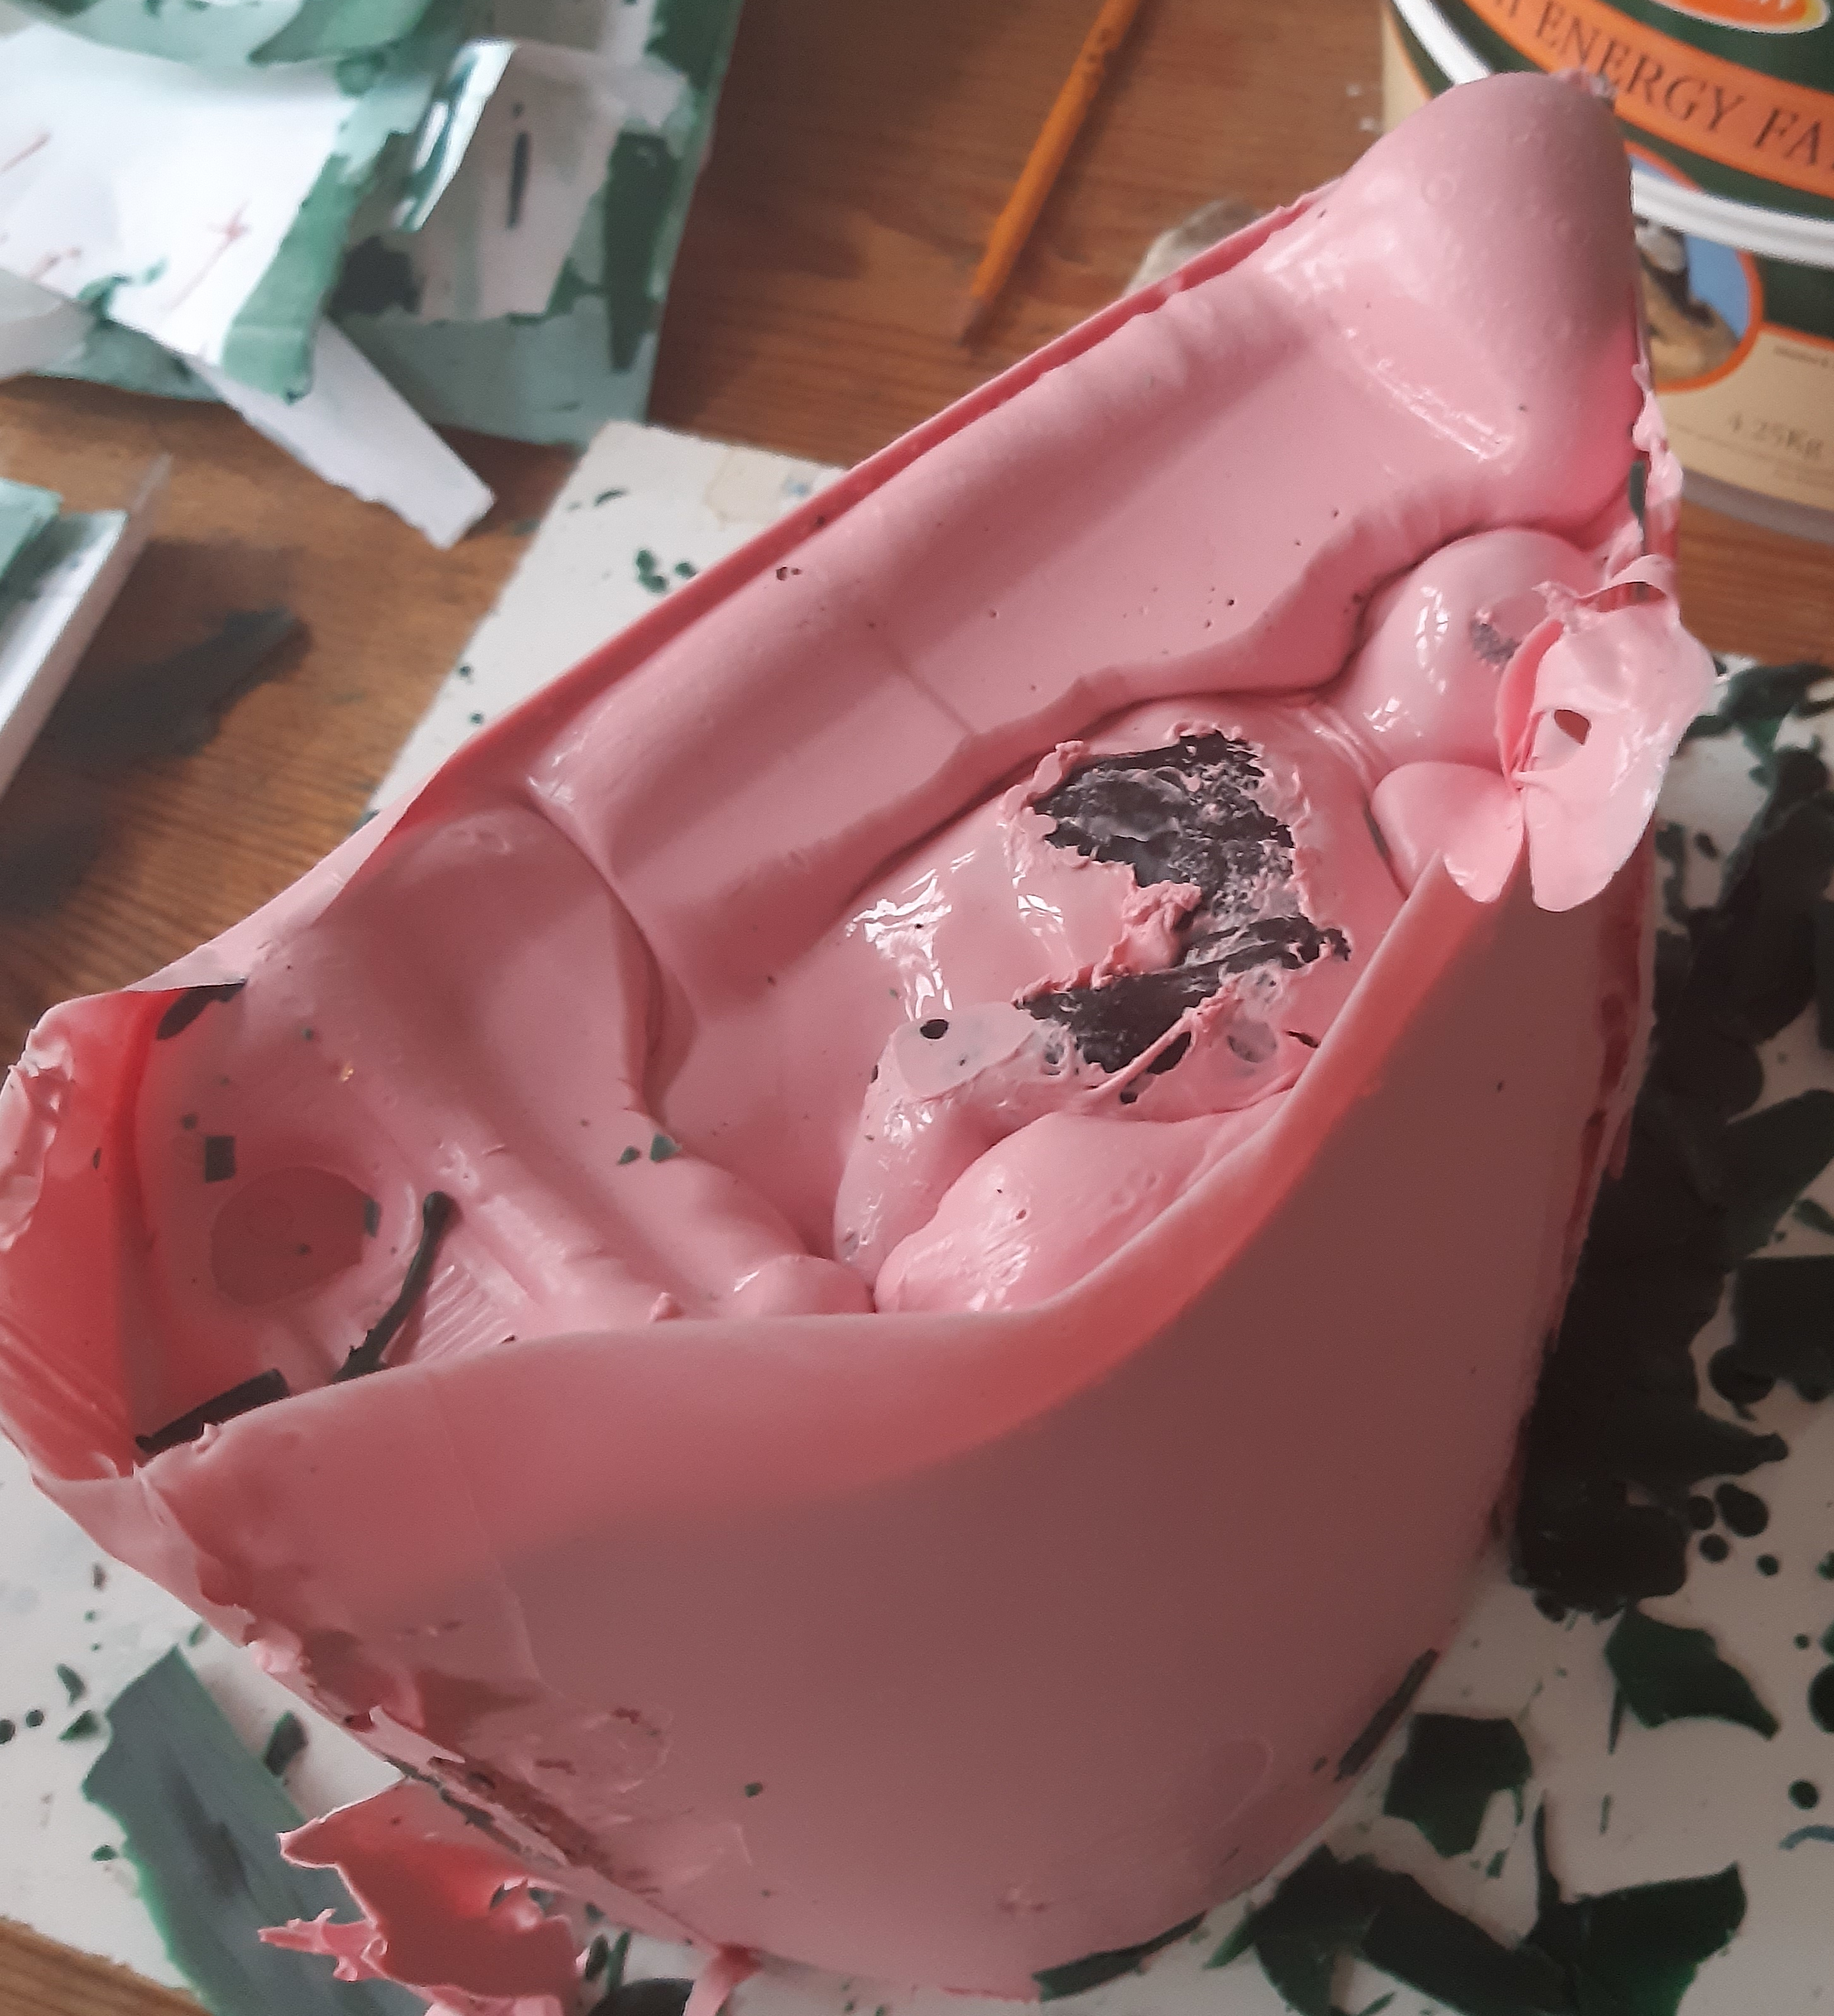
Job done. Time for a cuppa. So I went back up to the house to put the kettle on. Of course, now is the time that lessons are learnt. Lesson one; ensure your container cannot change shape. As the mix started to set, the pressure pushed against the card and moved it outward thereby changing its volume. Lesson two; if you don't anchor the wax down, as the mix sets it will lift it and see it rise to the surface! So it was then that when I returned several hours later I found my life model wax lying face down with her back uppermost escaping the mould. She had been seated, top of her head toward the sky when I'd left her!
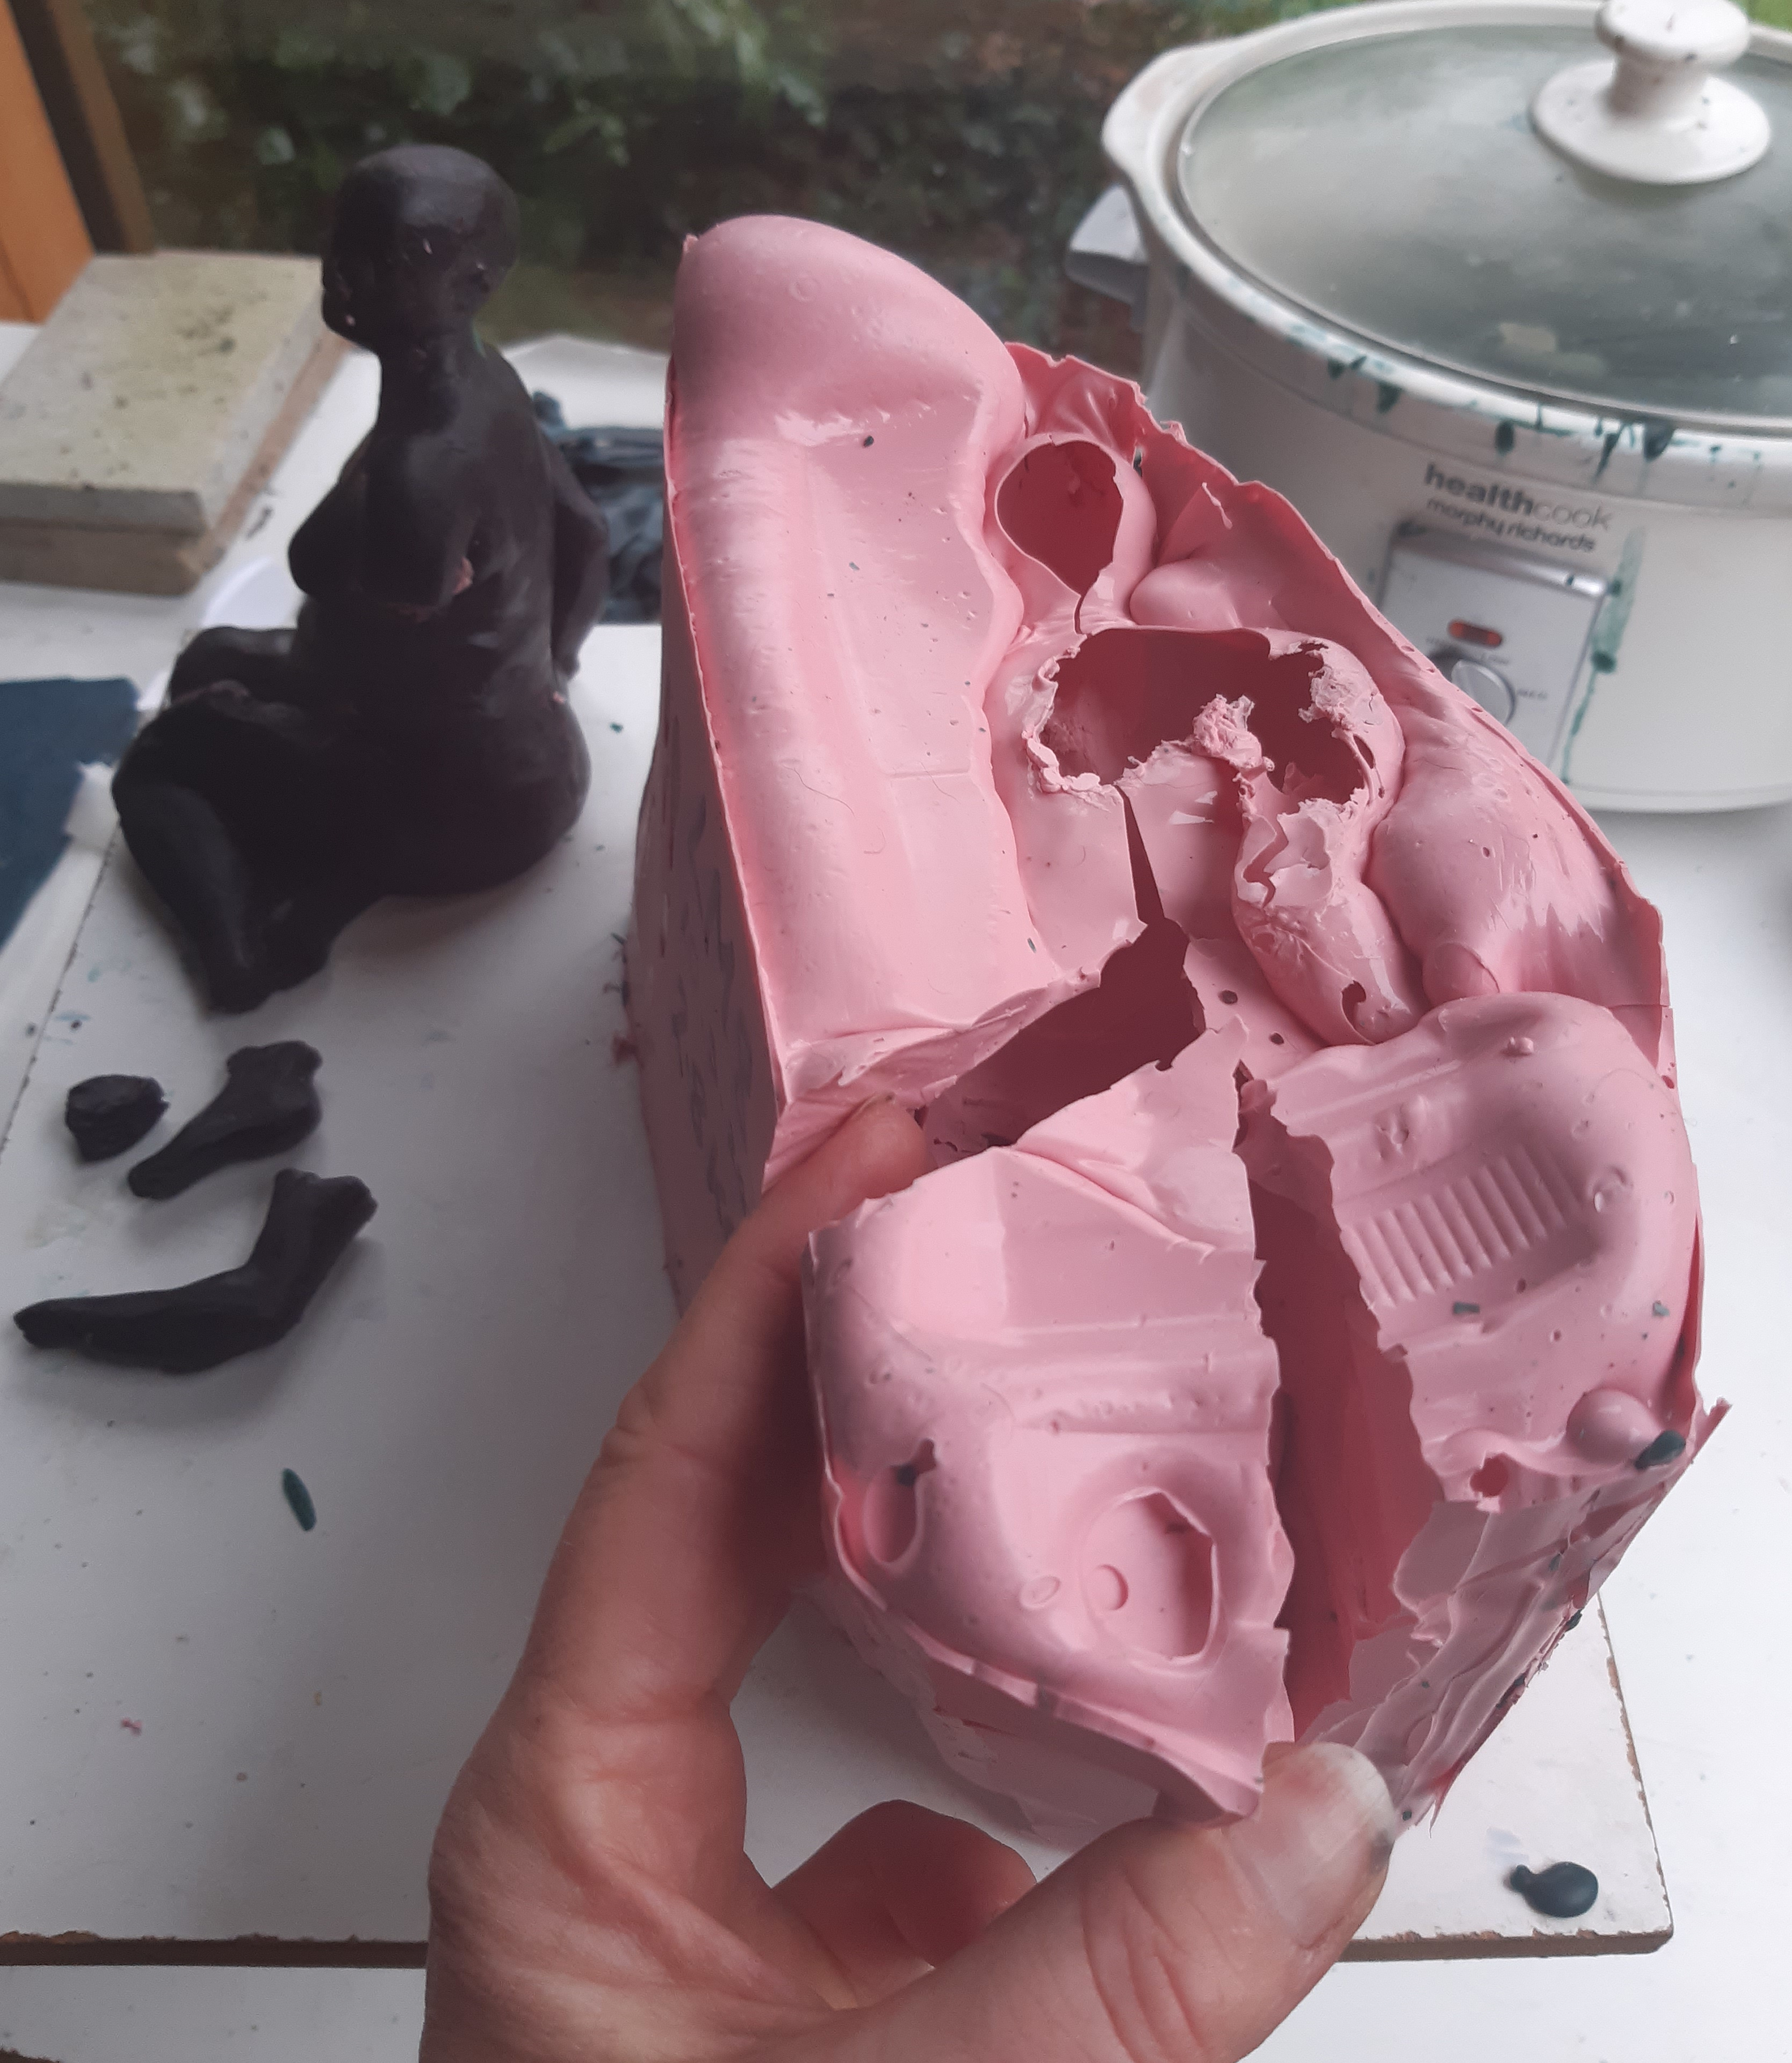
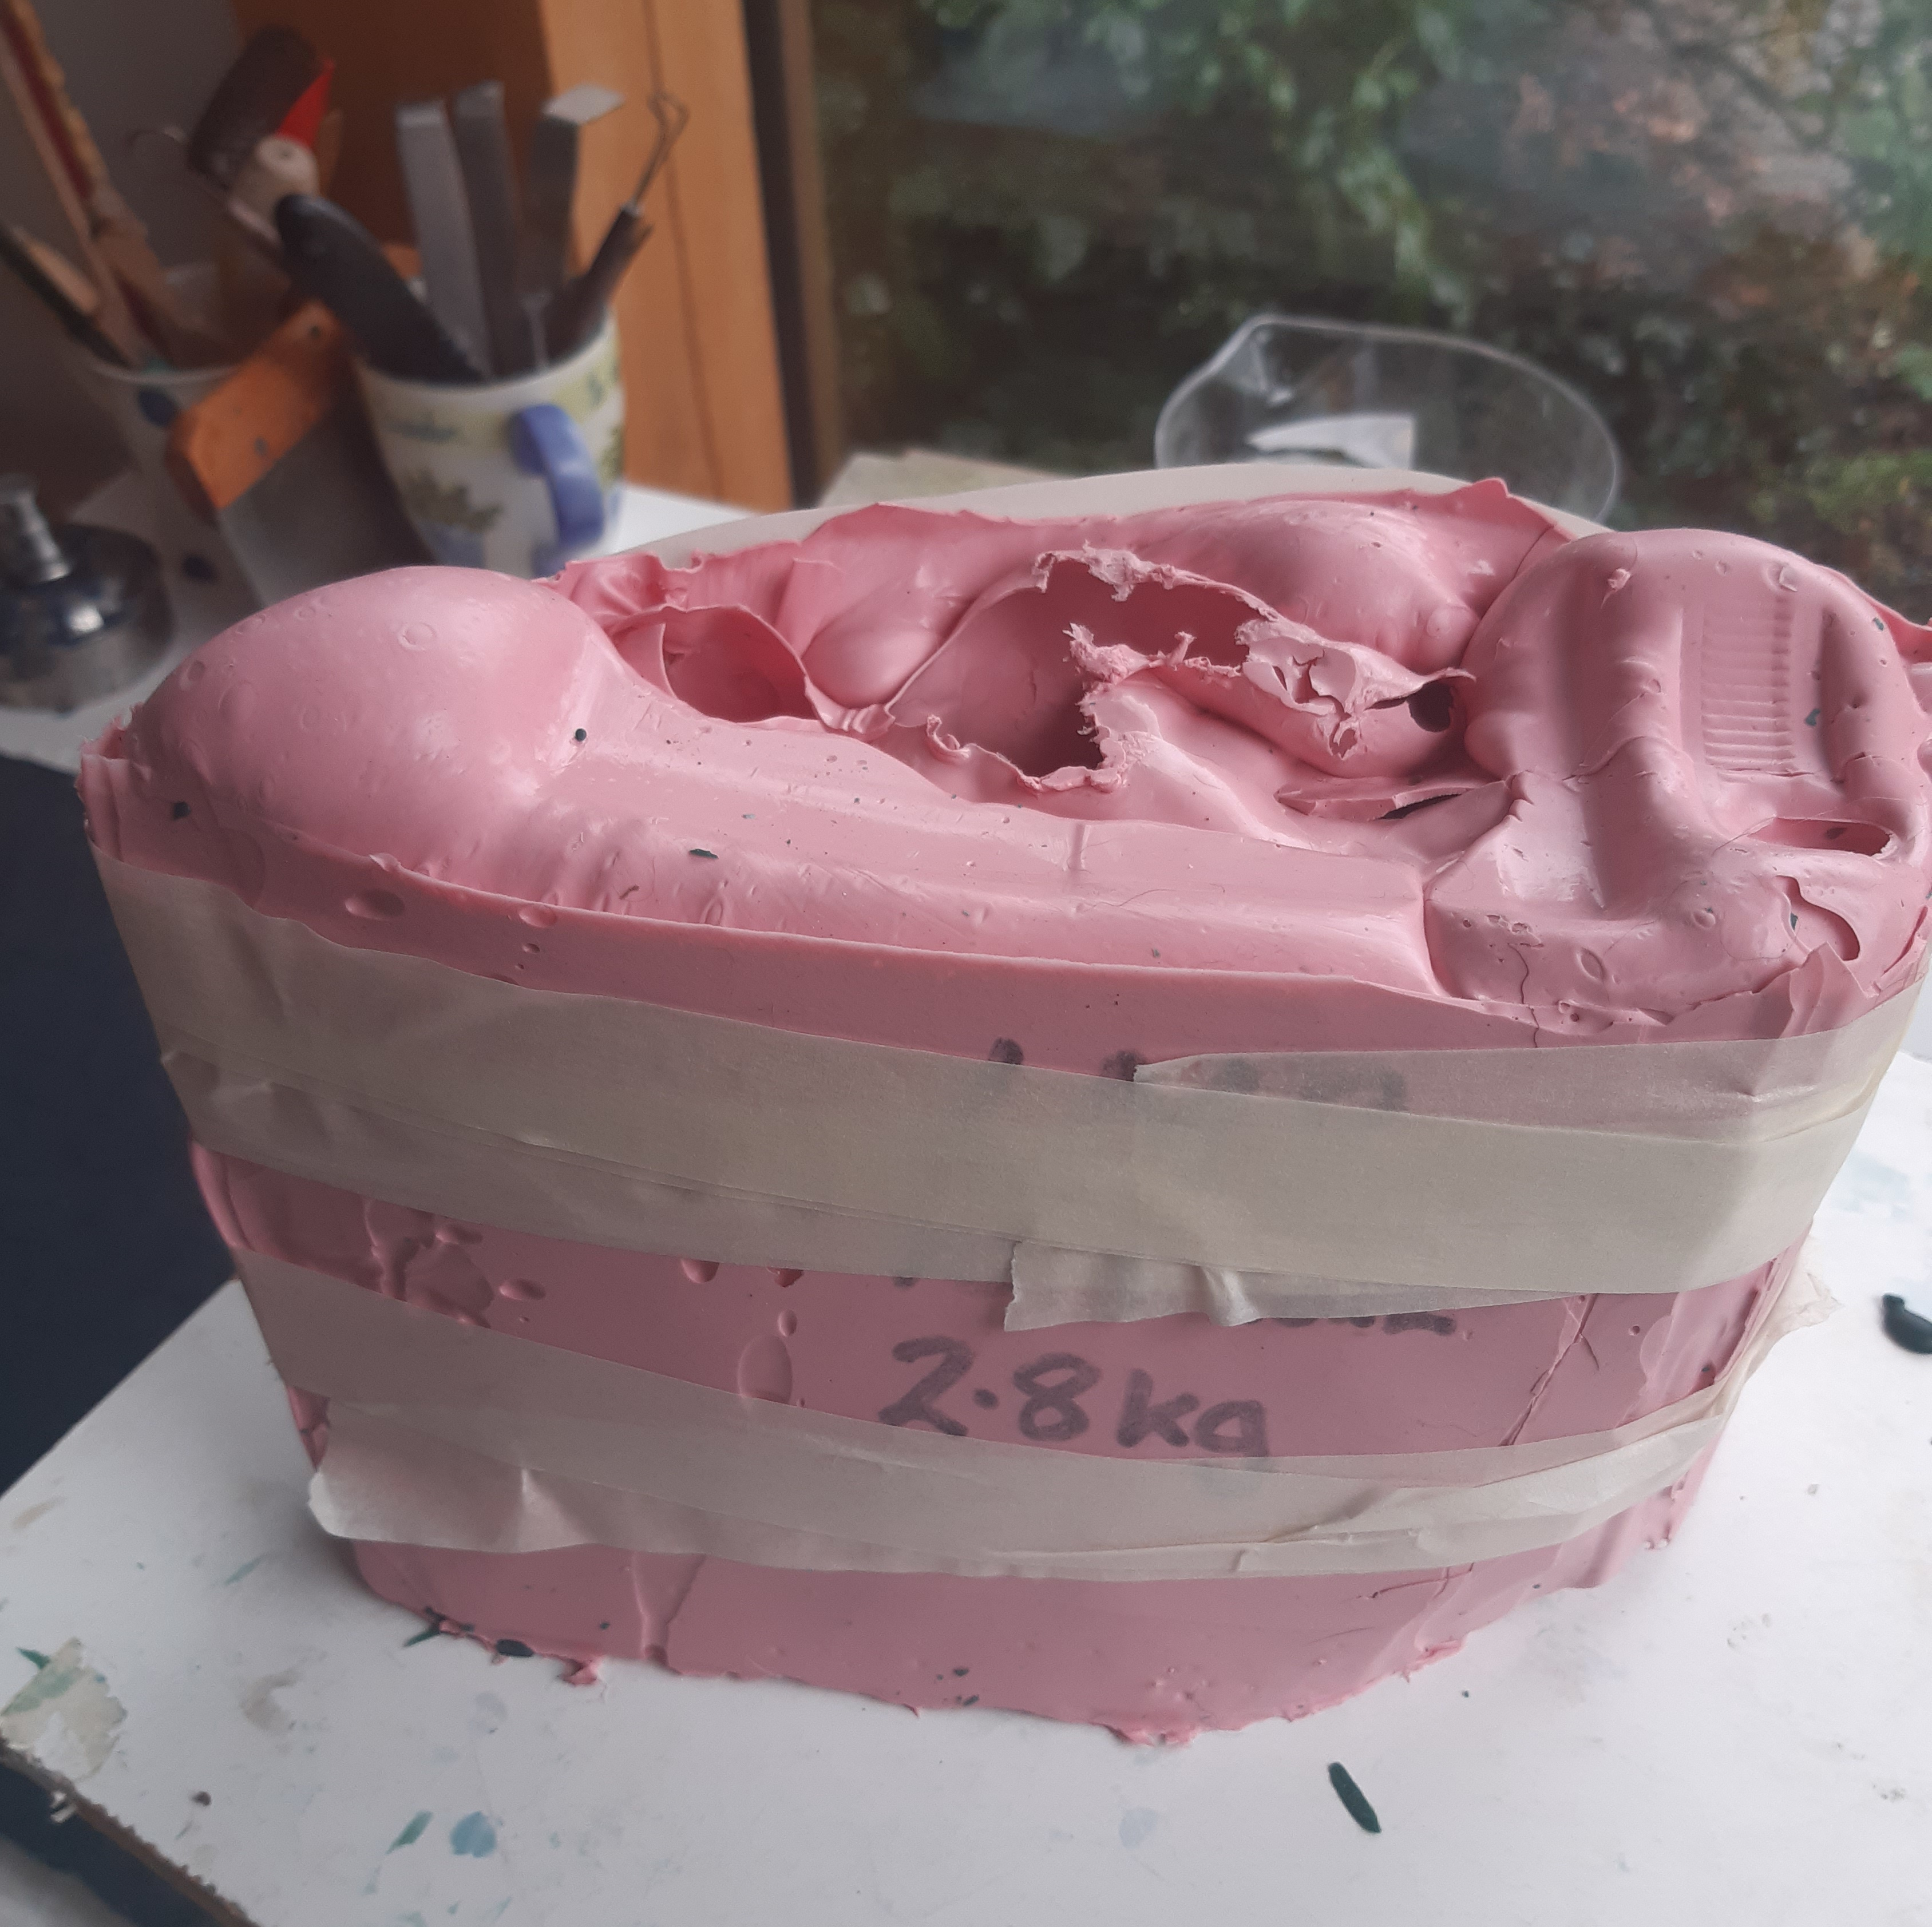
I carried on. The mould now needed to be cut apart to extract the wax model. Nothing prepared me for this physical task, save a new Stanley knife blade. The mould cut ok but the skill in doing so without cutting bits off and strength needed to prise it apart to get the solid wax out was another matter. Especially due to the now upturned position which meant parts of it were trapped by intertwined set rubber. Carefully determined jagged slicing finally released the wax. A foot and an arm took the brunt and broke off but it didn't matter. It was the negative void that was required, not the sacrificial original art. In order to know whether the negative space was true to the original, liquid green casting wax needed to be poured back in. First, the cut mould had to be knitted back together; a simple matter of pressing it back into position with a bit of a wriggle to ensure an exact match. Then, I taped it in place with masking tape. Having melted the wax in my slow cooker, hot and fast pouring, I ladled it in via the holes in the surface of he mould. Once full to brimming I further topped it up a few times as the wax cooled and settled.
Multiple editions.
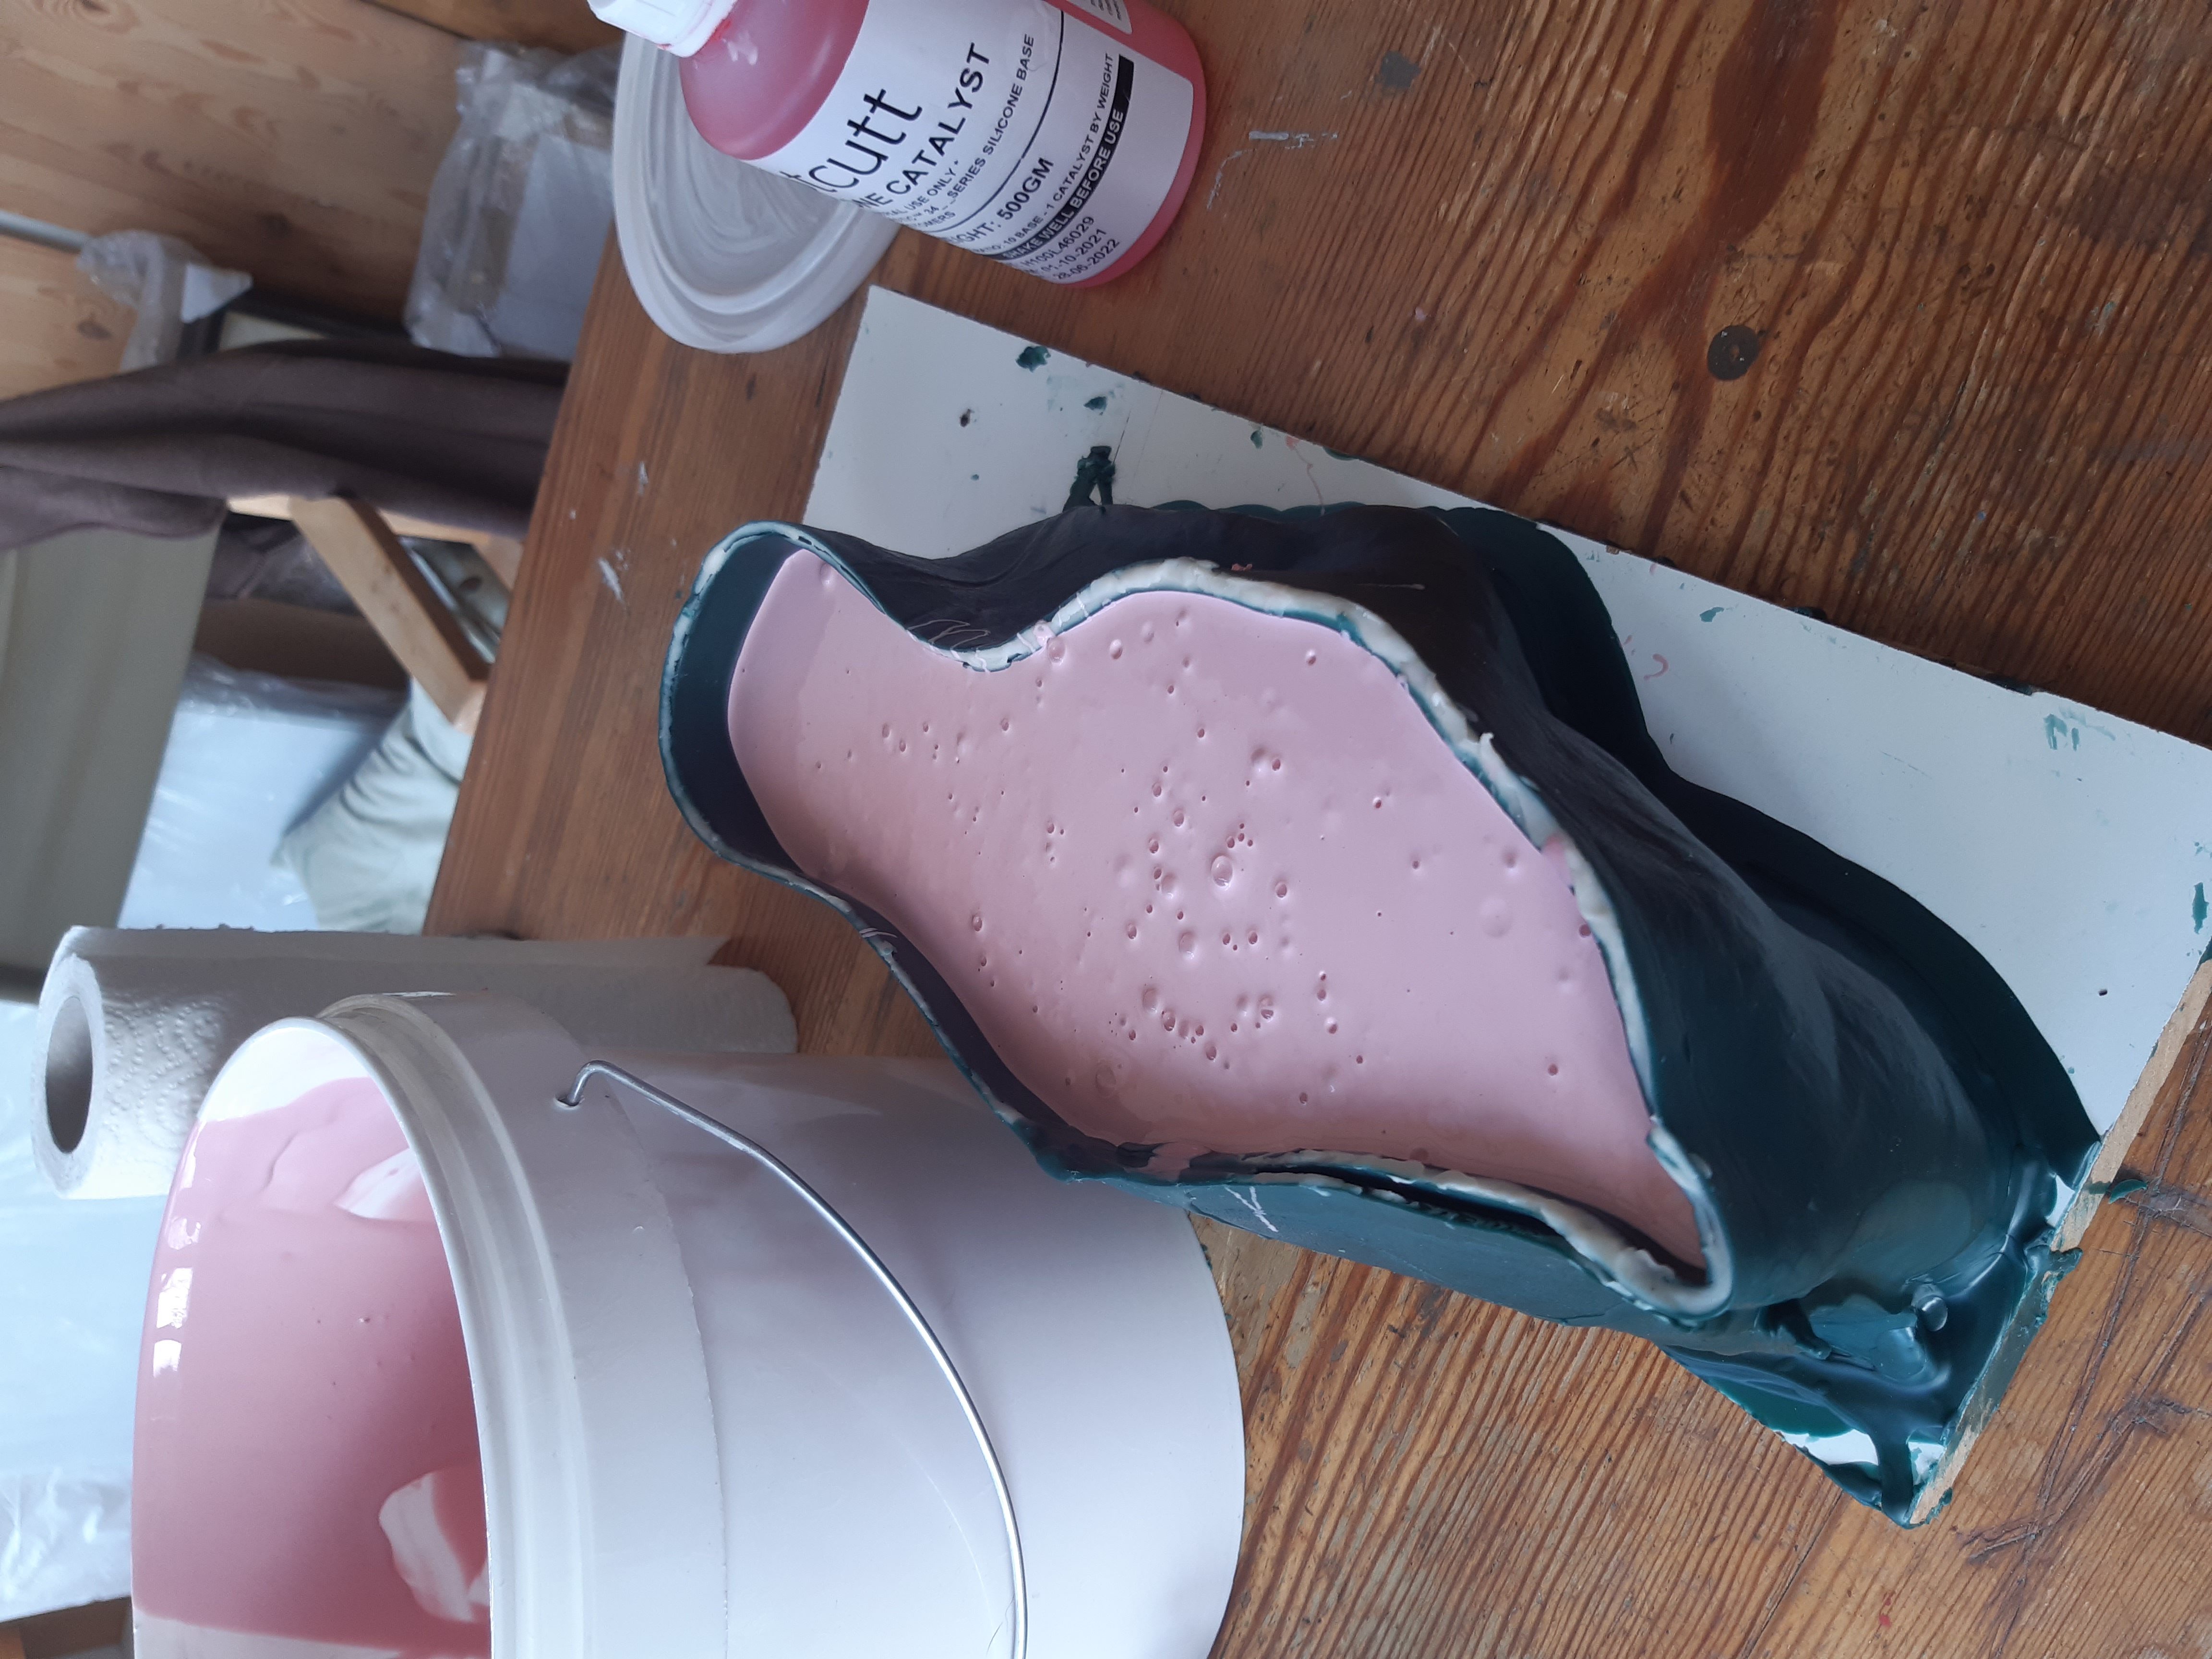
With the mould already cut when I'd taken the original art out, this time when the green wax had cooled by the following morning, the mould happily gave up its prize. I still needed to take care as this version needed to be intact. It wasn't. The foot again snapped but nothing that I couldn't repair. Dealing with the risen position however was another matter as in effect the back half of the head and part of the right shoulder were missing where the wax found it's level causing the effect of slicing off that part. I had to re-sculpt that section later.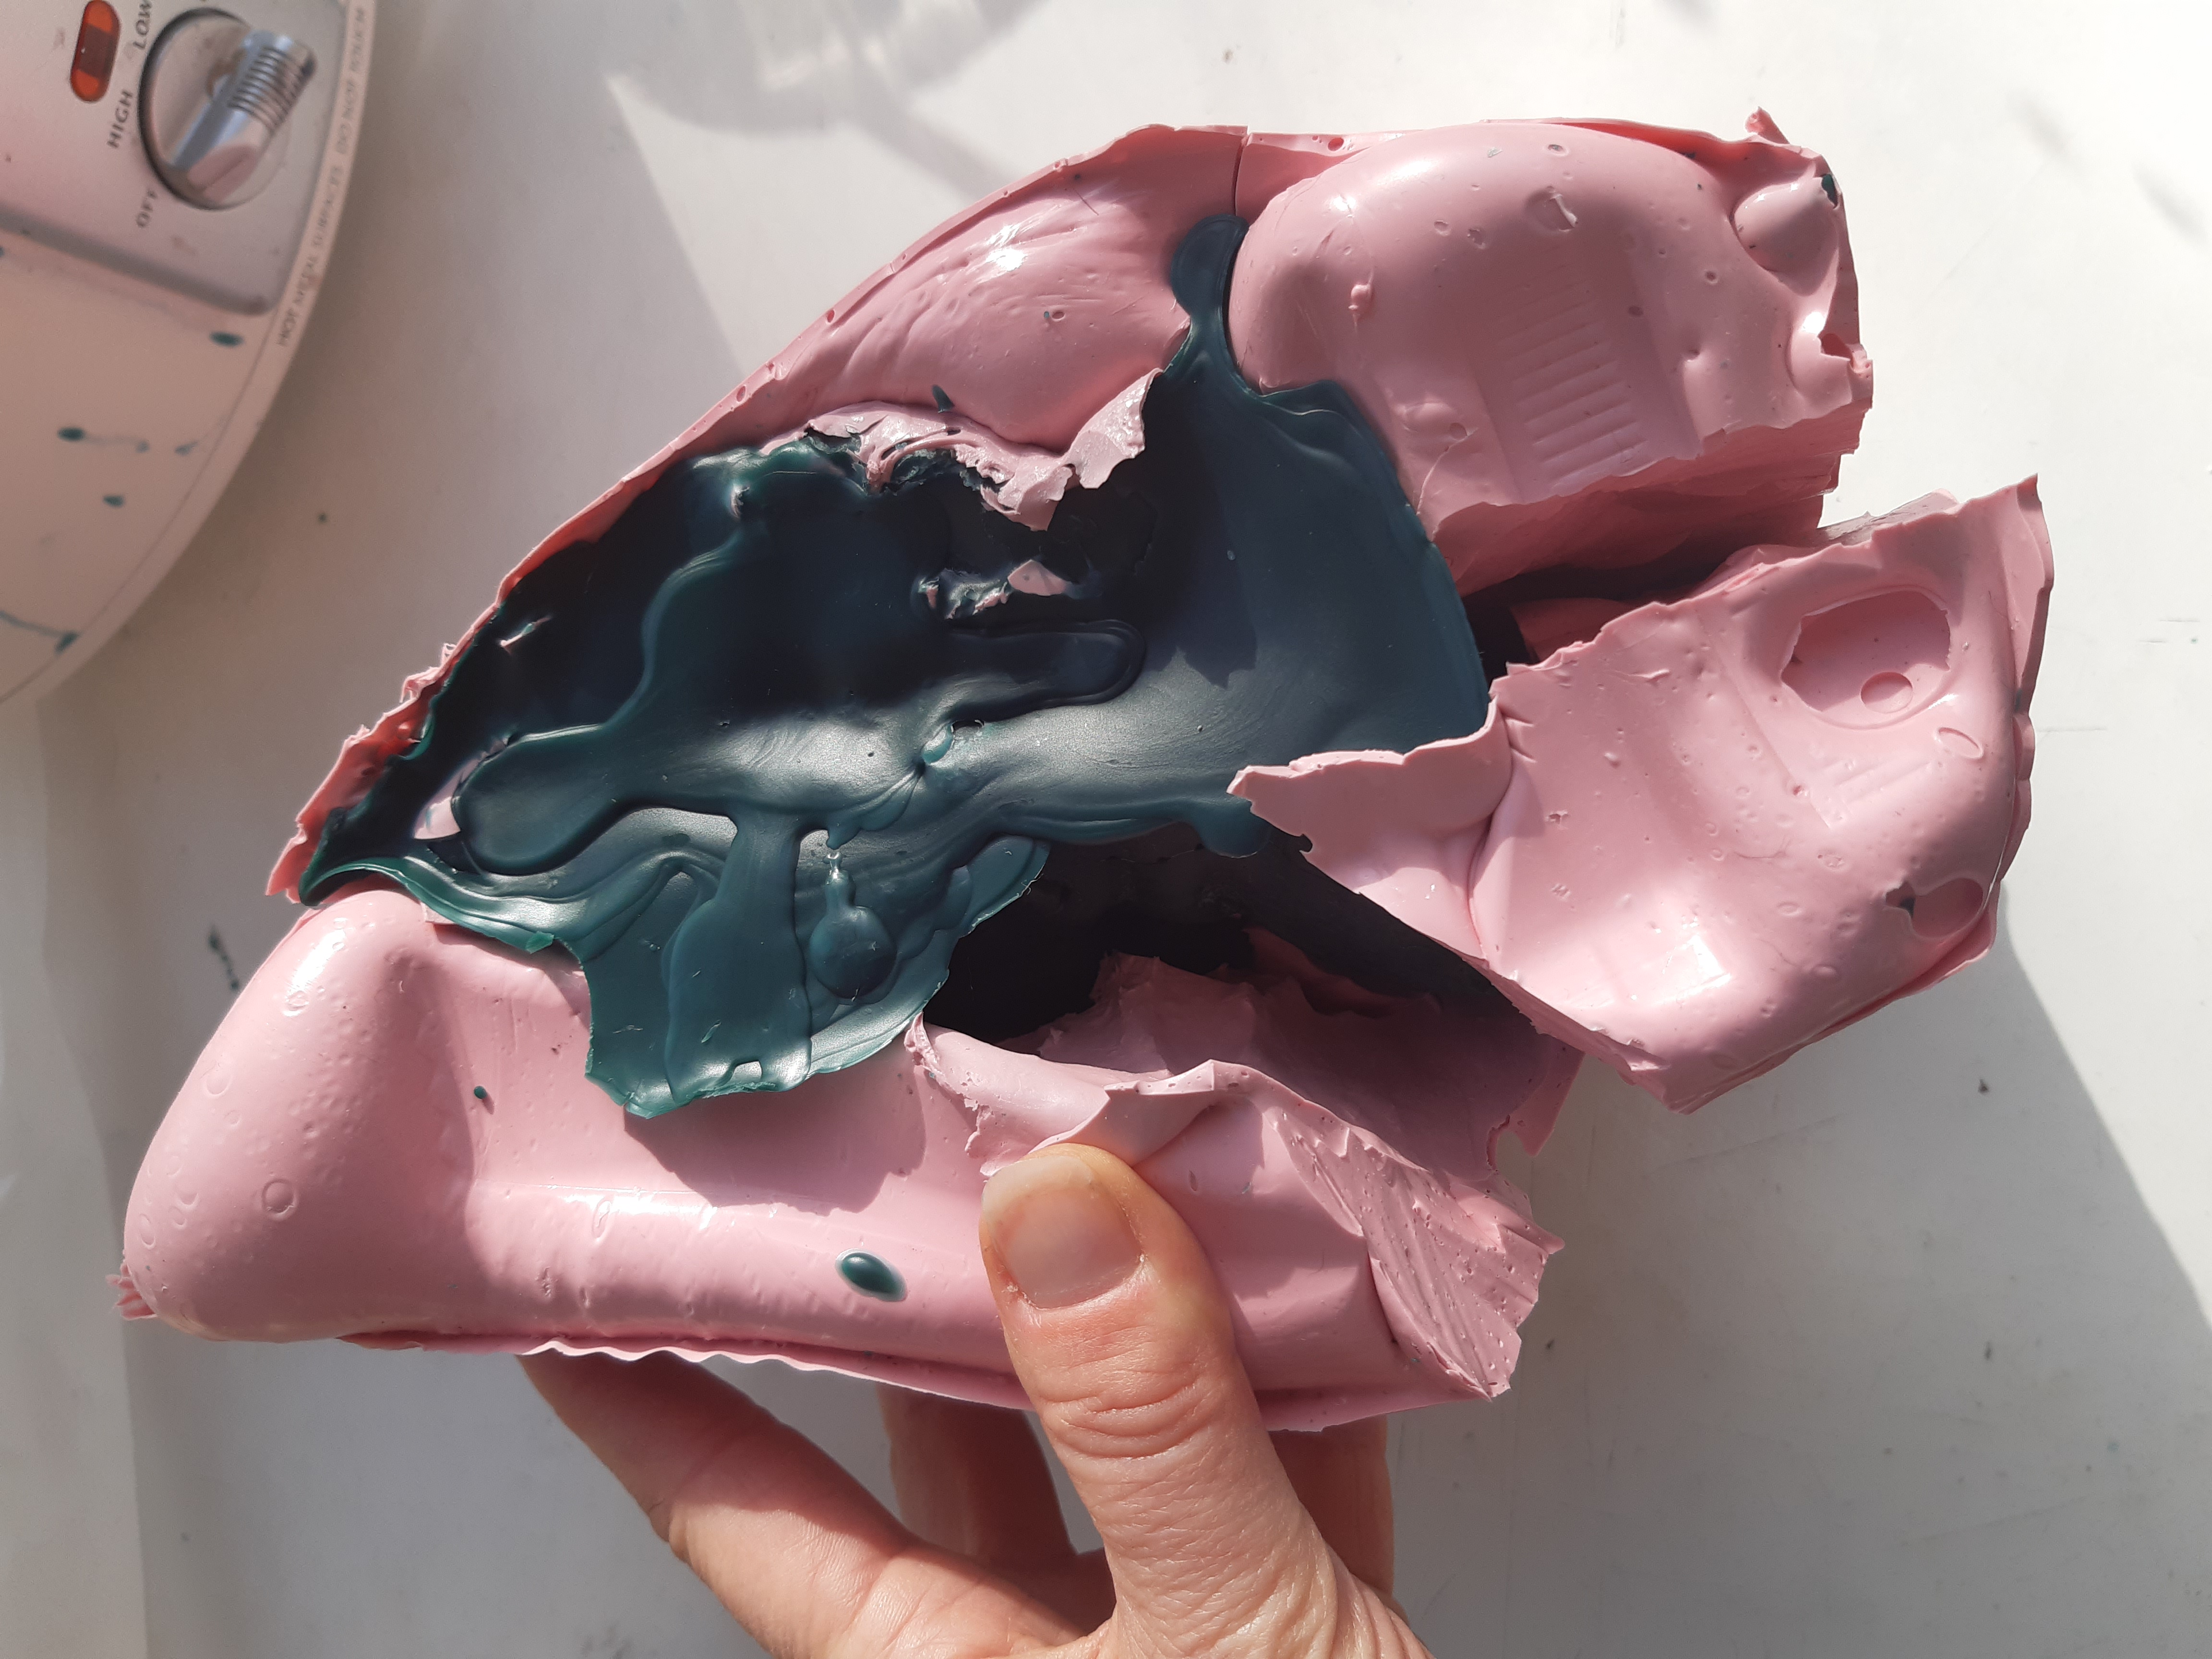

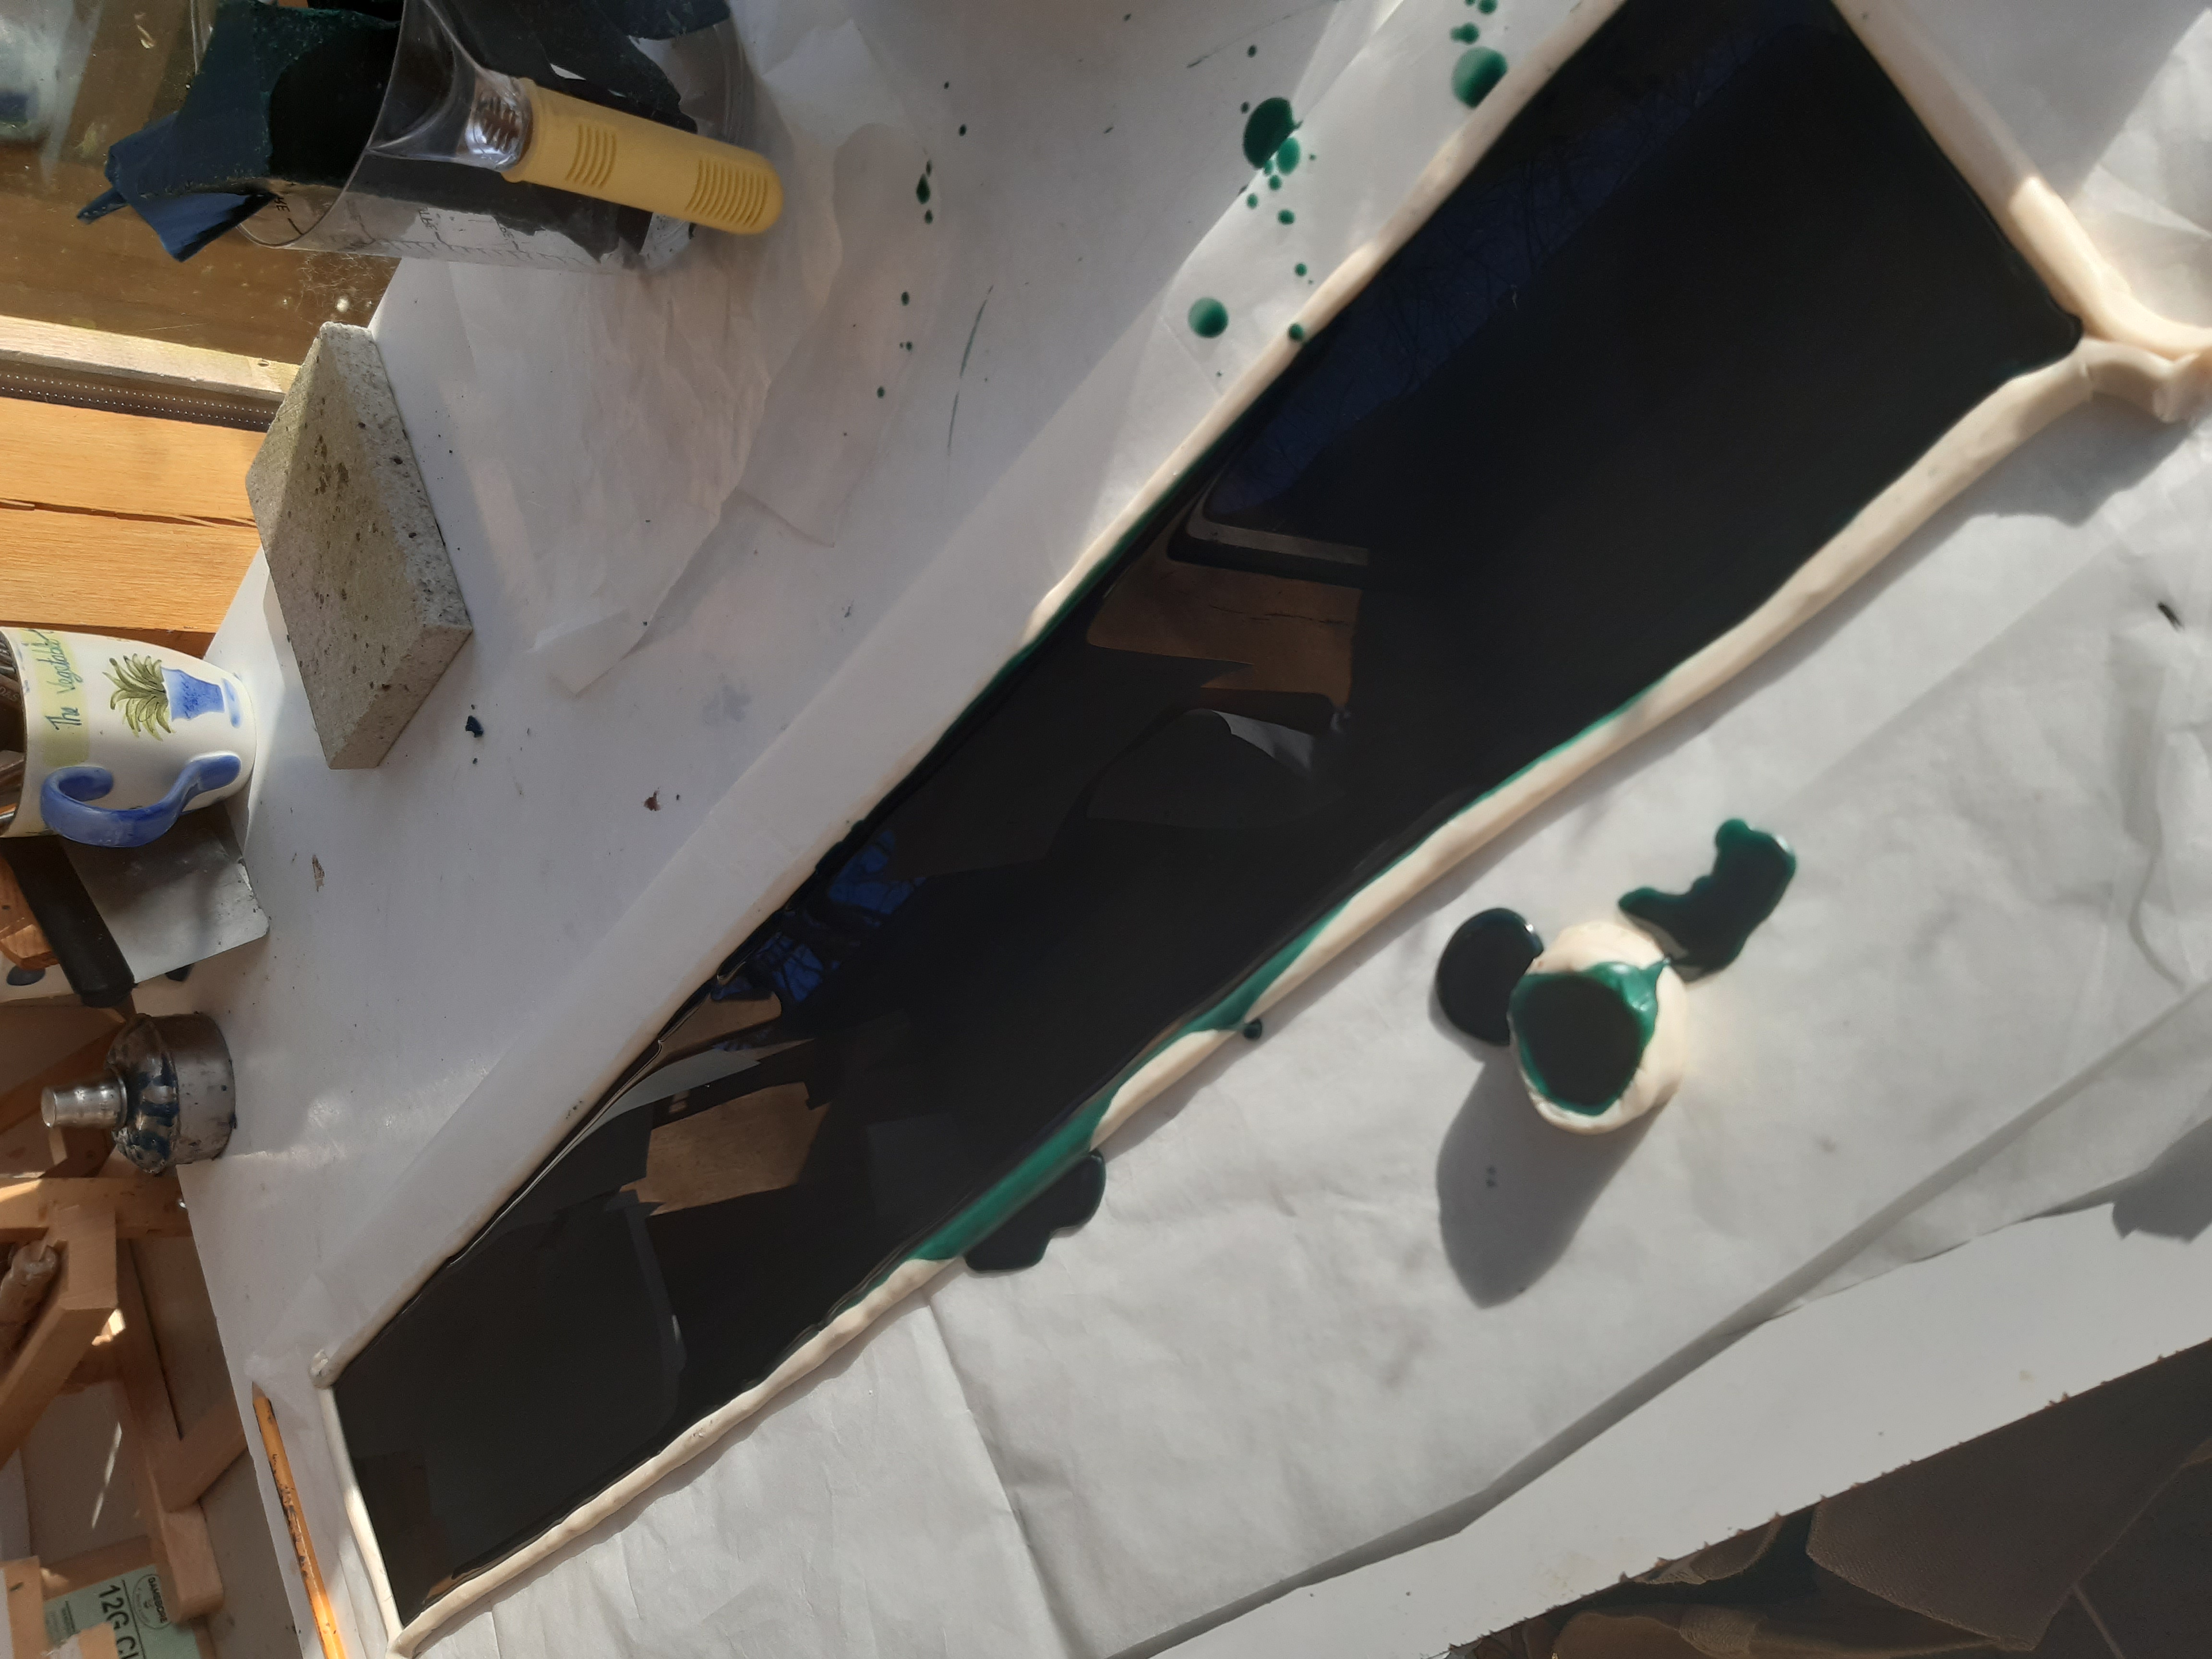
My money saving exercise was clearly going to undergo some initial and expensive teething problems as this first mould was rendered useless. Undetered my second attempt saw me ensure the wax would not move by adding wax attachments anchoring it to the base. I re-thought the container too; this time, and now my go-to method, I made the container out of wax: pouring a slab that when still warm was maluable. It could be squeezed into a reasonably tight shape around the model thereby reducing the amount of silastic needed. On setting, it produced a sturdy perimeter, one which could seal well. It takes a bit to smash it off but the wax can be reused.
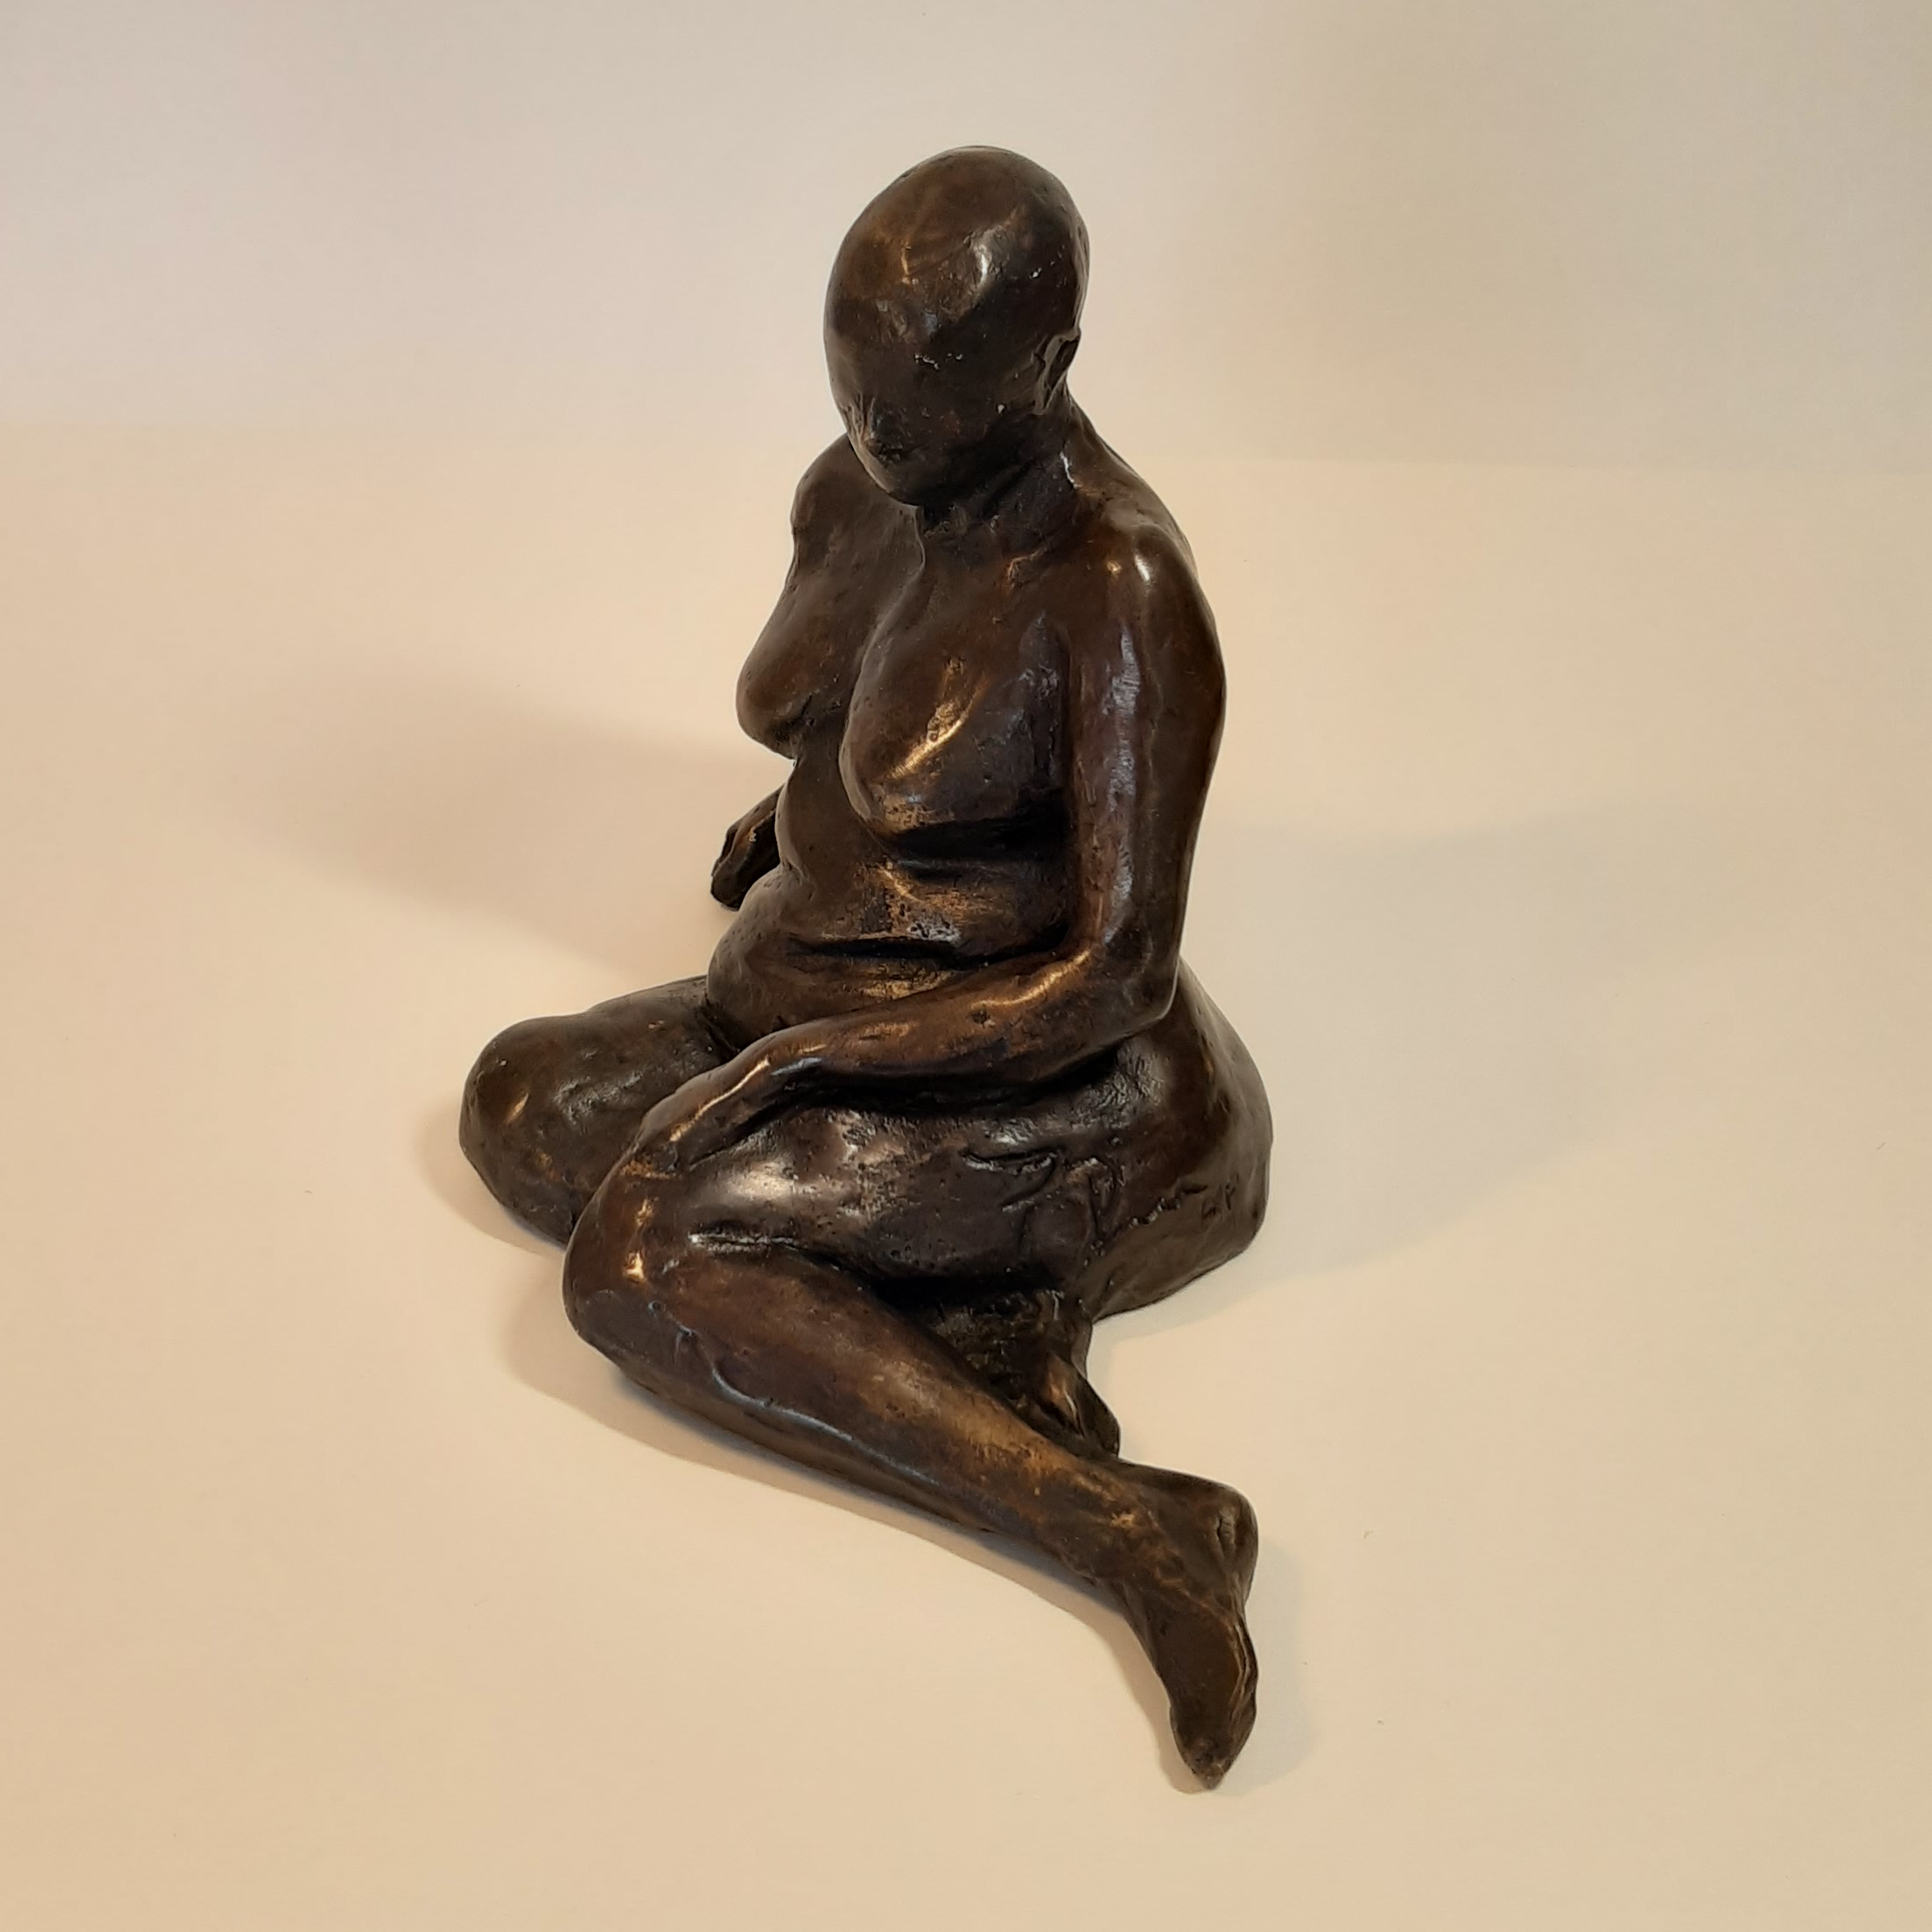
Creating my own small moulds is very rewarding. I love the consequence of greater control in my sculpture production too. I've used my new found skills to great effect and have since enjoyed taking several successful pieces to the foundry for casting. Life Model No.8 is consequently perfected and now realised in bronze. To my delight she was accepted for display at the 2025 Bruton Art Society Annual Exhibition where I hope she brings pleasure to viewers.